
Mirador Las Torres: One Day Hike at Torres del Paine
With chilly winter weather approaching, my husband & I were seeking a warm destination to celebrate the holidays. For a long while, we have been eyeing the Southern Hemisphere, more specifically the Patagonia regions of Chile & Argentina! More specifically, I am talking about Torres del Paine, a national park in Chilean Patagonia. Its name in Spanish means “Towers of Paine,” which refers to the three iconic rock formations. Many people prepare months ahead for multi-day backpacking through Patagonia’s wild. However, due to logistics & time constraints, we planned for a one-day hike. It was Mirador Las Torres, or “View of the Towers,” that intrigued us the most.
Please note: This post contains affiliate links.
This means that, at no extra cost to you, I may receive a small commission if you make a purchase through my affiliate link.
You may read my full disclosure policy here.
Yearning for another epic adventure before closing out the year, we had to check it out! However, we also knew it wasn’t going to be easy. The 11.2 mile round-trip trail with an elevation gain of 3,000 feet is a moderately difficult hike. Depending on fitness level, it takes an average hiker 7-9 hours, out & back, to hike Mirador Las Torres. To be honest, it really tested my endurance on my poor bronchitis-inflicted body. But to see those epic towers at the end was truly worth it all! My hope is that this guide will provide some helpful information to make your travels a little less challenging.
Contents of This Post:
Best Time to Visit Mirador Las Torres: Weather Versus Crowds
If weather is your foremost concern, the best time to visit Torres del Paine is during the Austral summer which includes December through February. Temperatures are at their highest, peaking at around 70ºF & the days are longer allowing for more time to explore. However, due to the high wind factor, it can feel a lot cooler, especially at higher elevations. Despite it being summer season, it tends to rain a lot as well. Basically, my best advice is to be prepared for any type of weather regardless of the time of the year. A great reliable weather resource that provides up-to-date conditions can be found on Windguru.
If crowds of people are a larger problem for you, then I suggest visiting during Patagonia’s shoulder seasons. This revolves around September to November (Spring) & March to April (Fall). Keep in mind, temperatures will be cooler & there is more precipitation, but winds are less vigorous. Overall, the weather is still tolerable especially for one day treks like Mirador Las Torres.
What to Pack for Mirador Las Torres Day Hike
Unless you are planning to remain outdoors for several days, you only have to pack a few essentials for this hike. Trust me, the lighter your load, the easier & quicker you can reach the base! If you forget an essential item for your trek, don’t fret! Stores in Patagonia fully stock their shelves with all sorts of outdoor equipment & some are even available for rent. Just expect to pay premium prices.
The following are some of my recommended items for your one-day hike to Mirador Las Torres. I will follow-up with a more detailed post on a packing guide & gear reviews. In the meantime, if you have any questions, feel free to reach out!
Hiking essentials for Mirador Las Torres:
- Sturdy waterproof hiking boots to keep your feet dry & comfortable.
- For everyday hiking, I rely on my durable Merrell Moab 3 Hiking Shoes. But for our Patagonia trip, I brought along my hardcore Danner Mountain 600 Hiking Boots. Both are great brands that are well-known for their comfort & durability. They come in a variety of colors & similar styles for men as well!
- Daypack or hydration pack
- Base layers of clothing
- Lightweight, compressible down jacket
- I absolutely love my Patagonia Nano Puff Insulated Jacket as it is lightweight yet keeps you warm through the coldest conditions.
- Fleece base layer sweater
- You can’t go wrong with the best-selling, versatile Patagonia Better Sweater Pullover that comes in many colors.
- Waterproof/windproof packable jacket
- The Patagonia Torrentshell Jacket is a great breathable shell with drawcord hems & adjustable storm hood.
- Buff, beanie, or cap
- Gloves
- I love my The North Face Etip Gloves that allow me to utilize my phone for quick pictures on the go!
- Merino wool socks
- Darn Tough Hiker Boot Socks may be a little pricey, but they are worth the investment as they keep your feet warm, dry, & odor-free all day long! Plus, they come in cute colors & designs!
- Trekking poles
- Sunglasses
- Sunscreen
- Tissue or wipes (some restrooms do not have toilet paper)
- Snacks & water
- Extra Chilean money for Torres del Paine park fees, restrooms, & other emergencies
- Passport
Our Torres del Paine Travel Itinerary
Santiago, Chile ➜ Punta Arenas, Chile.
To prepare for our journey to Torres del Paine, we planned to spend a restful night at Puerto Natales. However, it is not an easy journey to get to this little hub city. Connections from the capital city of Santiago to Puerto Natales are still fairly new. While Puerto Natales has their own airport, it only serves direct flights to & from El Calafate, Argentina. With that being the case, we flew at 5:00am to the southernmost harbor town of Punta Arenas. Fortunately, our flight took about 3.5 hours via LATAM Air which allowed us to catch up on some much needed sleep.
Once we landed at the Punta Arenas Airport, we took a 3 hour bus ride to Puerto Natales. A one-way ticket cost us 7,500 CLP ($10.00 USD), but fares may vary depending on the season. Throughout our Patagonia trip, we relied on the highly rated Bus Sur for our public transportation needs. We also found this website helpful when comparing rates & departure times of other bus companies. While you can purchase your bus tickets at the airport, I highly recommend booking online & printing them out. There are no mobile ticket scanners & bus seats tend to fill up pretty quickly.
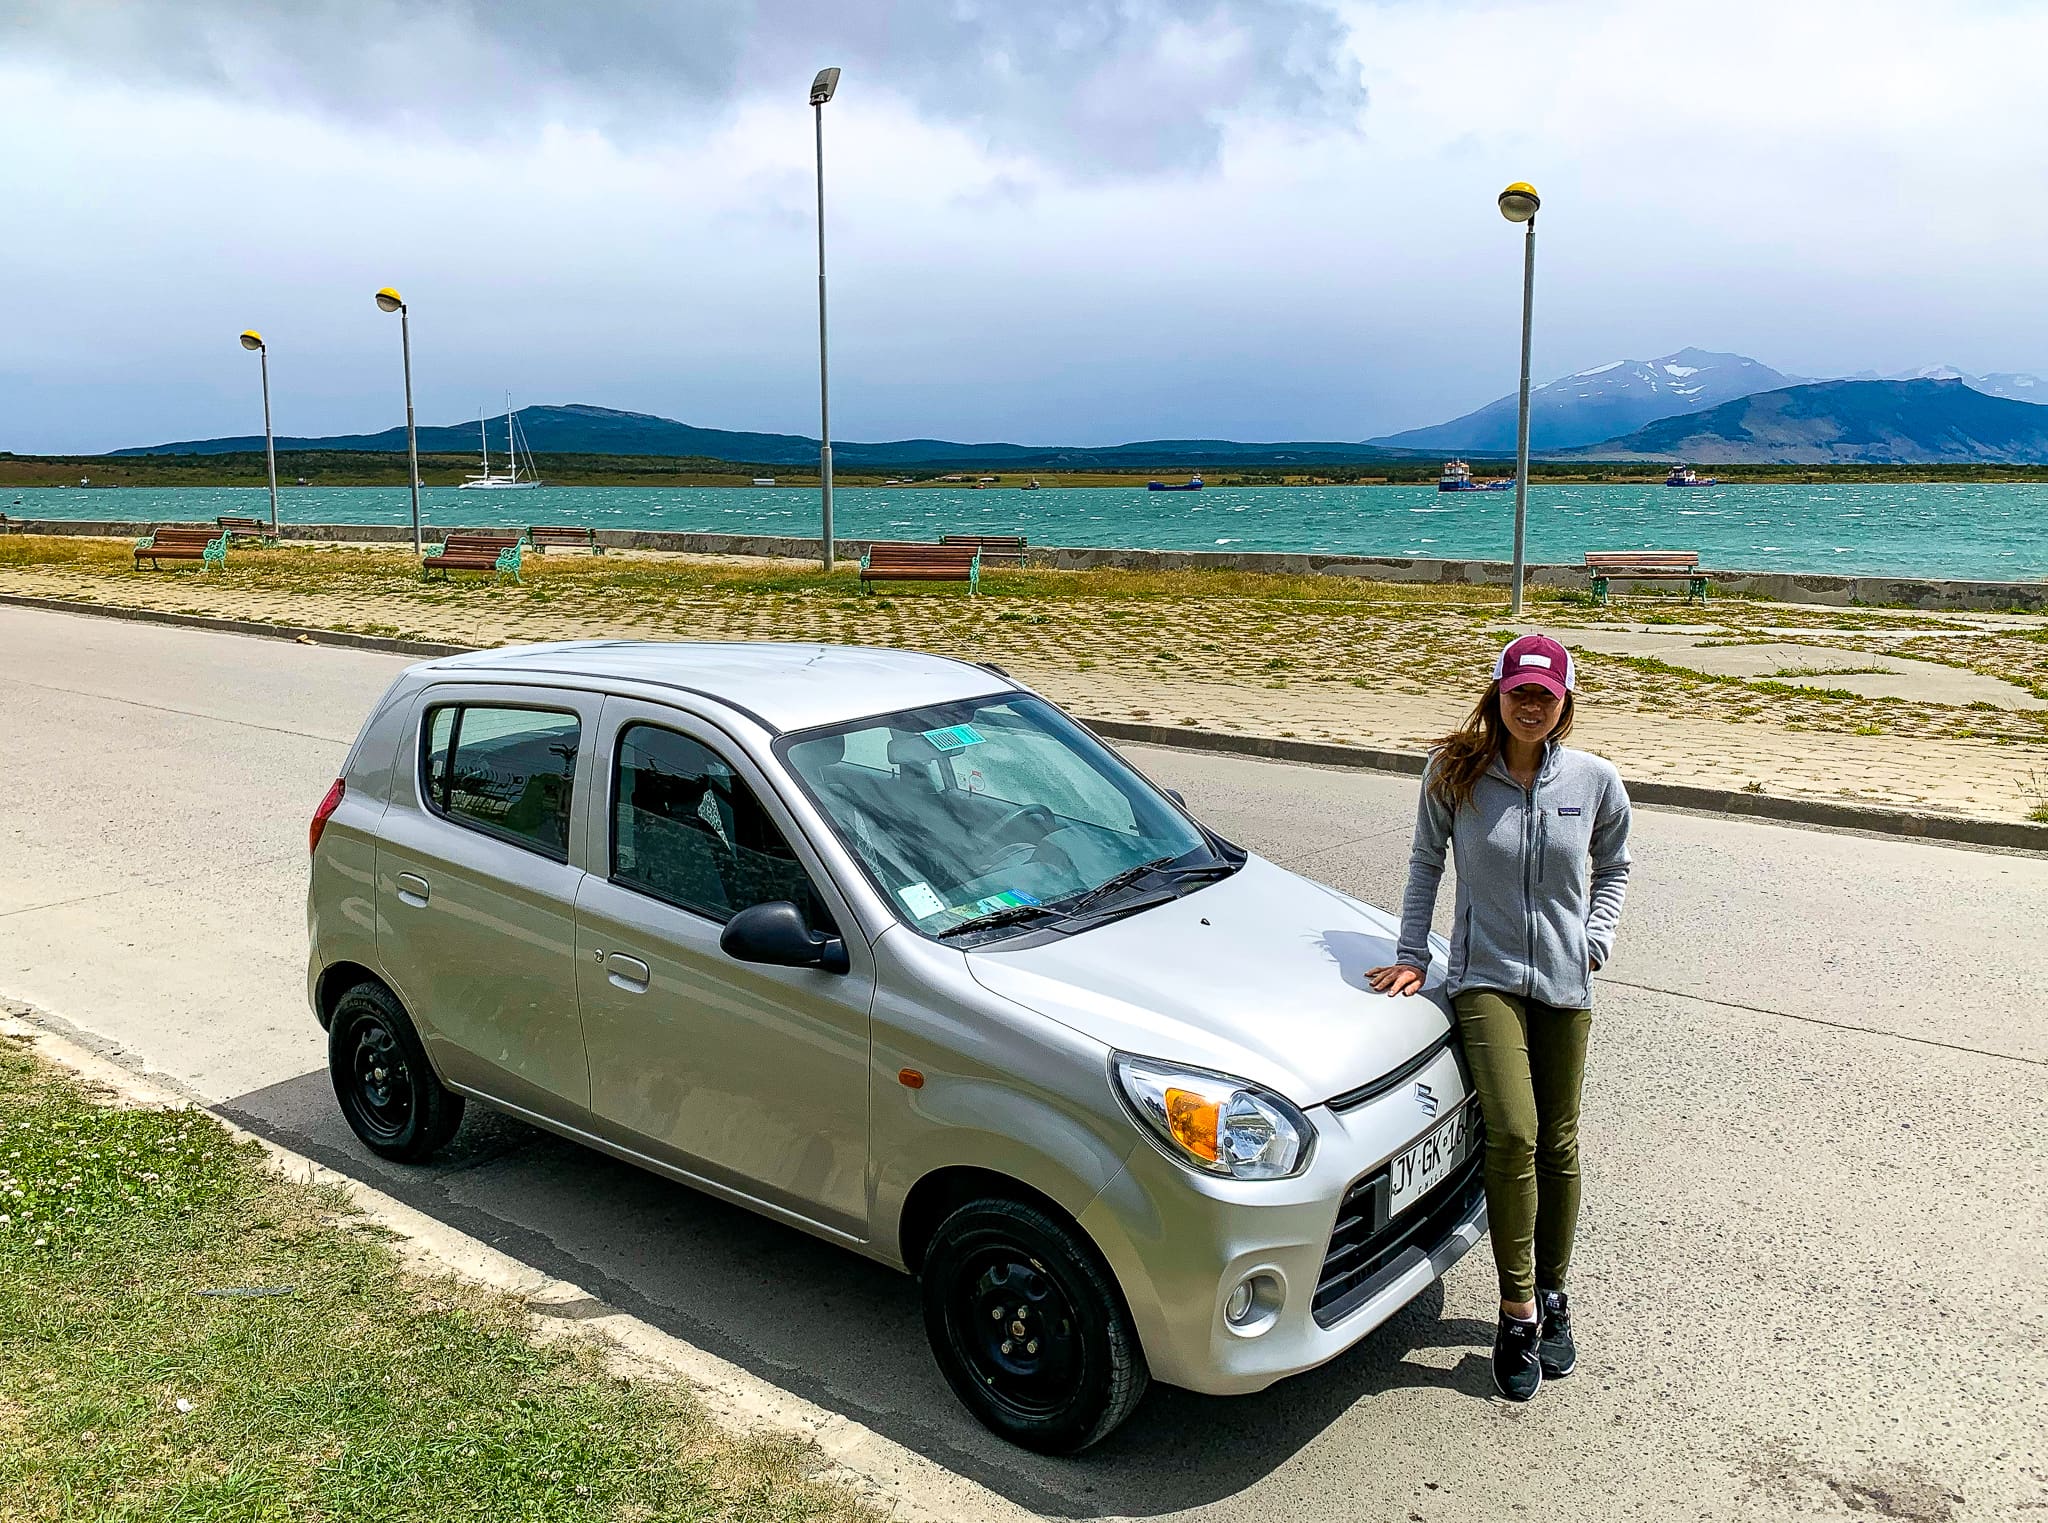
Punta Arenas ➜ Puerto Natales, Chile.
As soon as we reached Puerto Natales, we walked across the street from the bus station to Magallanes Rent a Car. While we have been vigilant about booking everything online, we somehow failed to do so with the rental car. Thus, upon arrival, we found our selection was very limited. After much debate, we hesitantly settled on a Suzuki Alto 800 CC which we later dubbed “Suzi.” Little did we know, Suzi had just enough horsepower to take us up to our final destination. We were quoted 75,000 CLP ($100.00 USD) per day & our rental included 7 day, 24 hour customer service which proved very helpful later in our trip.
After picking up our rental, we headed to our lodge to check-in. Puerto Natales is a quirky city, reminiscent of Reykjavík, Iceland with its diverse restaurants, cozy coffee shops, & unique street art. Because it is the gateway to Torres del Paine, there are several accommodations & outdoor gear shops that cater to its visitors. We especially loved having Puerto Natales as our home base in between our adventures in Patagonia.
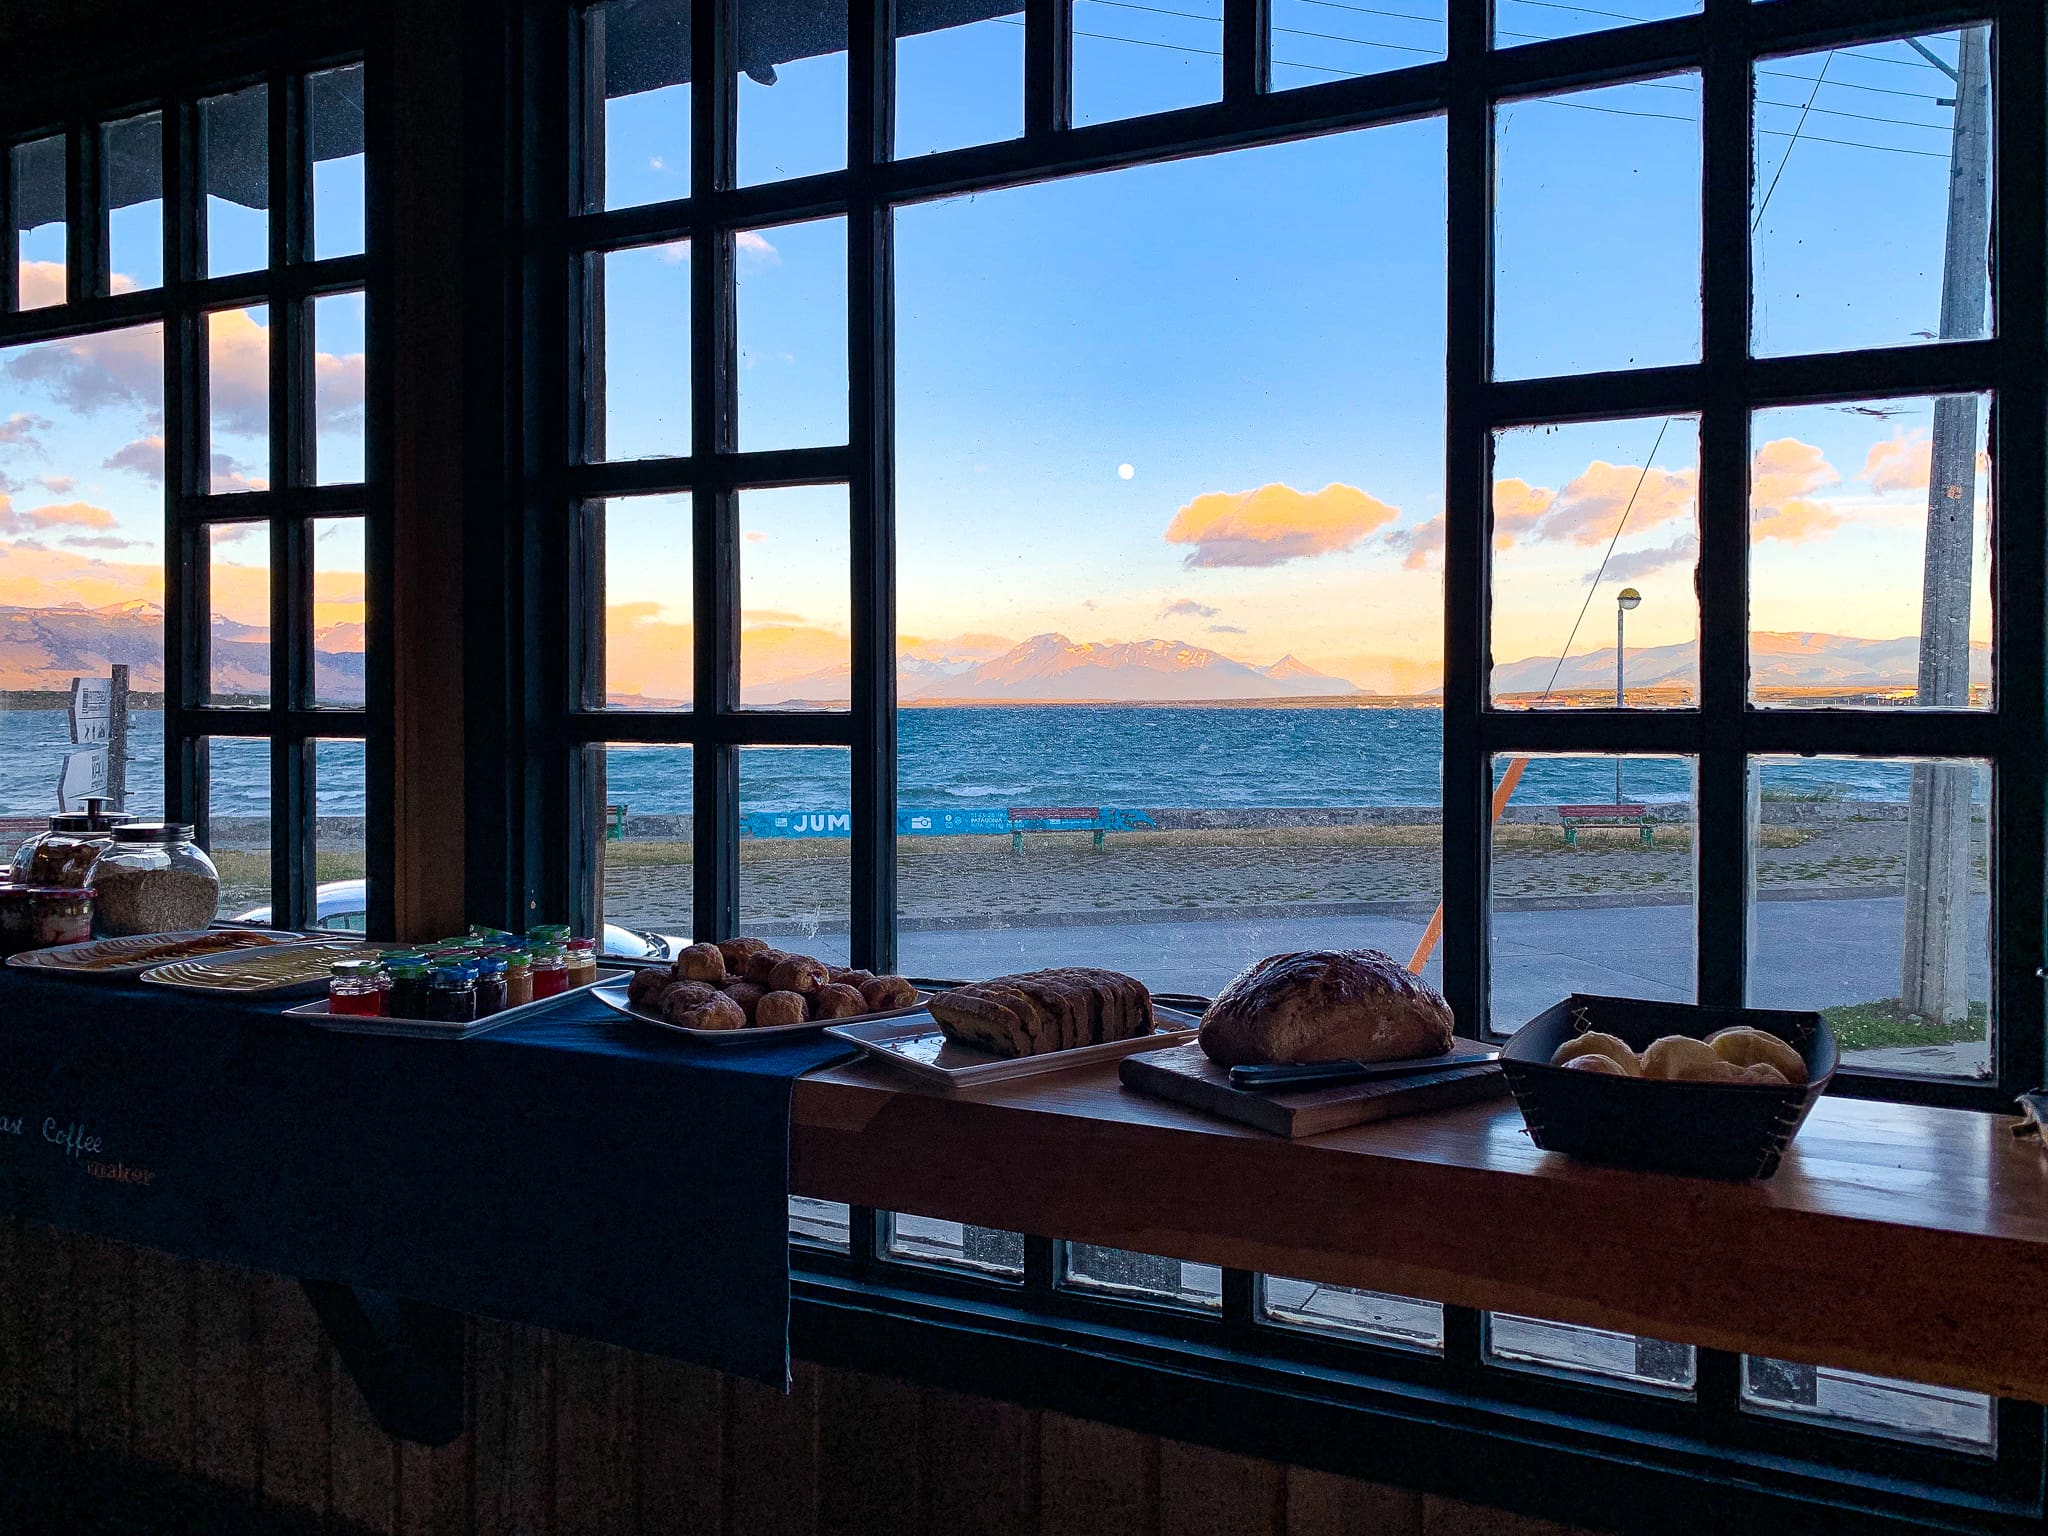
For our first night in, we stayed at the Kau Lodge, a Hygge-inspired cabin with lovely waterfront views. Next to the reception desk is a small cafe where you can refuel your caffeine levels with their delicious coffee. On the opposite side of the lobby is an outdoors shop for last minute shopping. Buffet-style breakfast is available at 6:00am, so people heading out to hike Mirador Las Torres can get an early start. Overall, we enjoyed our stay here & cannot rave enough about the amazing staff!
Puerto Natales ➜ Torres del Paine National Park.
The following morning, we woke up before dawn full of excitement of what was to come. After a fulfilling breakfast of toast, eggs, & fruit, we gathered our daypacks into the rental car & were off! From Puerto Natales, our little Suzi puttered 1.5 hours to the Torres del Paine National Park Ranger Station located next to Laguna Amarga.
You can also choose to take a bus from Puerto Natales to Torres del Paine. As of late 2019, buses leave at 6:40am, 7:00am, 7:15am, 12:00am, & 4:30pm from the Terminal Rodoviario Puerto Natales Bus Station. A round-trip ticket costs about 10,000 – 15,000 CLP ($13.00 – $19.50 USD) per person. Again, I highly recommend making your reservation a day or two ahead of time as spots fill up fast. You can purchase your tickets at the bus station or online. Buses return to Puerto Natales from the Ranger Station at various times throughout the morning & late into the evening.
Torres del Paine Entrance Fee & Registration
Once you arrive at the ranger station, expect to queue in a long line & fill out a registration form. Due to recent forest fires, there will be an informative video to watch on the park’s rules & regulations. You will then pay an entrance fee of 21.000 CLP ($27.50 USD) that is valid for three days. Even if you plan to only hike the Mirador Las Torres, this is the cheapest option. During low season (May – September), the fee is about half price at 11.000 CLP ($14.50 USD). Check this website for updated entrance fees.
With ticket in hand, we hopped back into our rental car & drove about 10 minutes towards Hotel Las Torres. There is another visitor center here where you will present your admission ticket. This is also your last chance to use the restrooms & purchase snacks before you start trekking. If you are dependent on public transportation, you can catch the hotel’s private shuttle for 4,500 CLP ($5.80 USD), one-way.
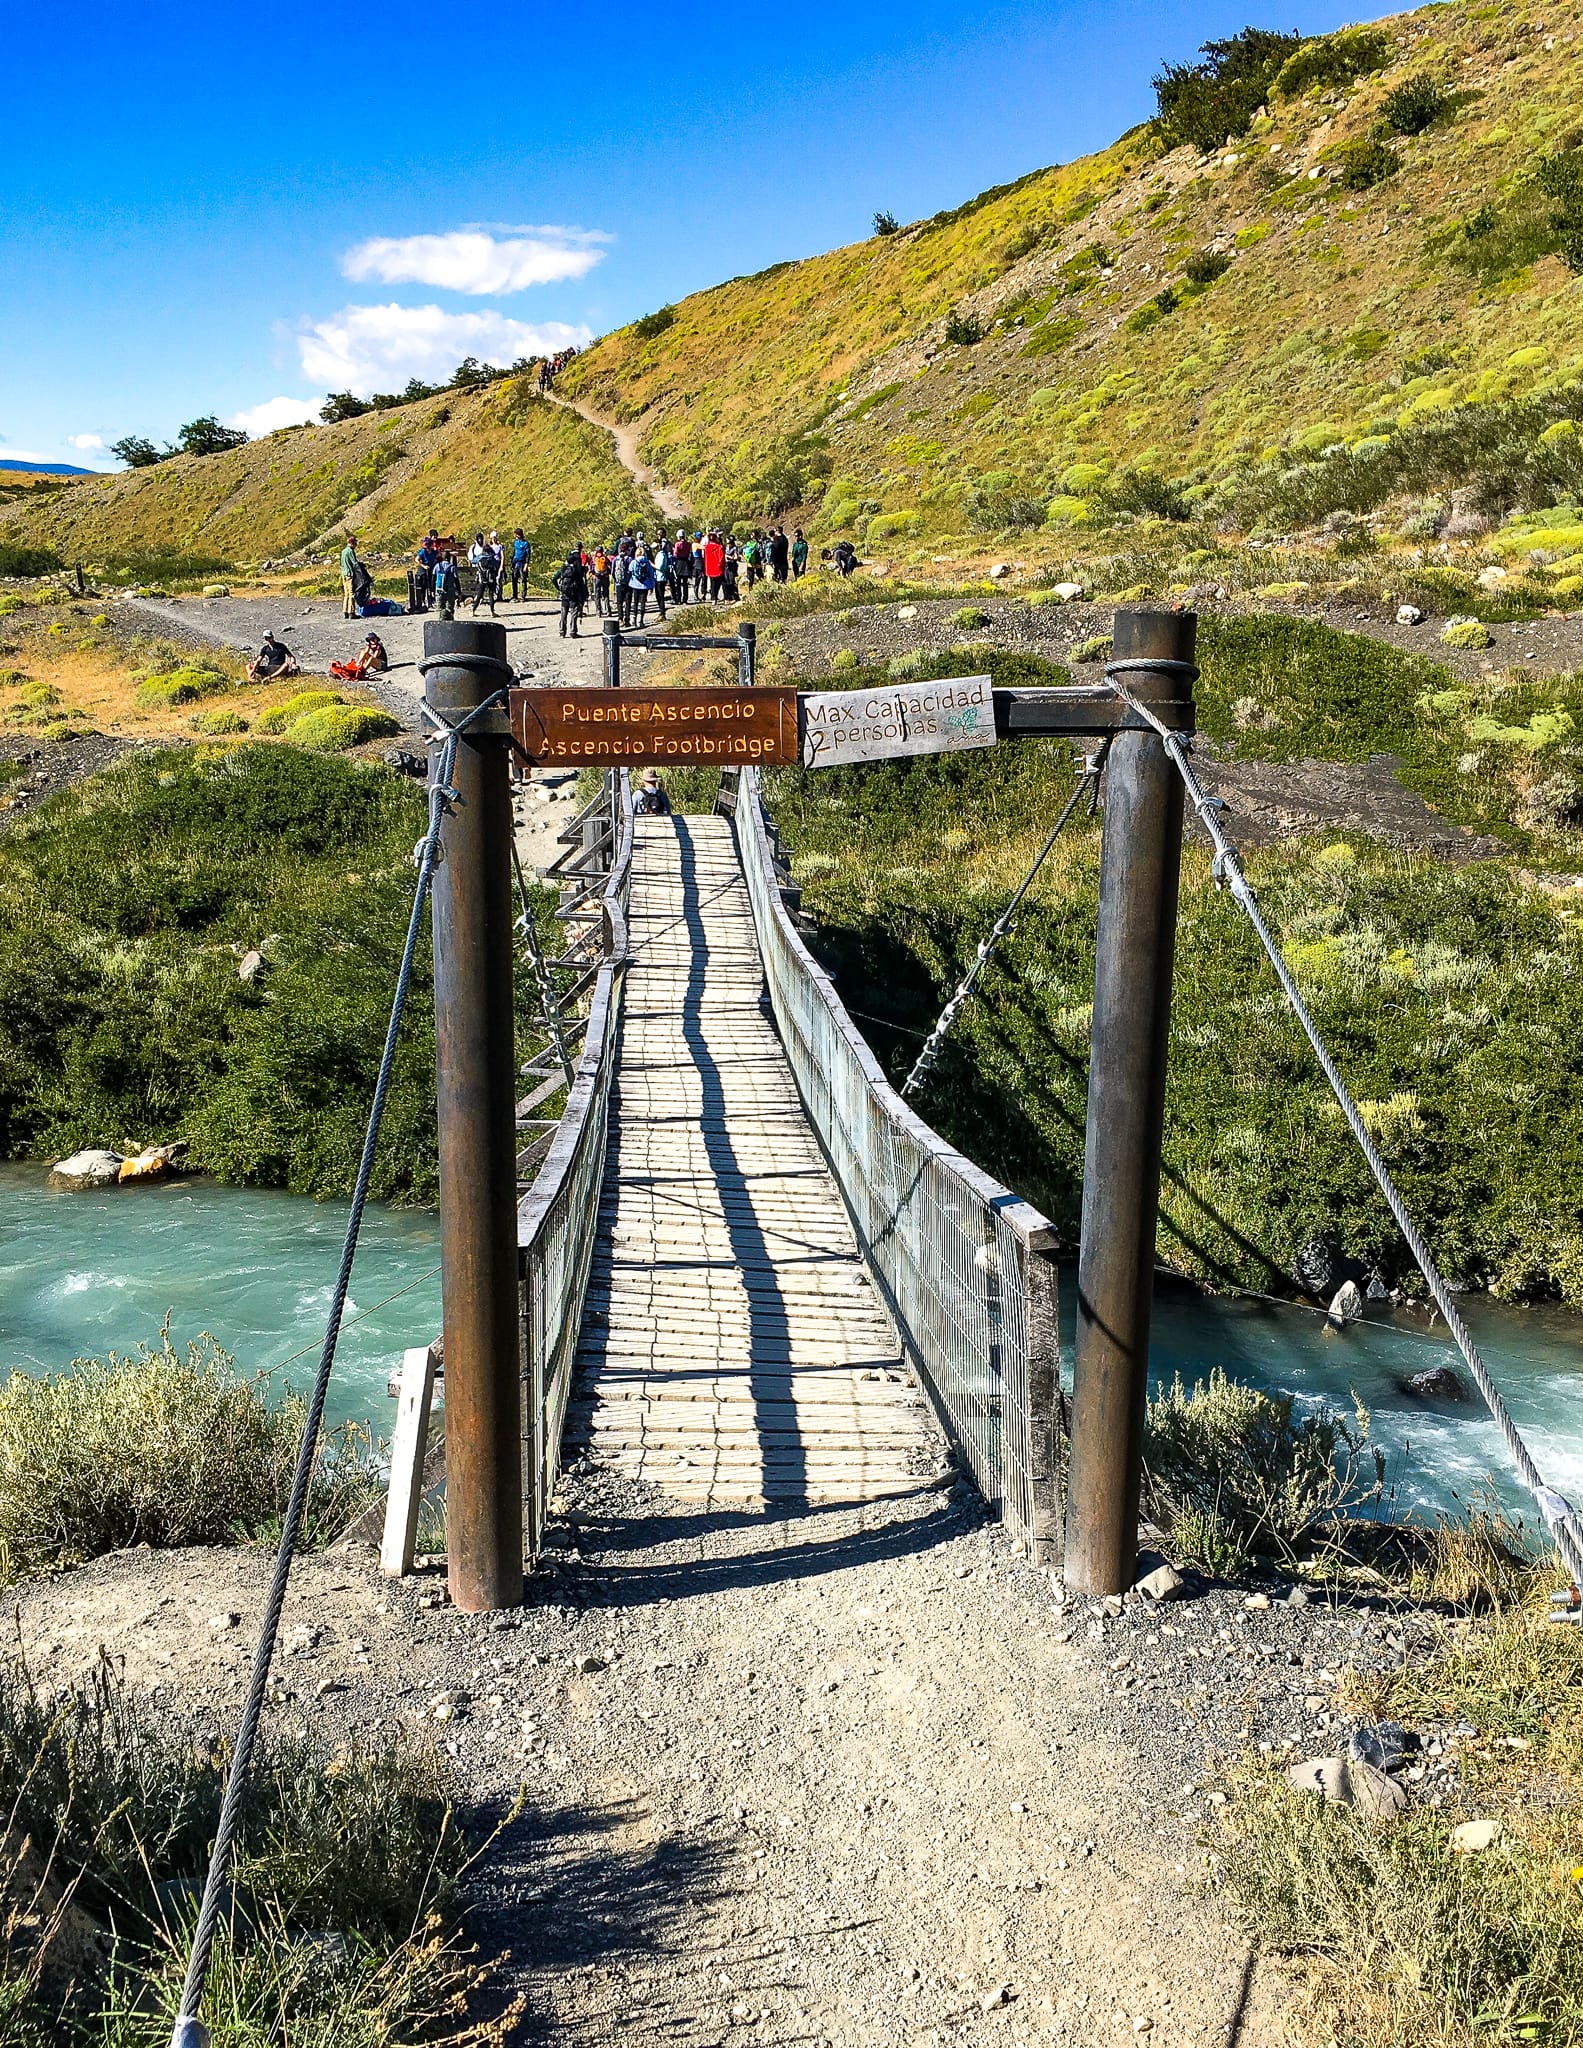
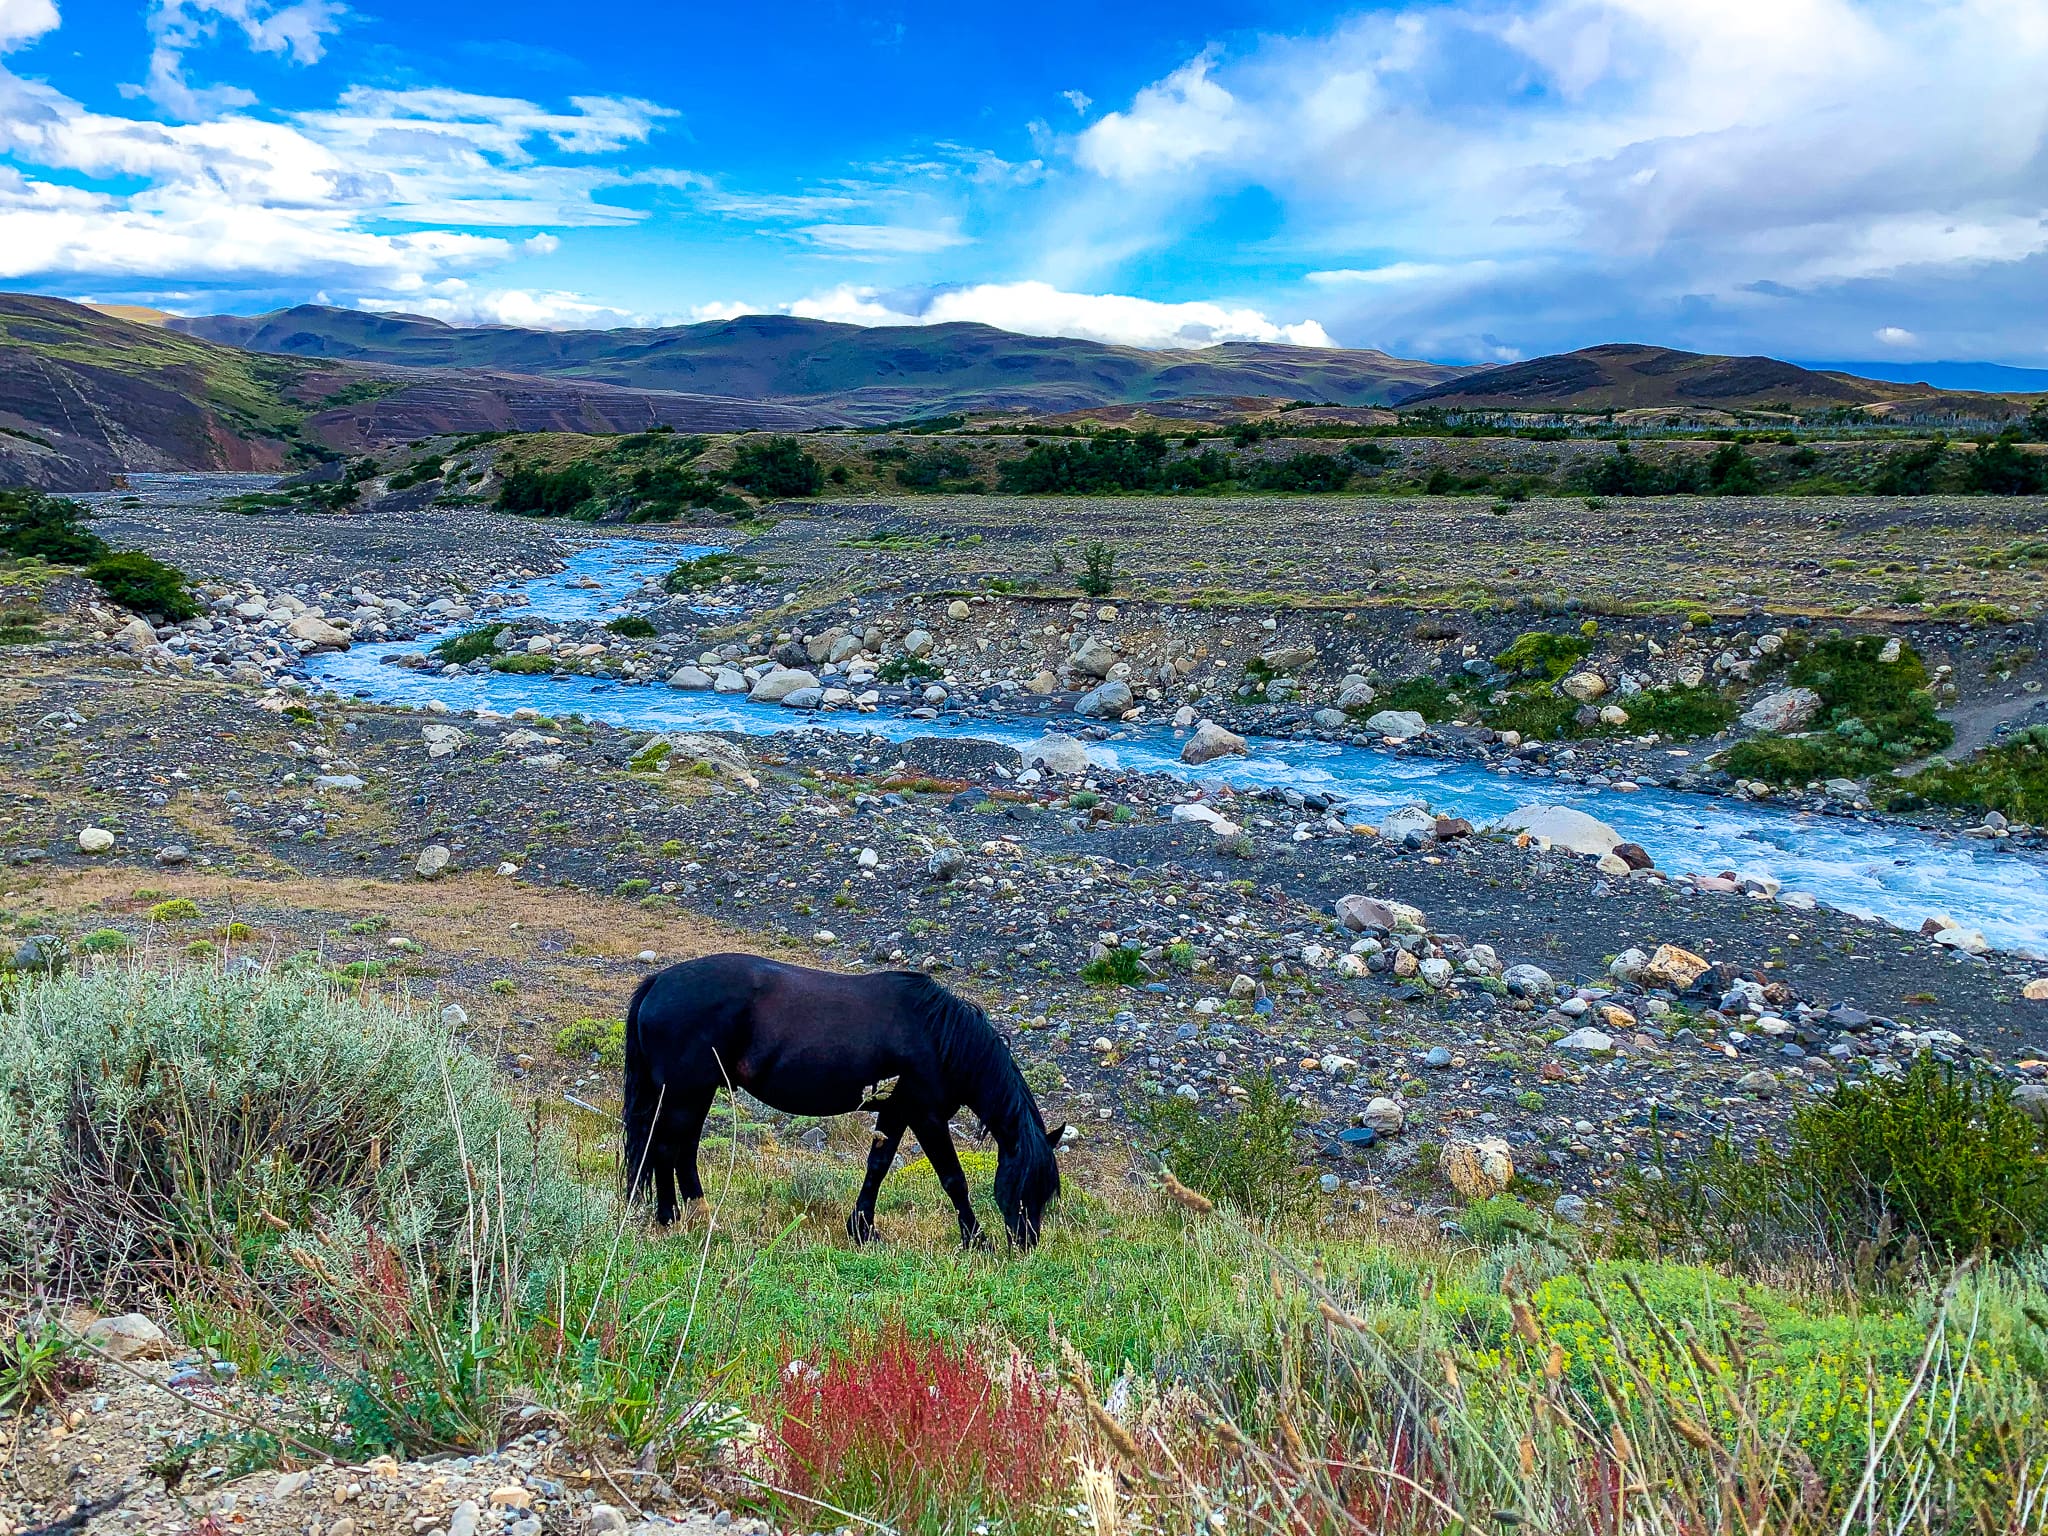
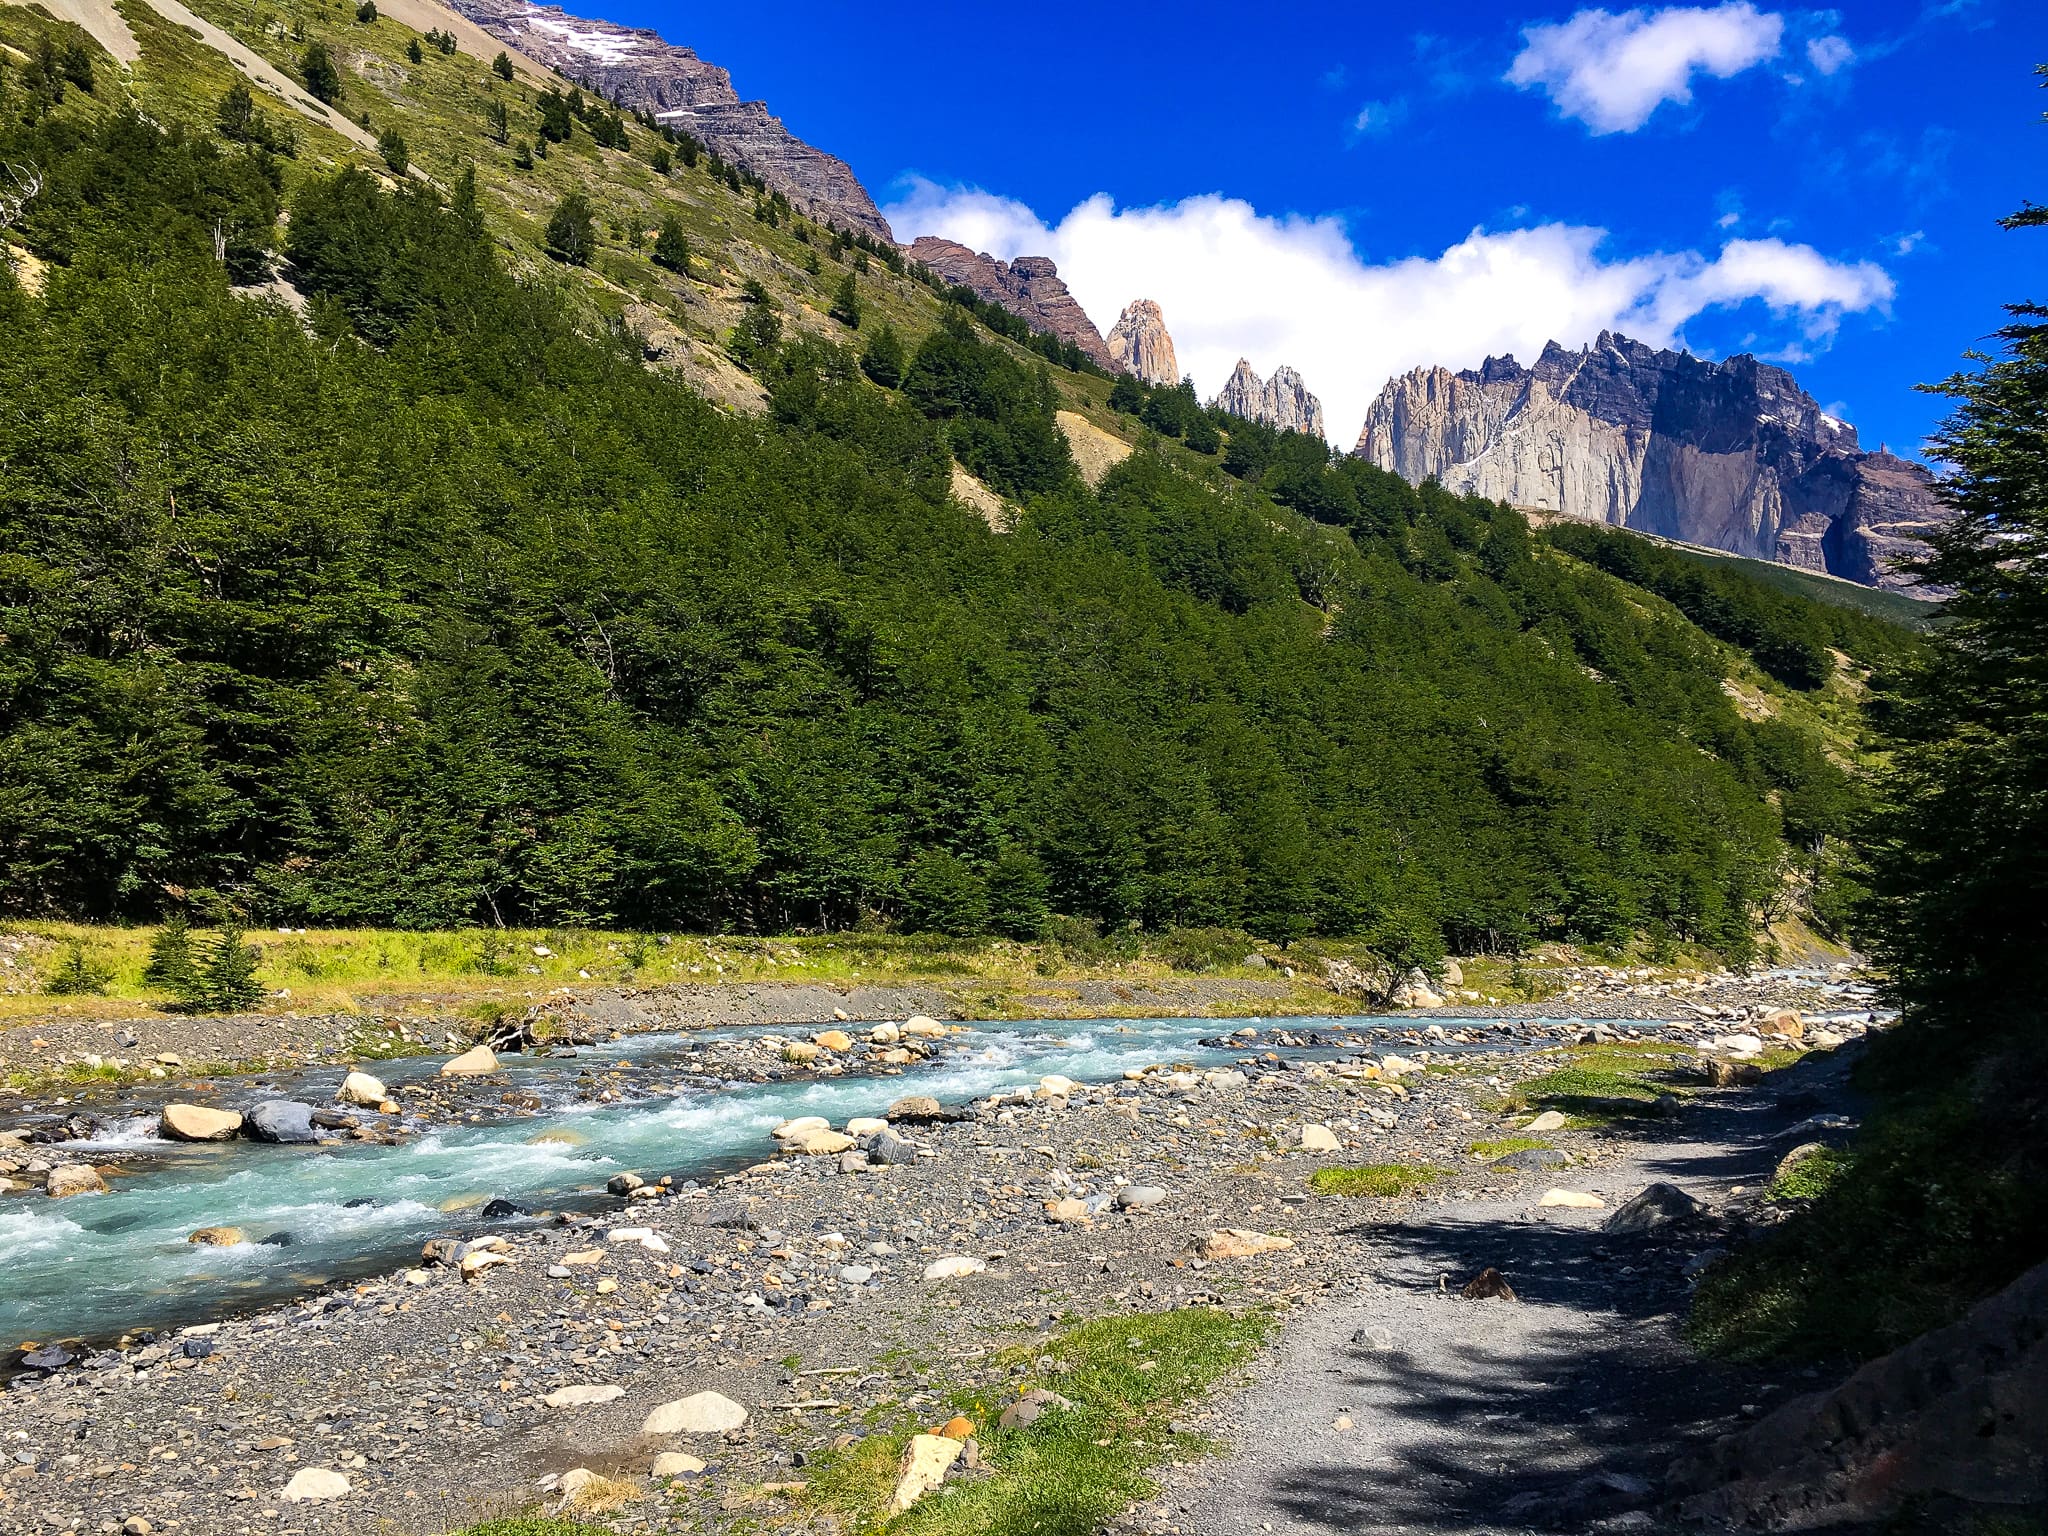
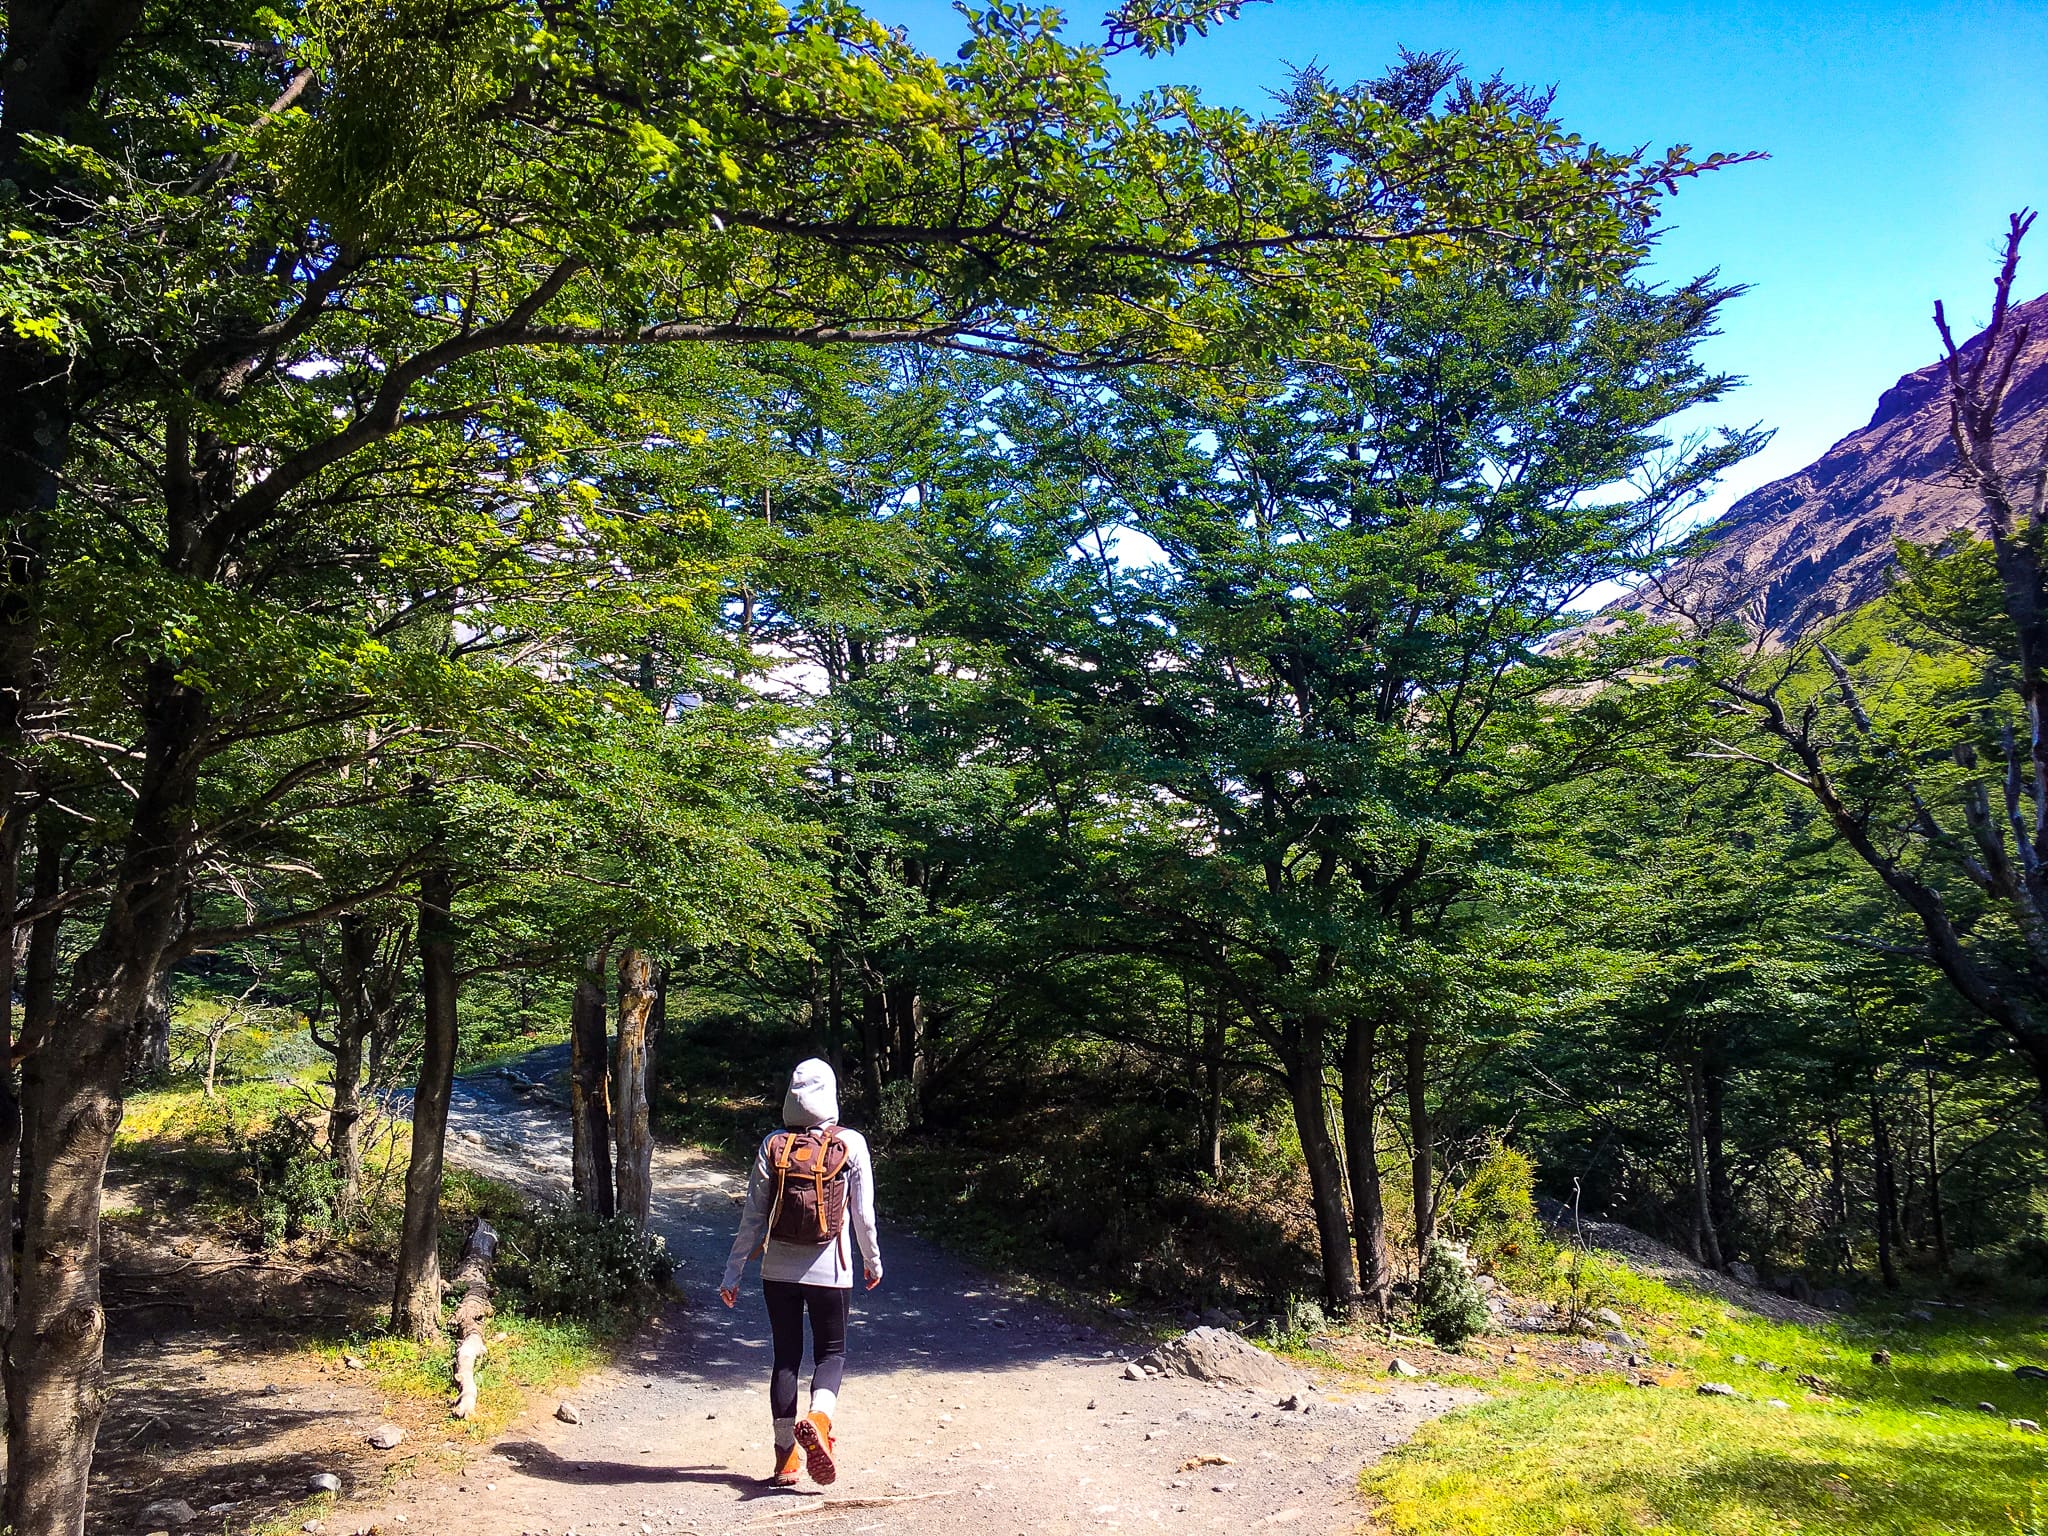
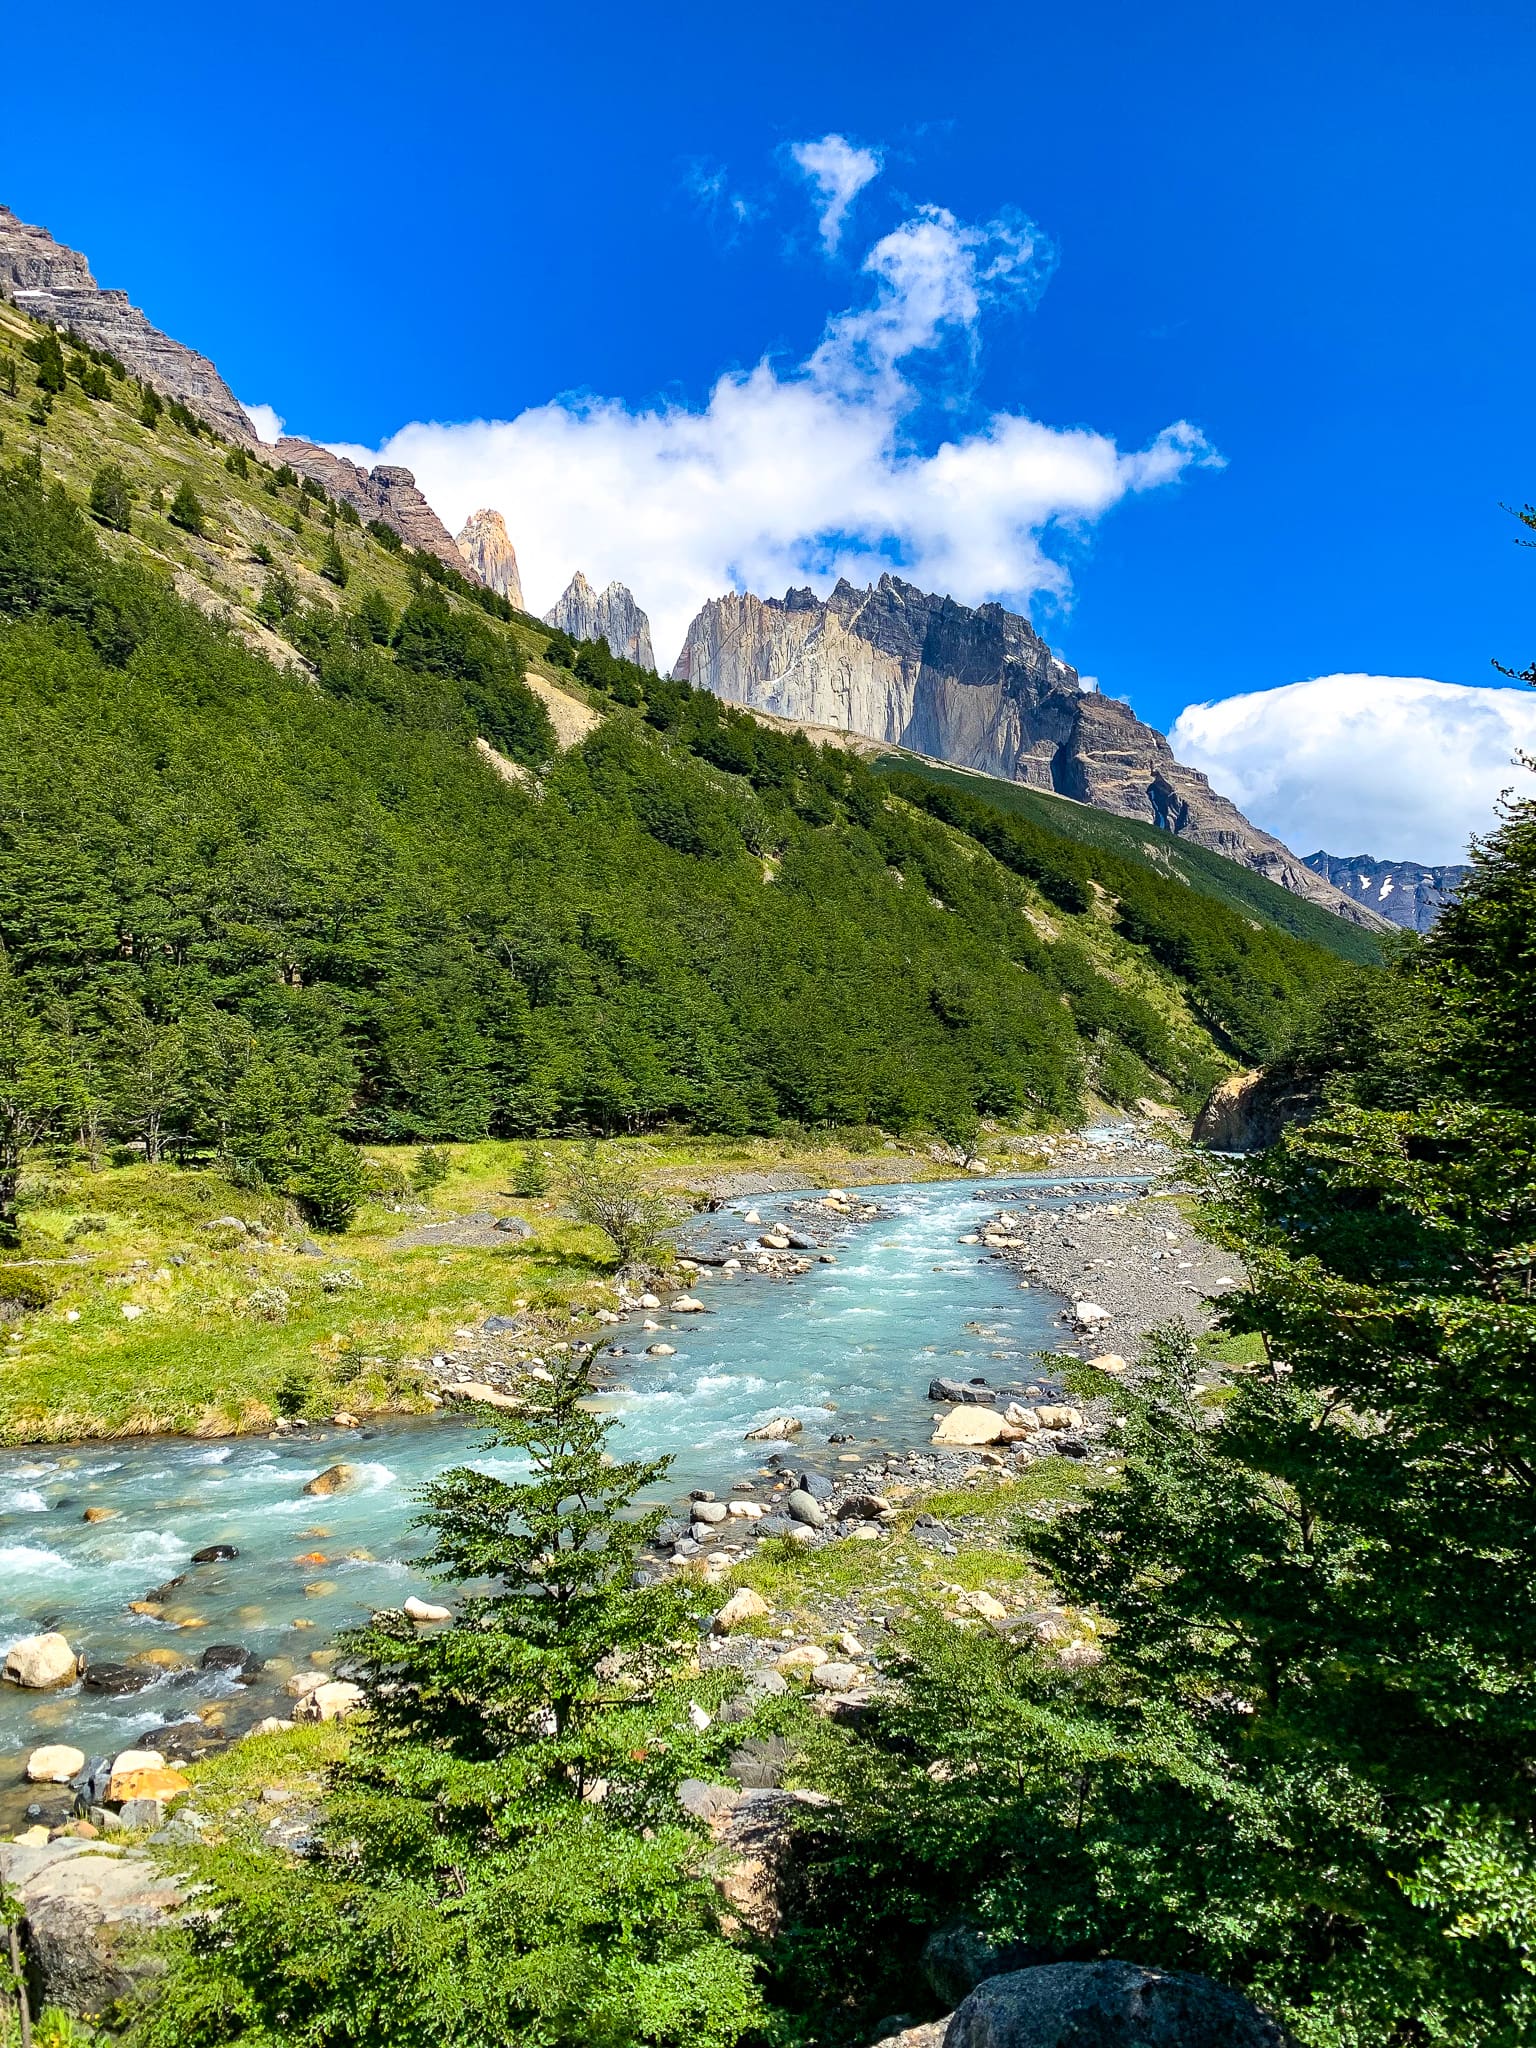
Part One: A Stroll Through Green Valleys & Rolling Hills
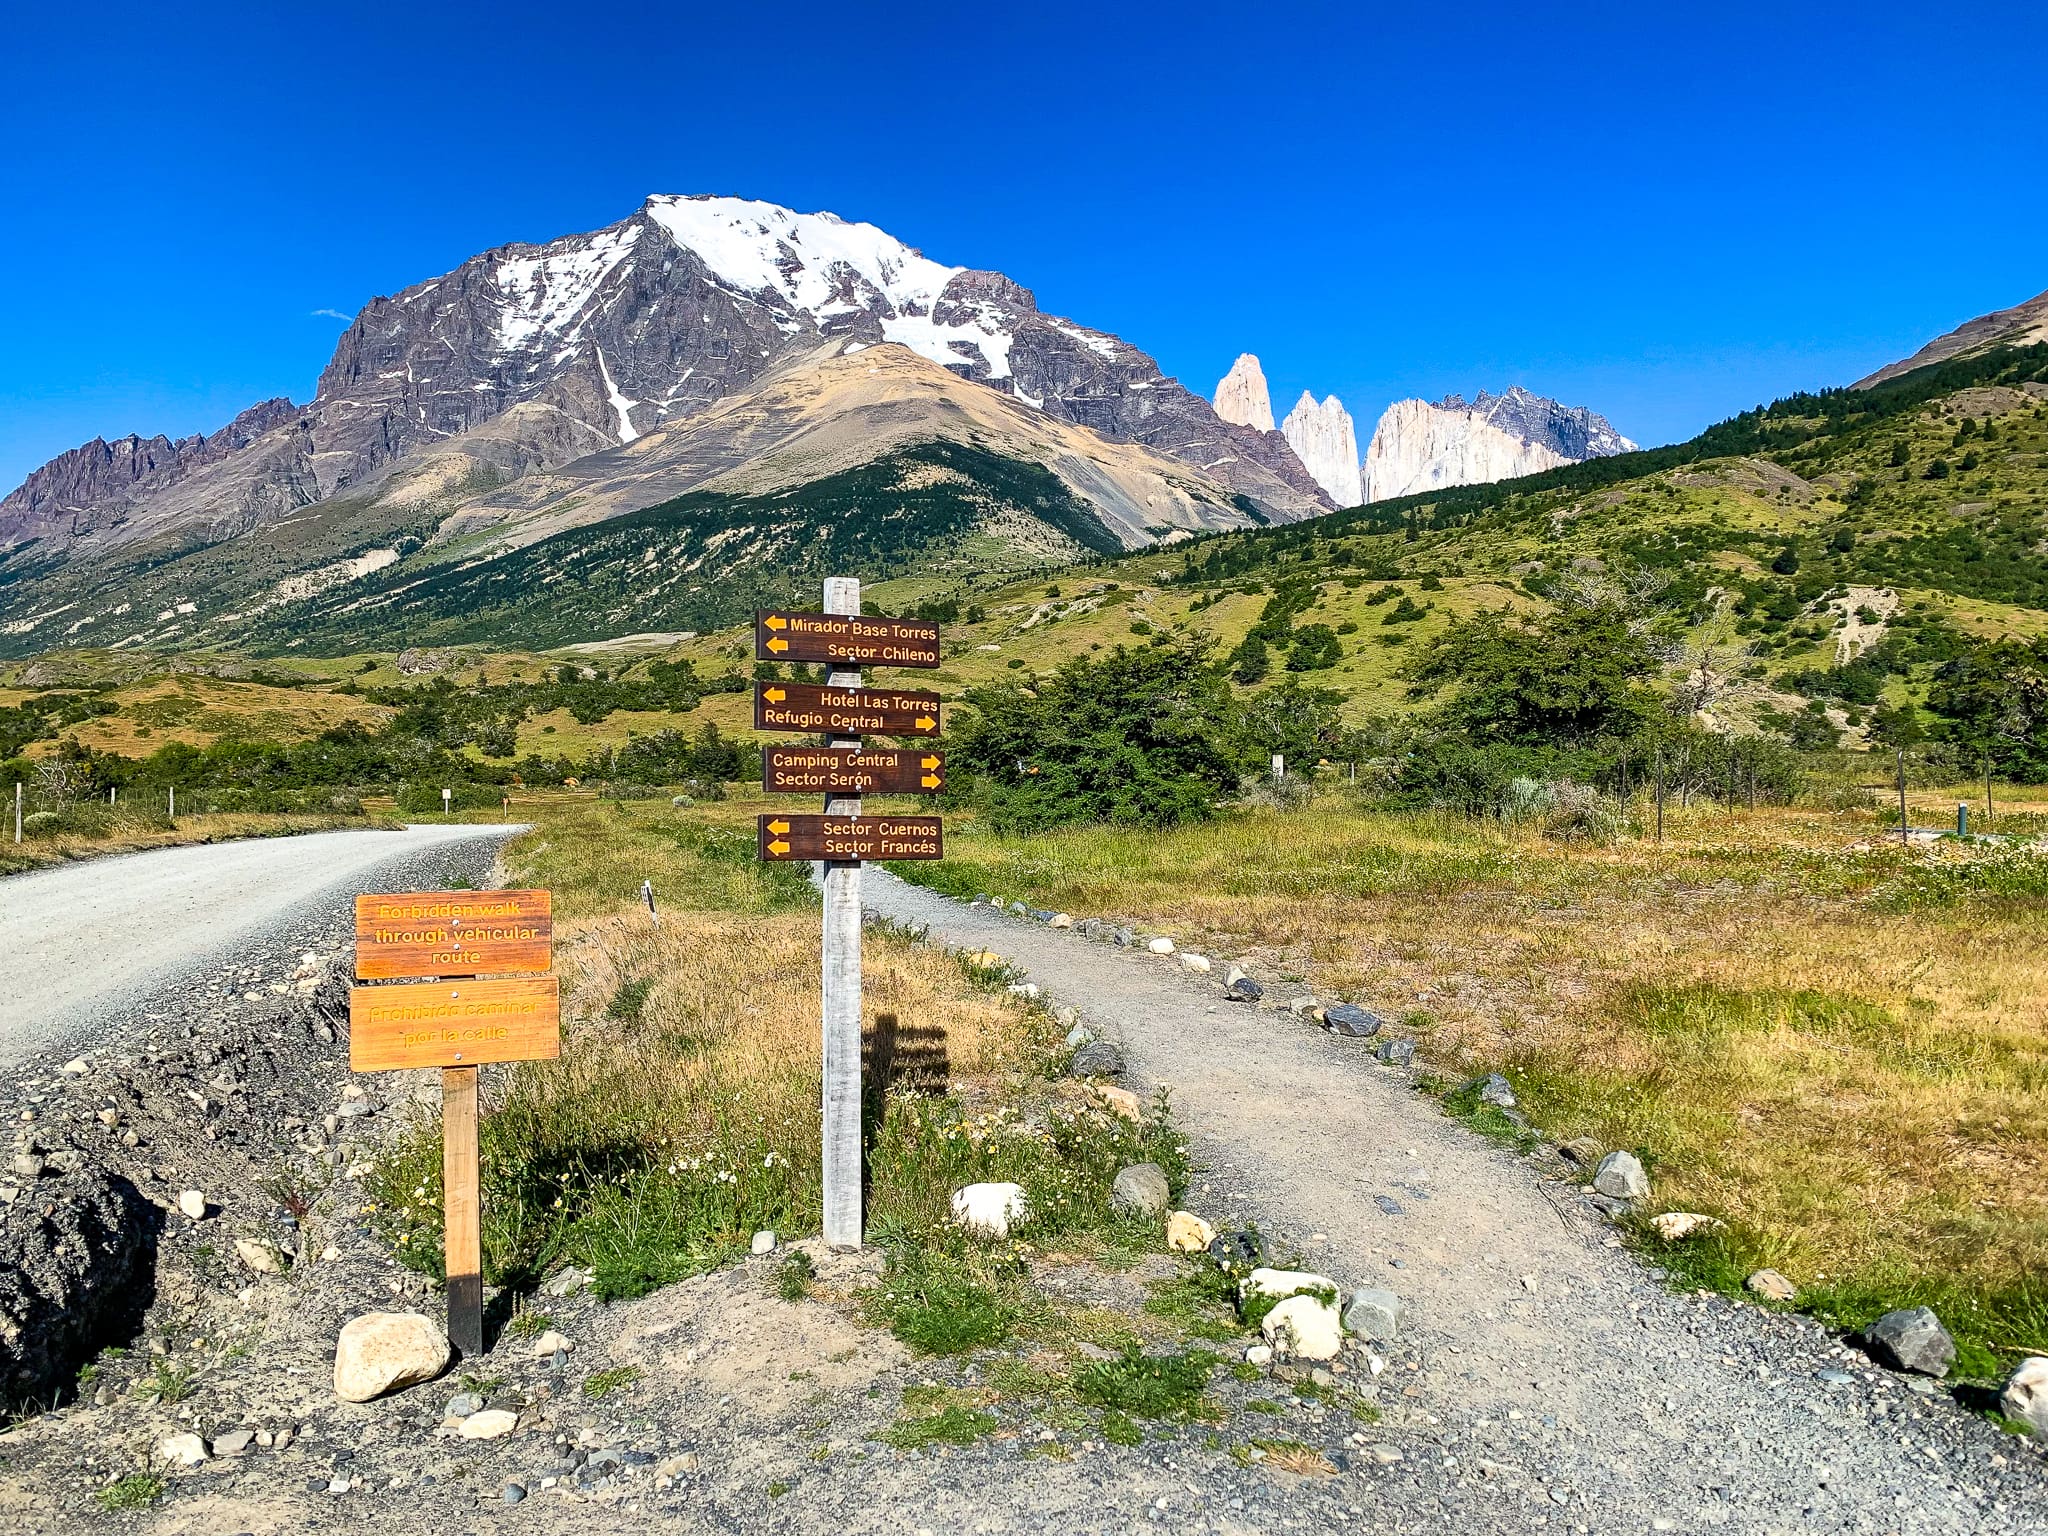
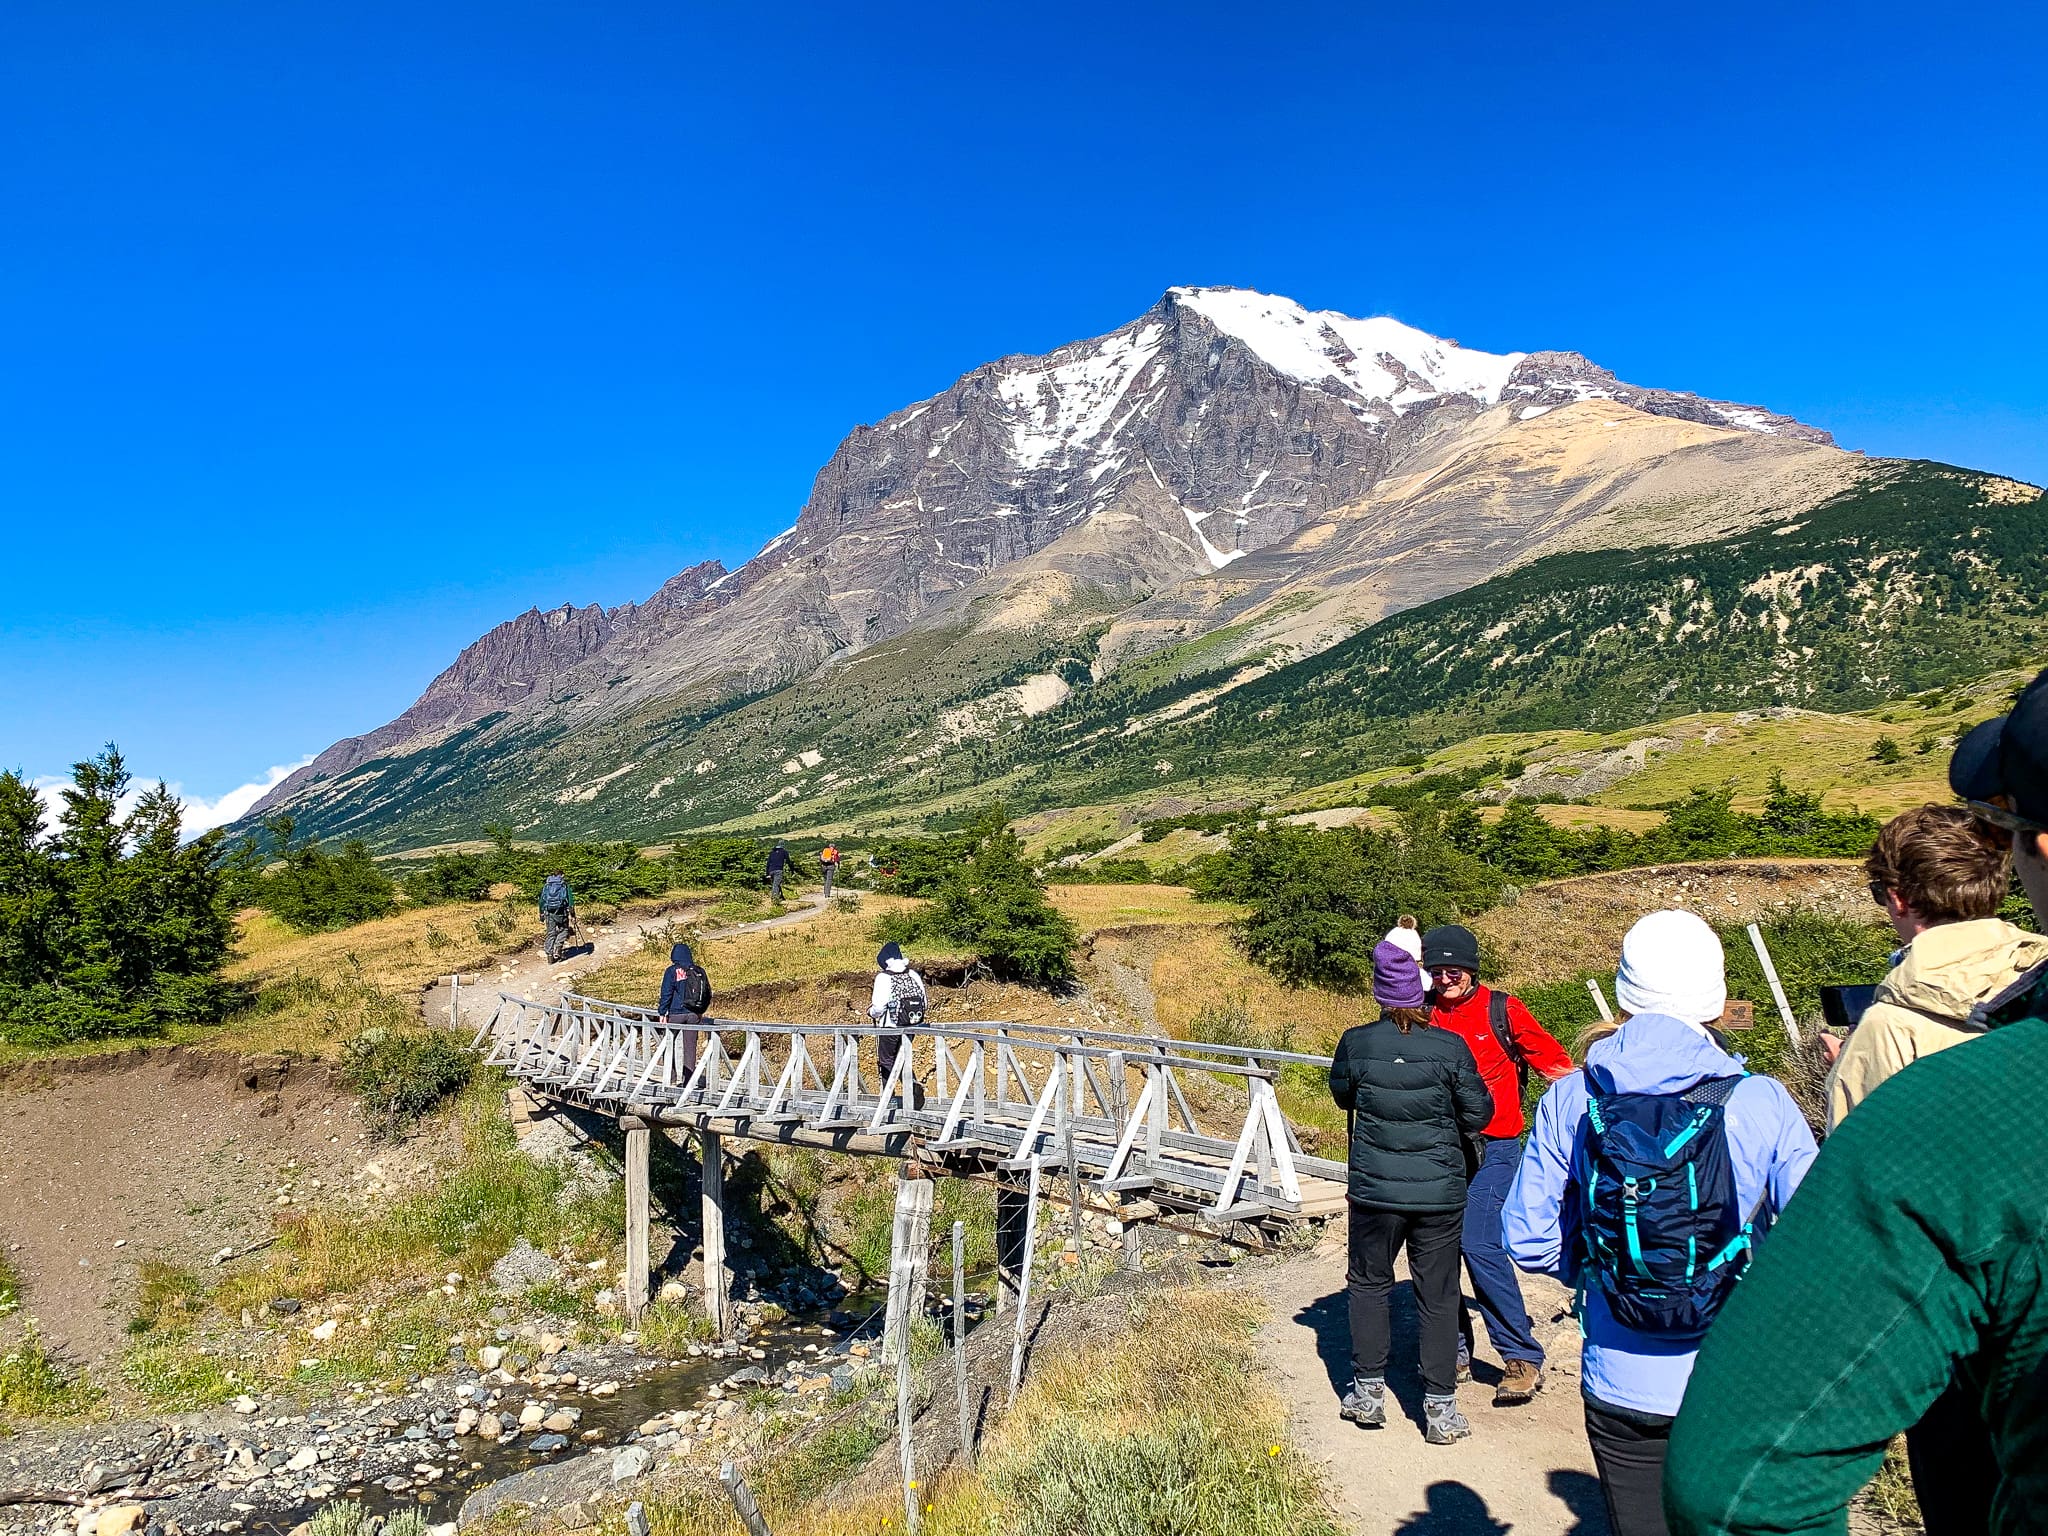
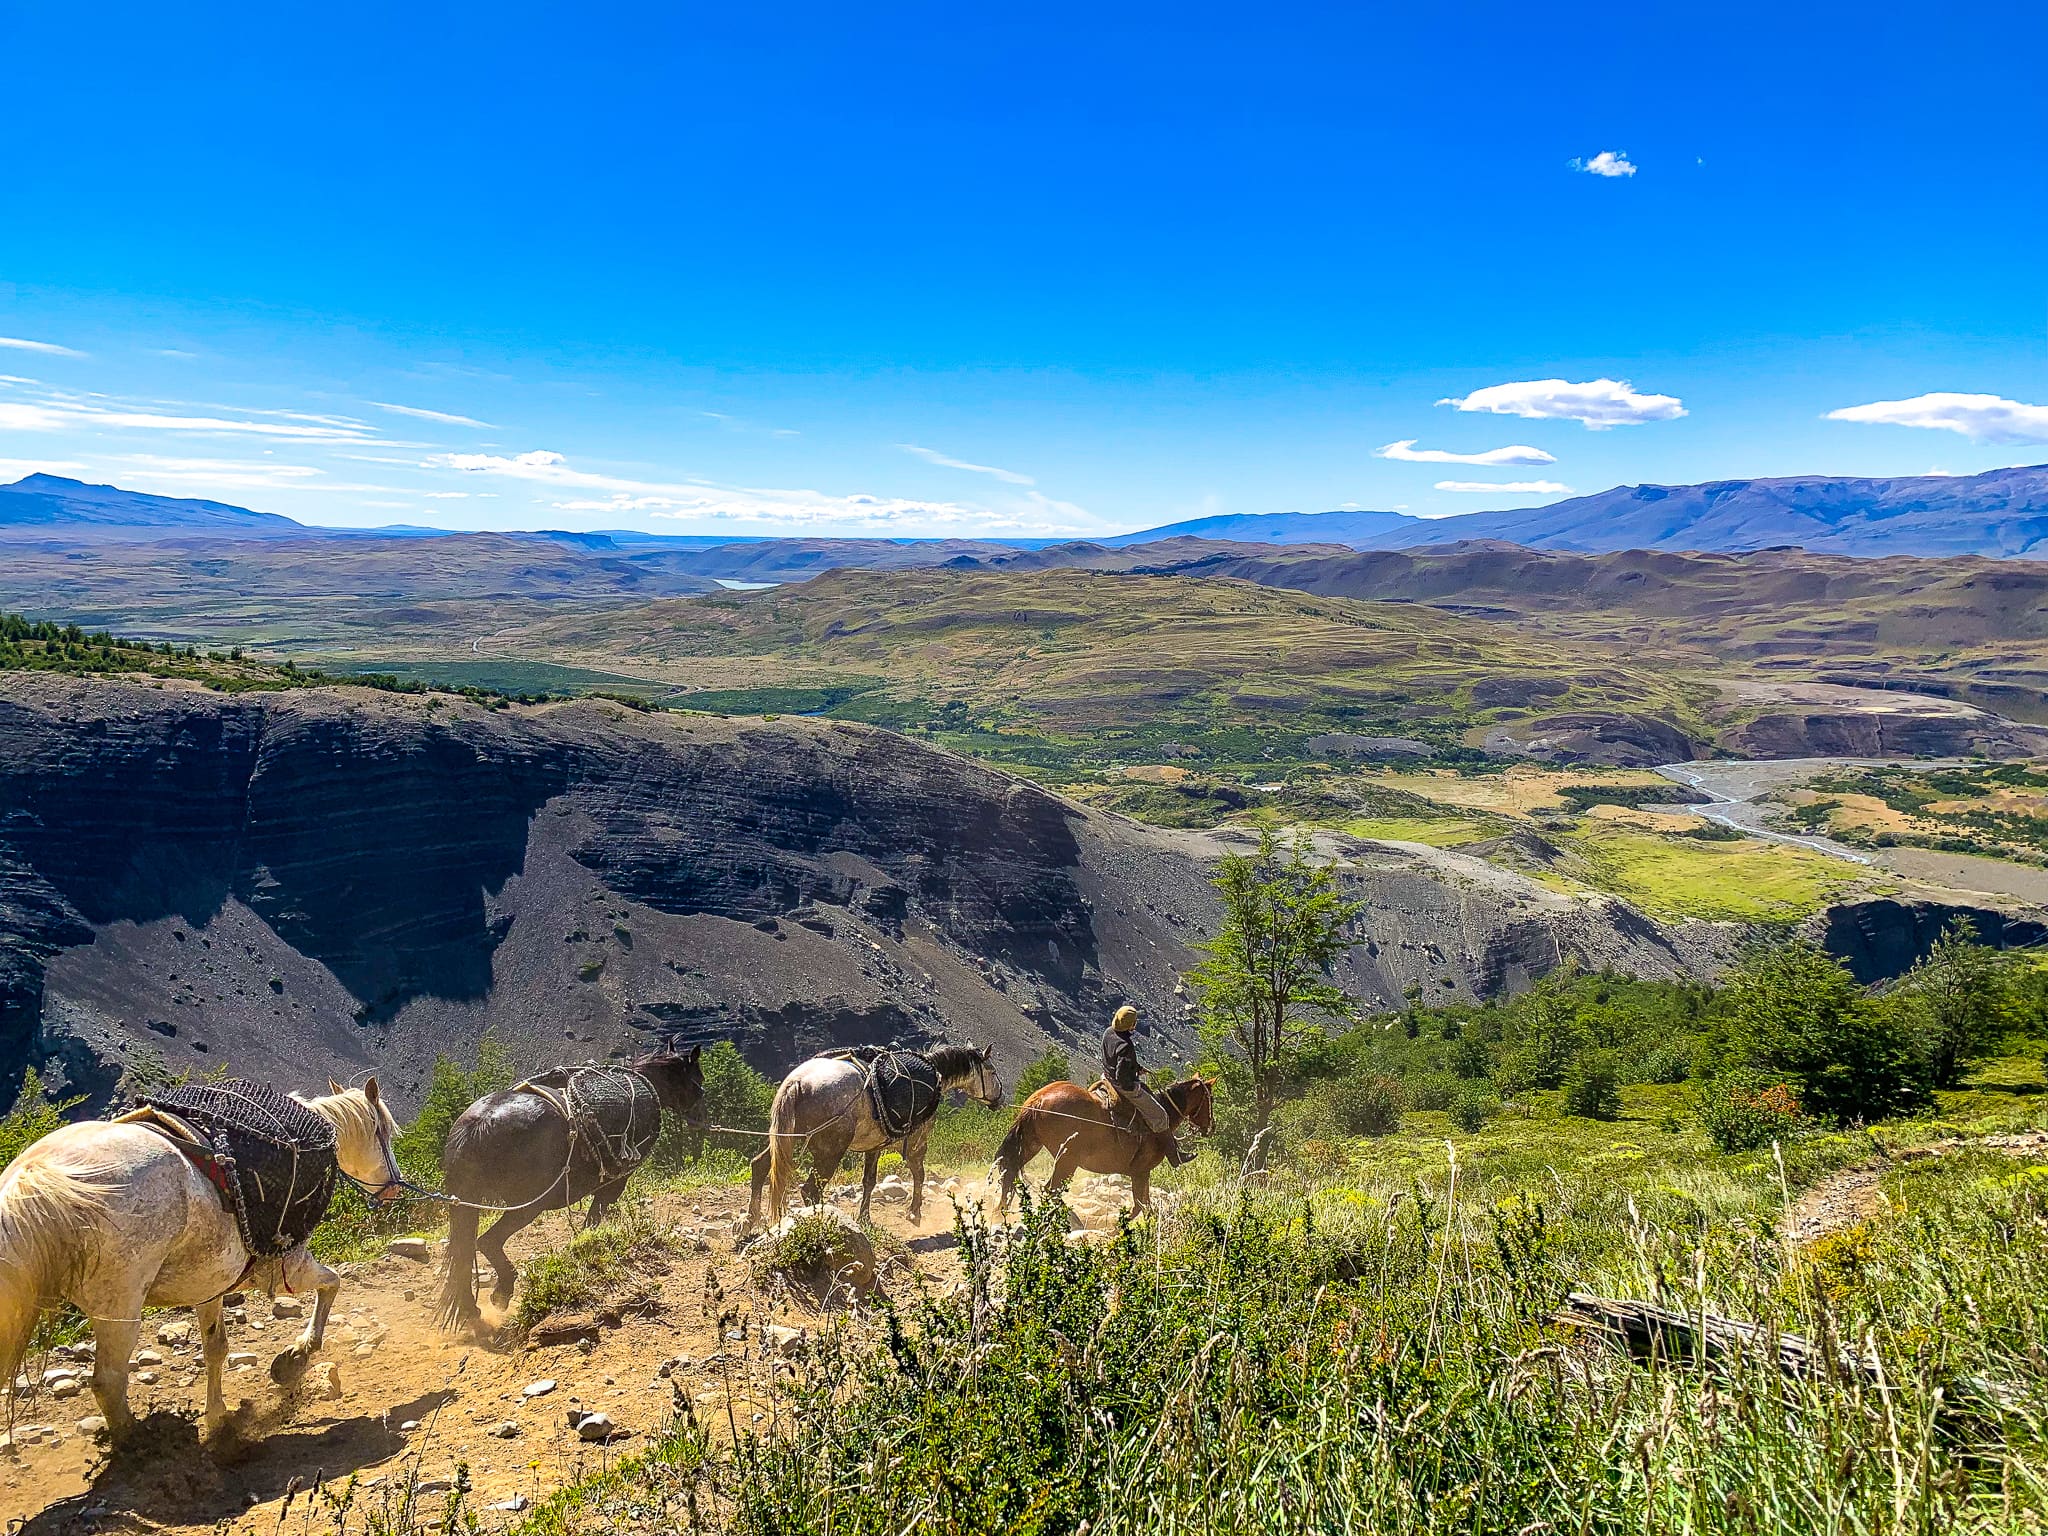
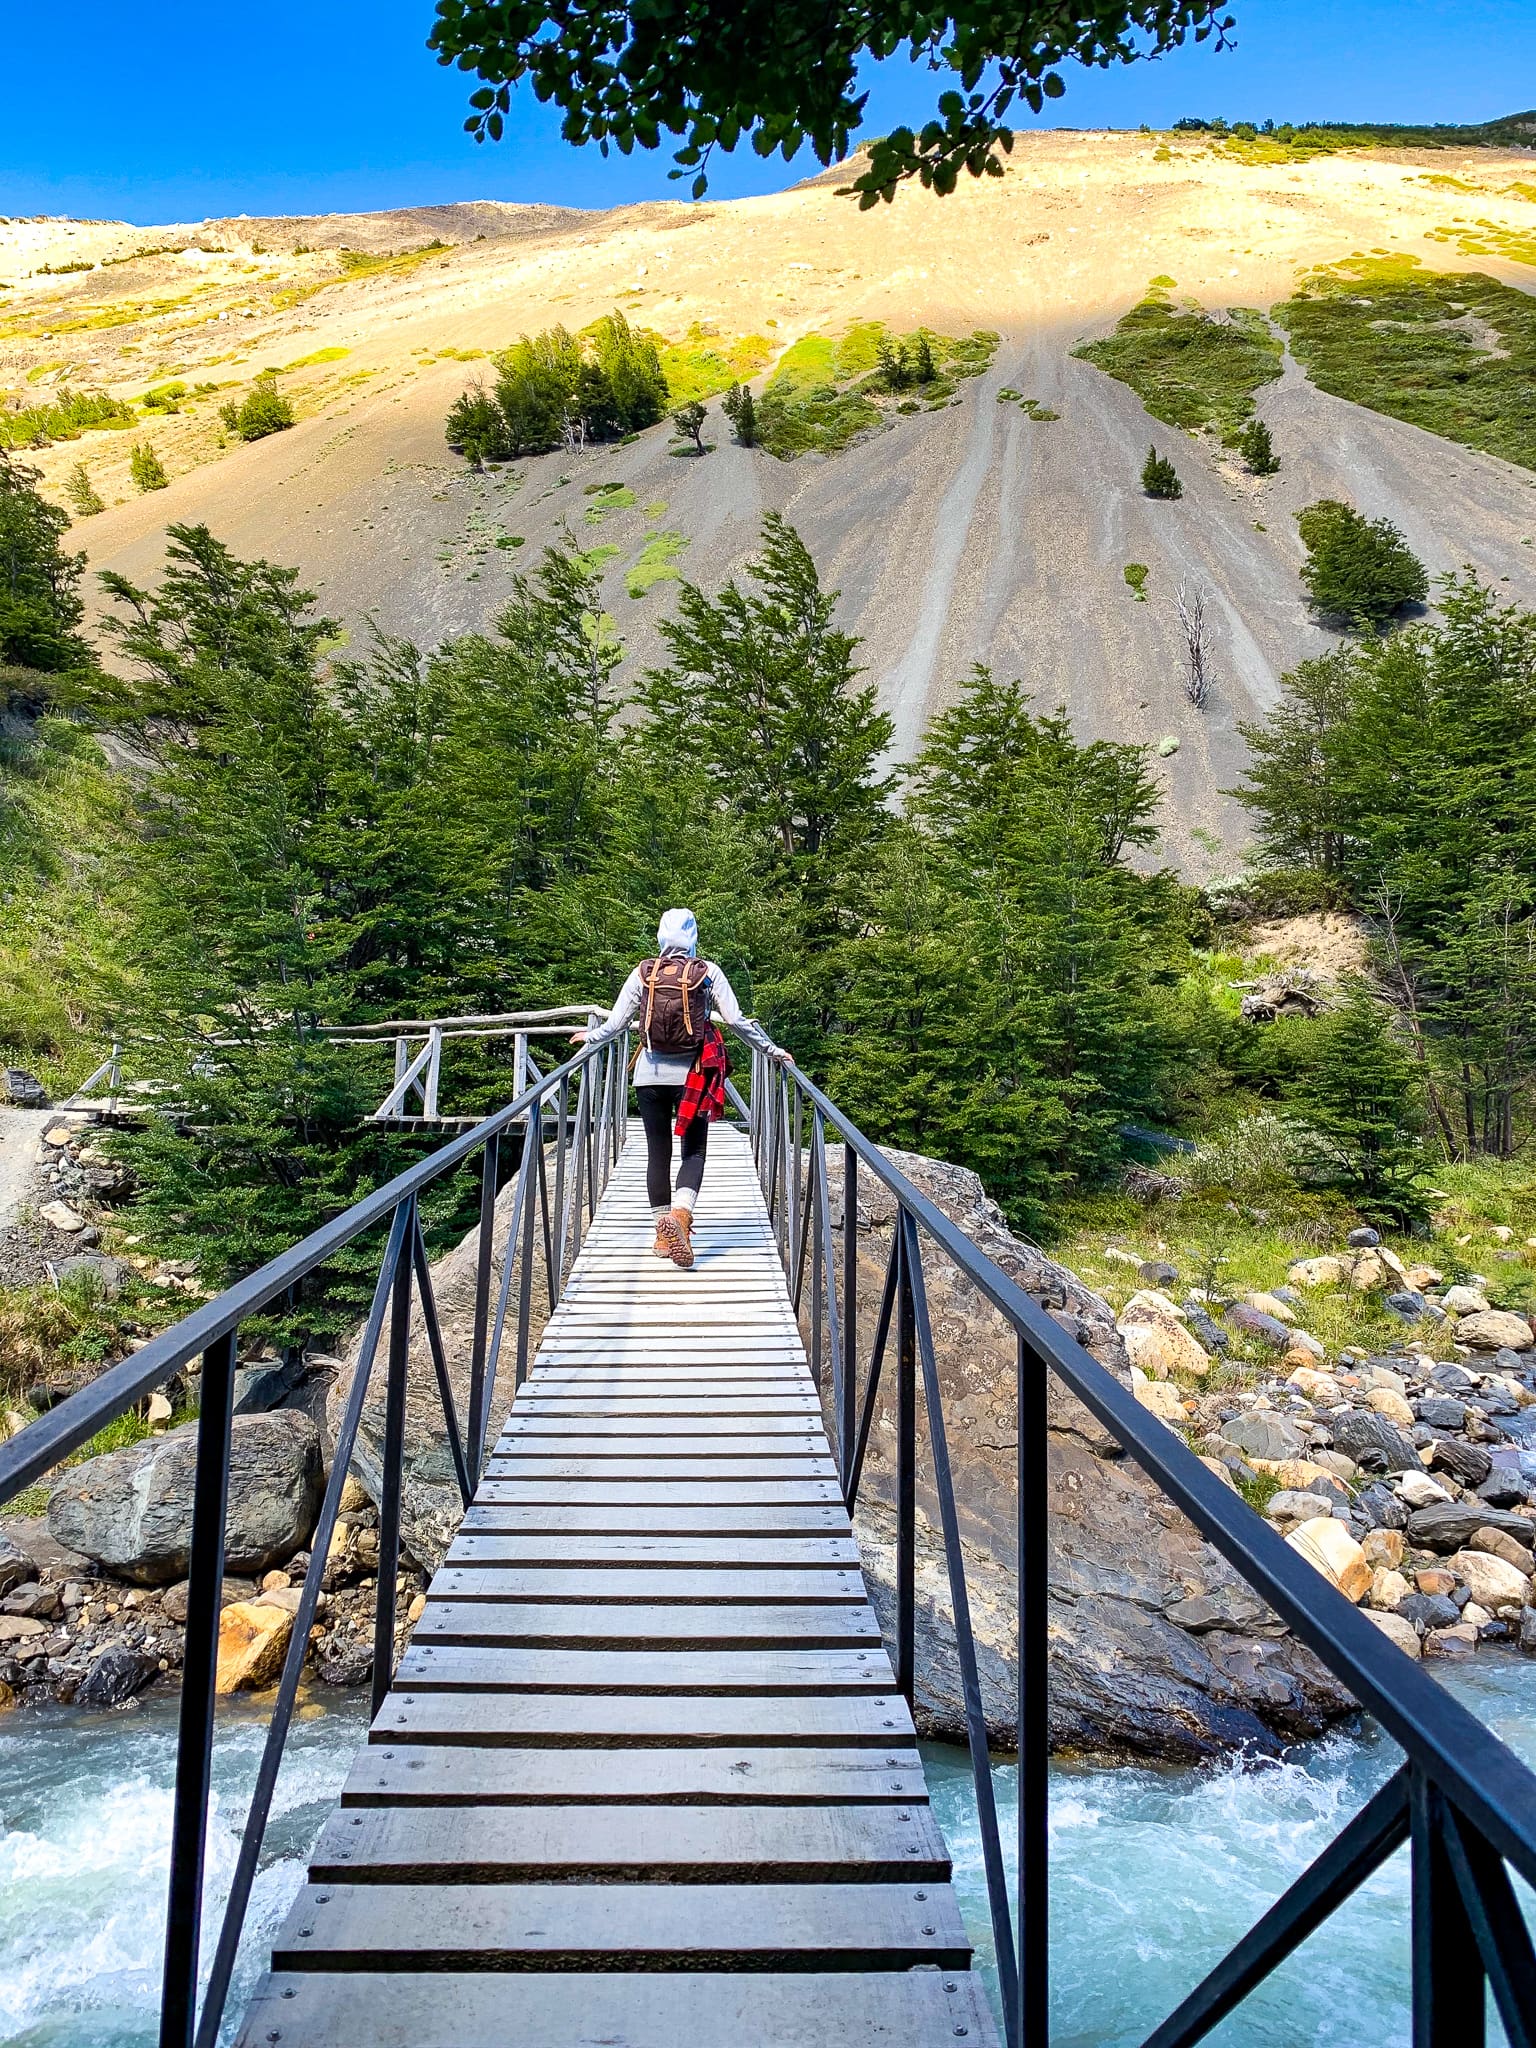
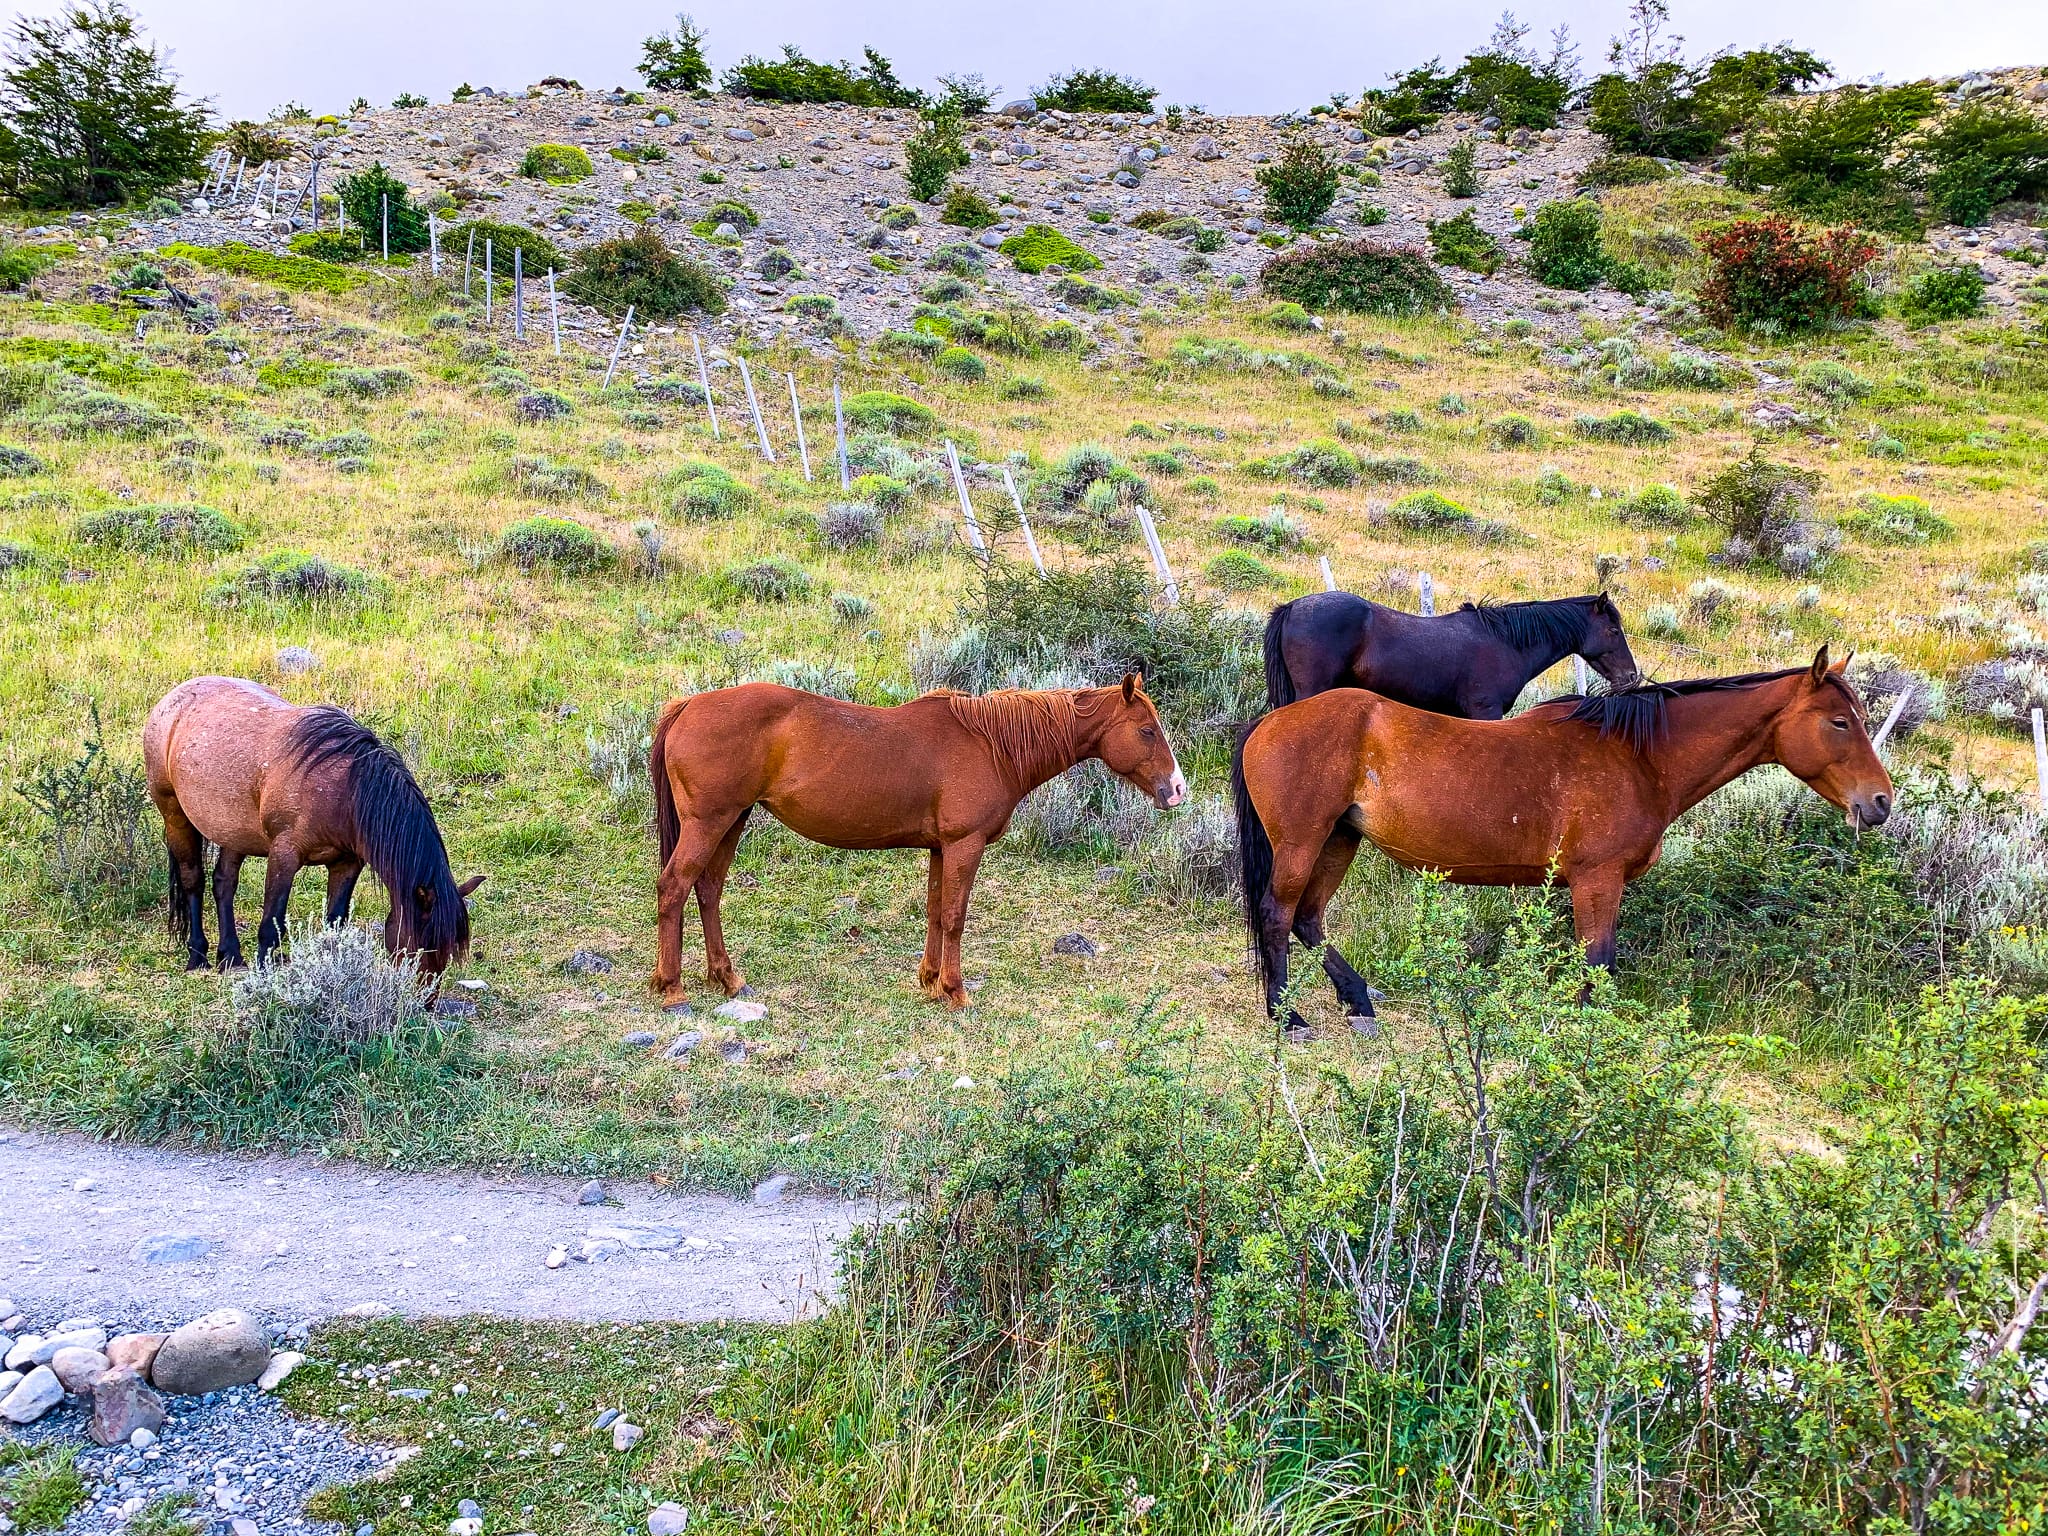
As soon as you leave the visitor center, your journey begins with a leisurely stroll across Rio Ascencio Valley. Nearby is Estancia Cerro Paine, an old horse ranch & nature reserve. The flat path is a nice warm-up as you walk along grassy fields where horses may be seen grazing. You will come across sketchy hanging bridges that allow only two people at a time. After about 20 minutes, you will come to the trailhead sign with arrows pointing in all directions. Note that this is the starting point for many backpacking routes in Torres del Paine so make sure you follow the correct one.
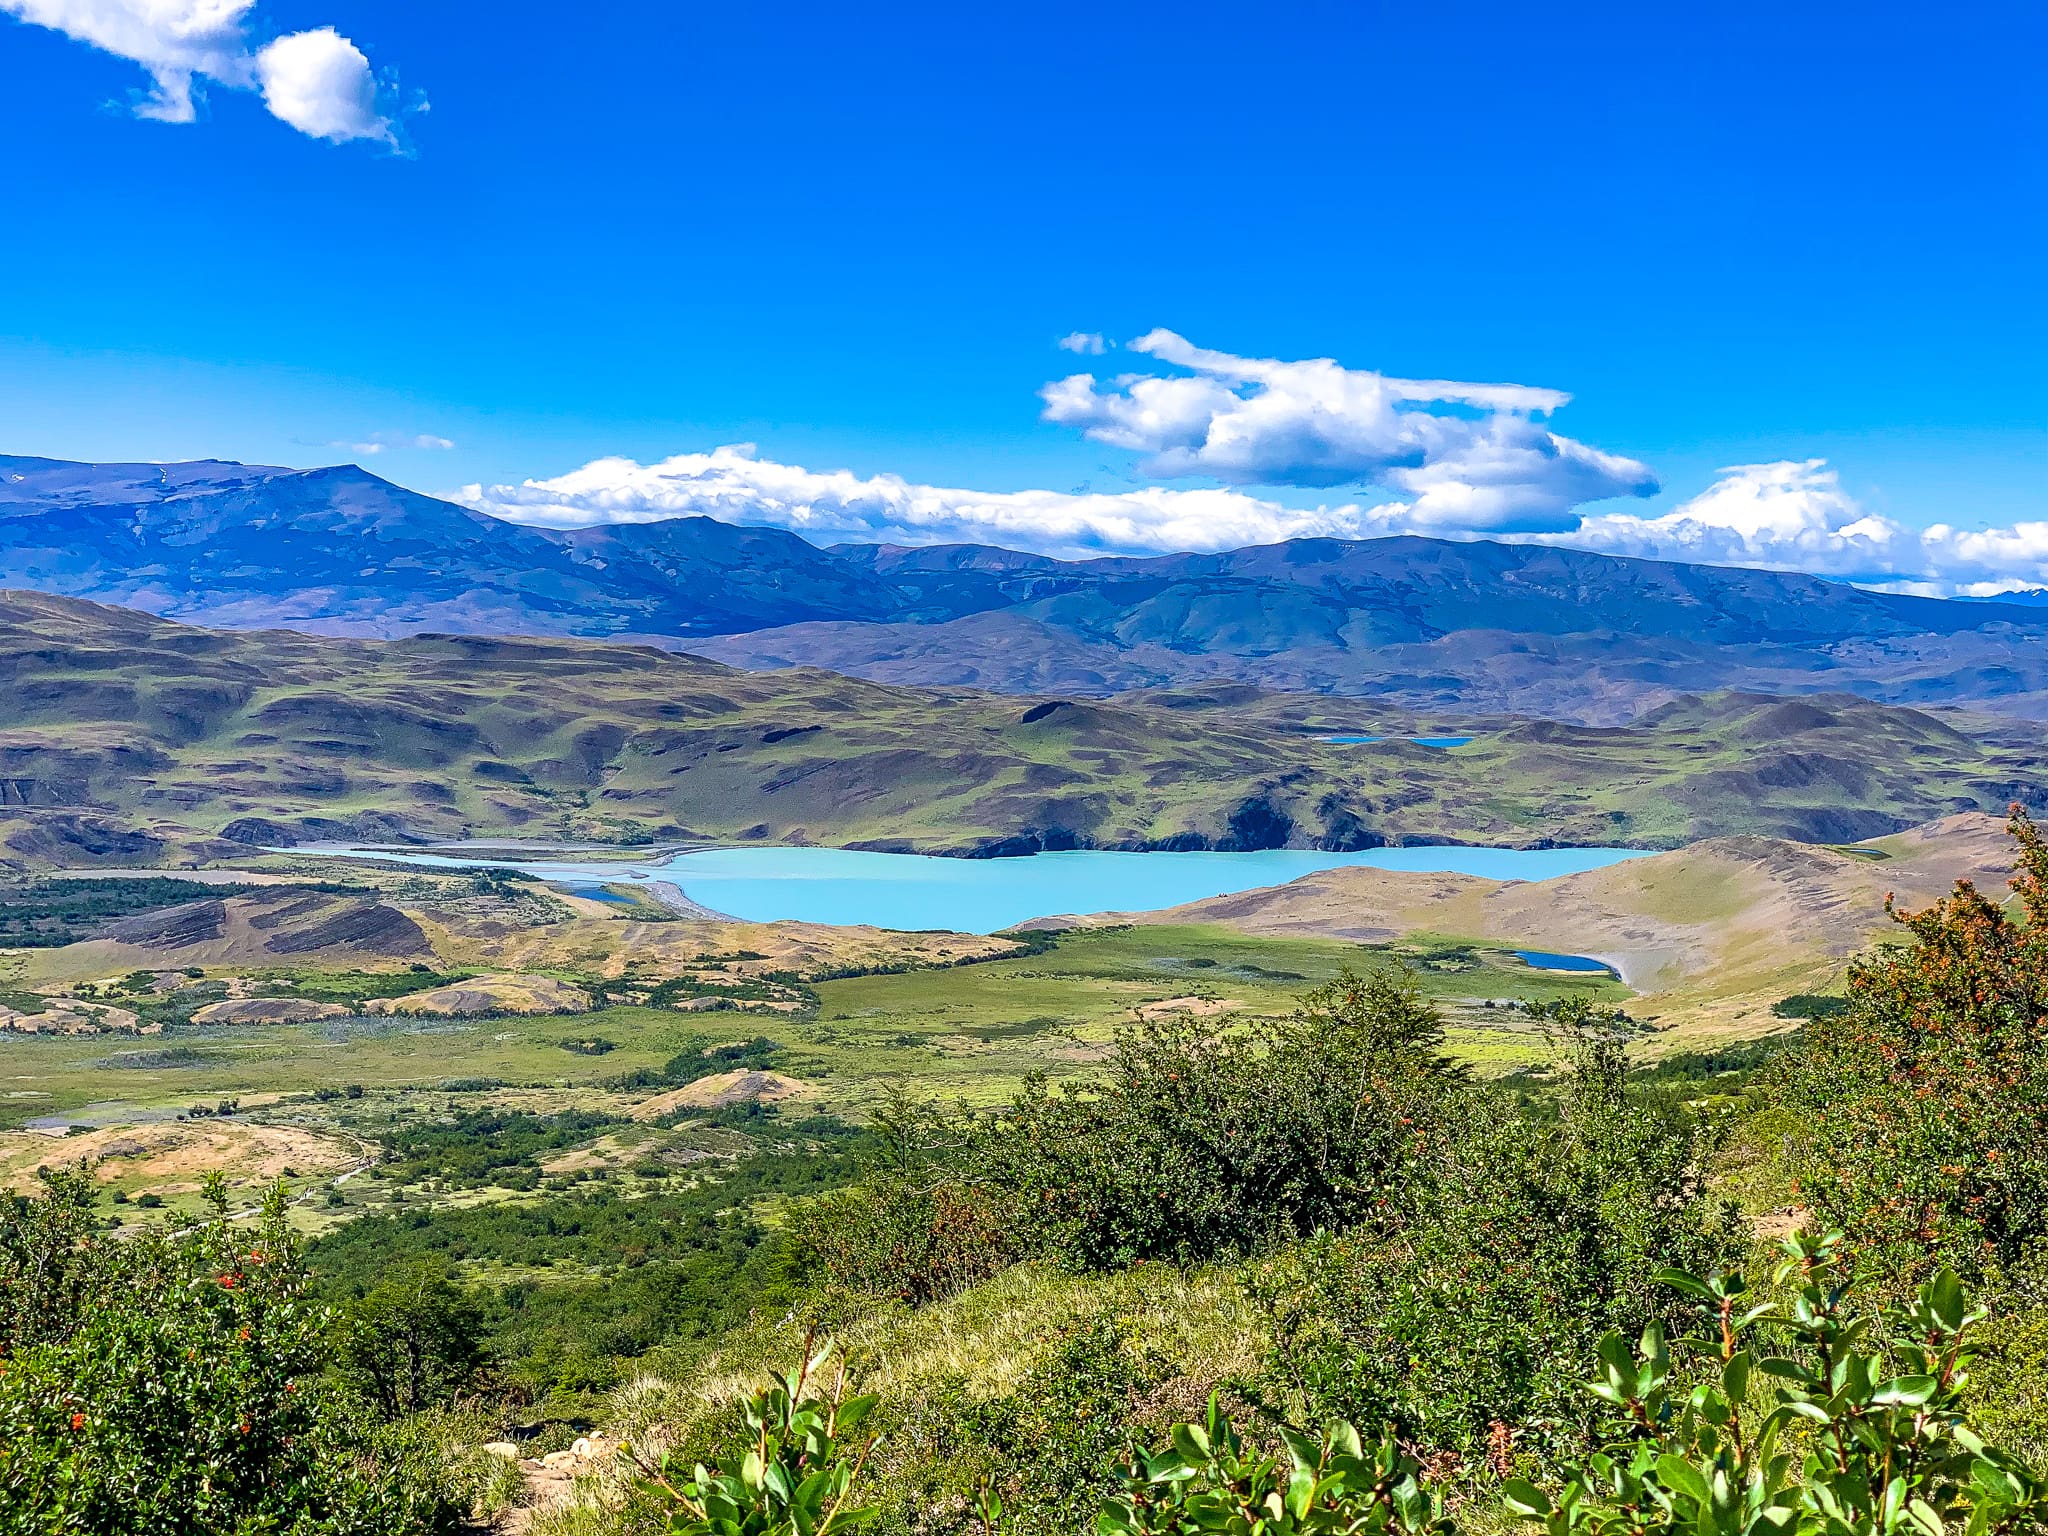
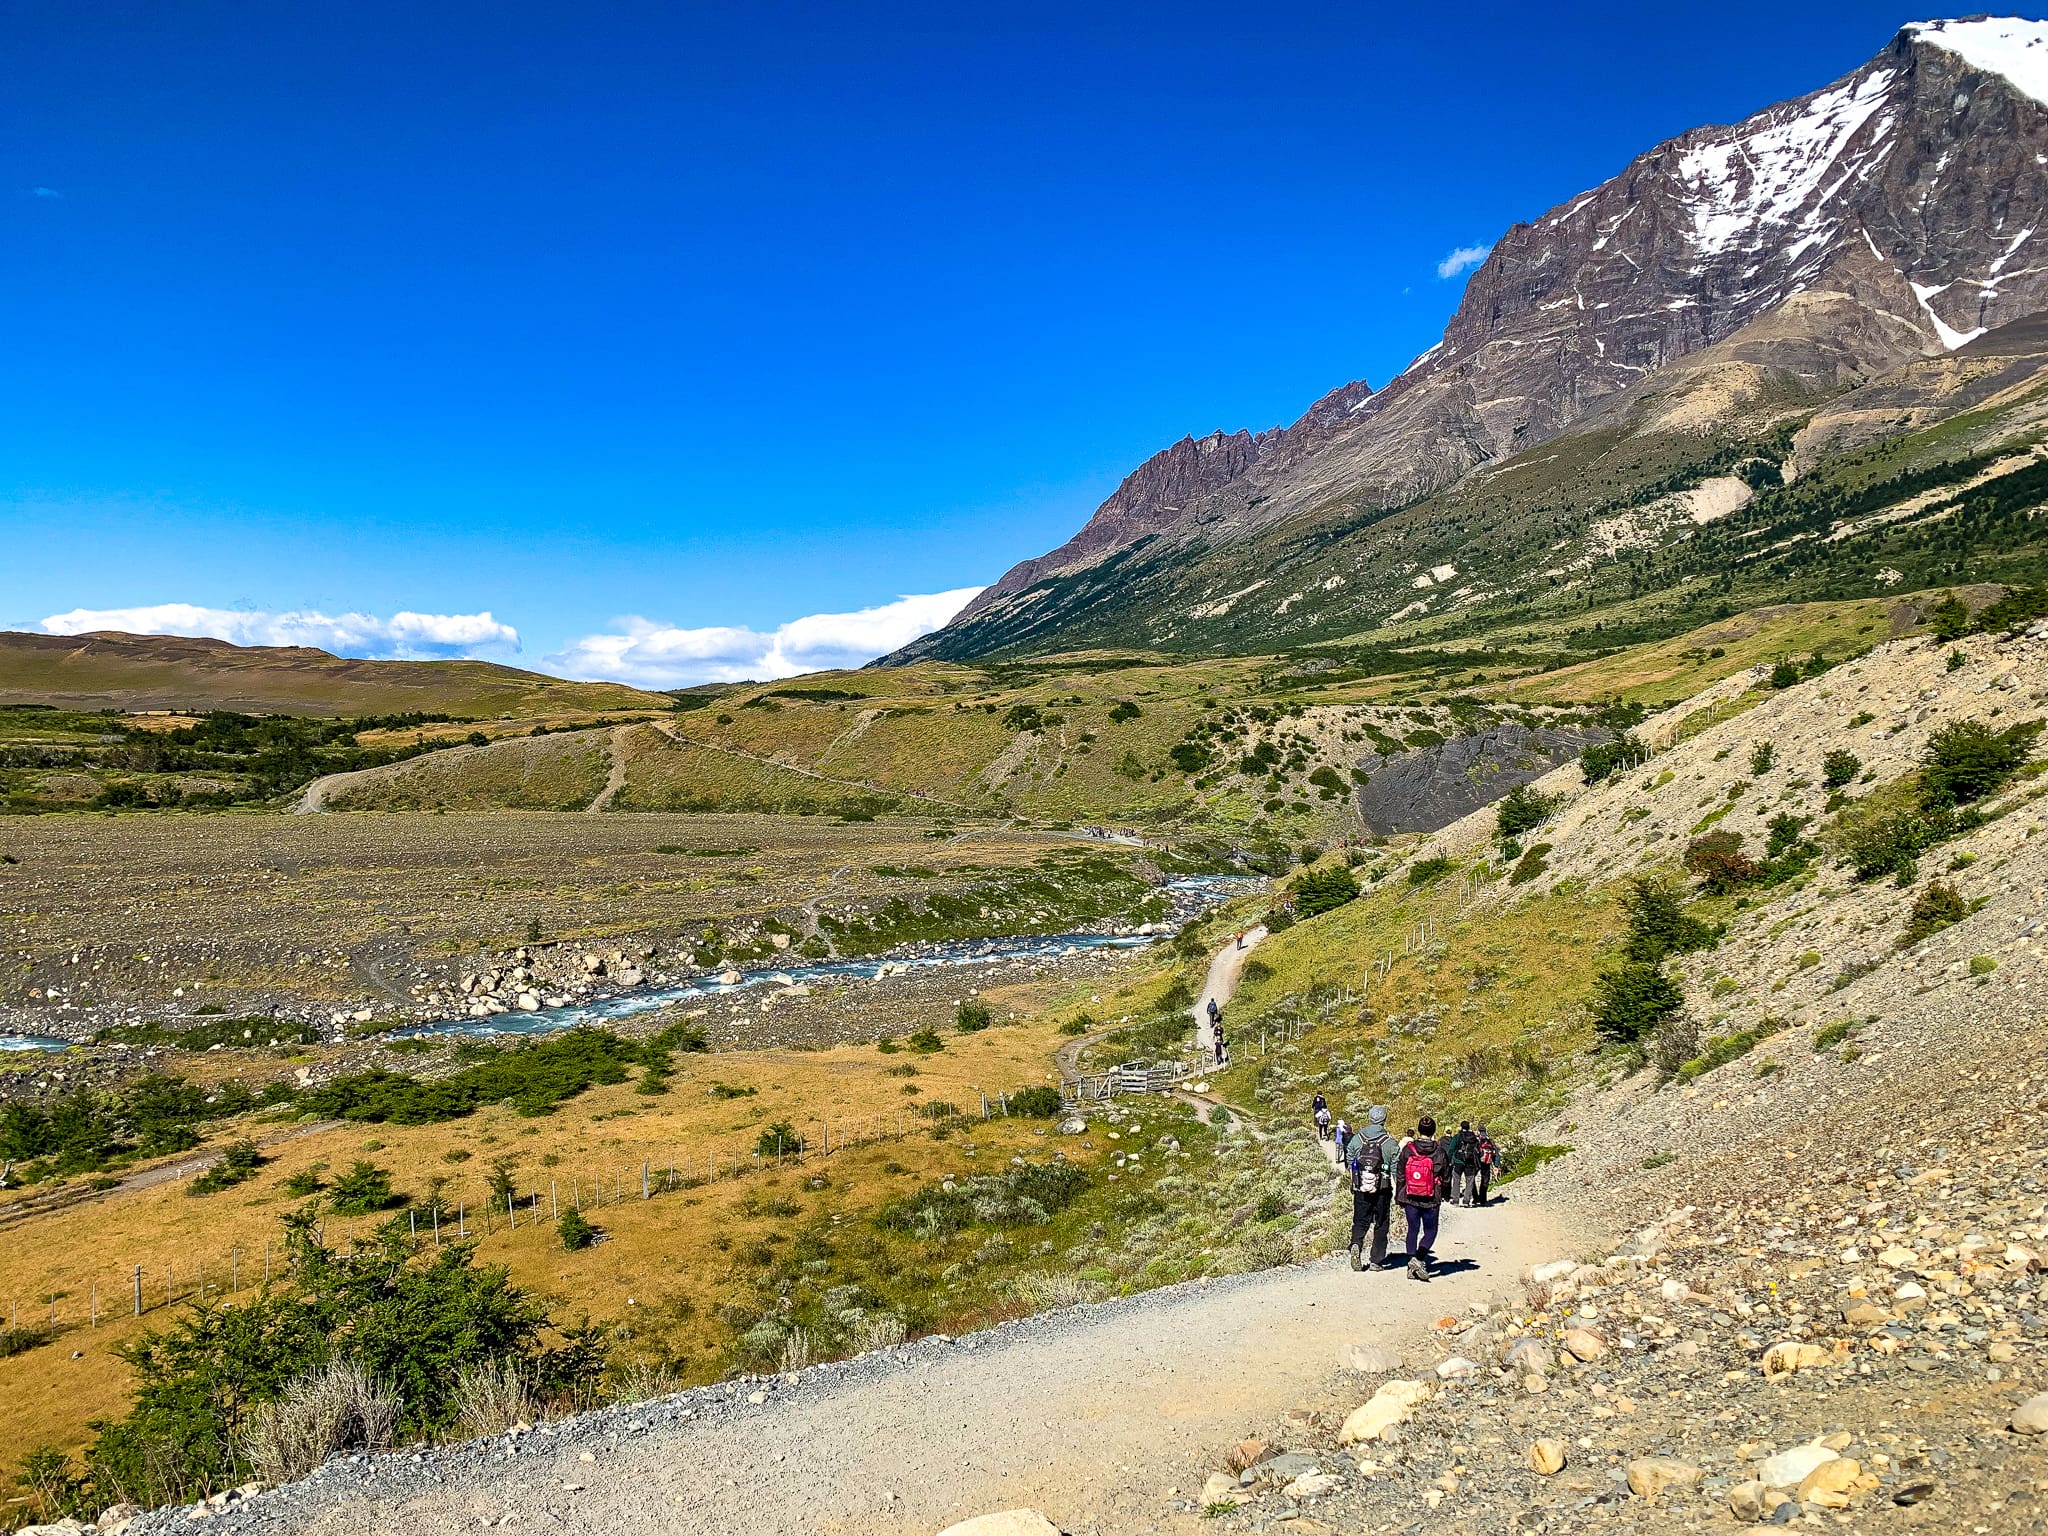
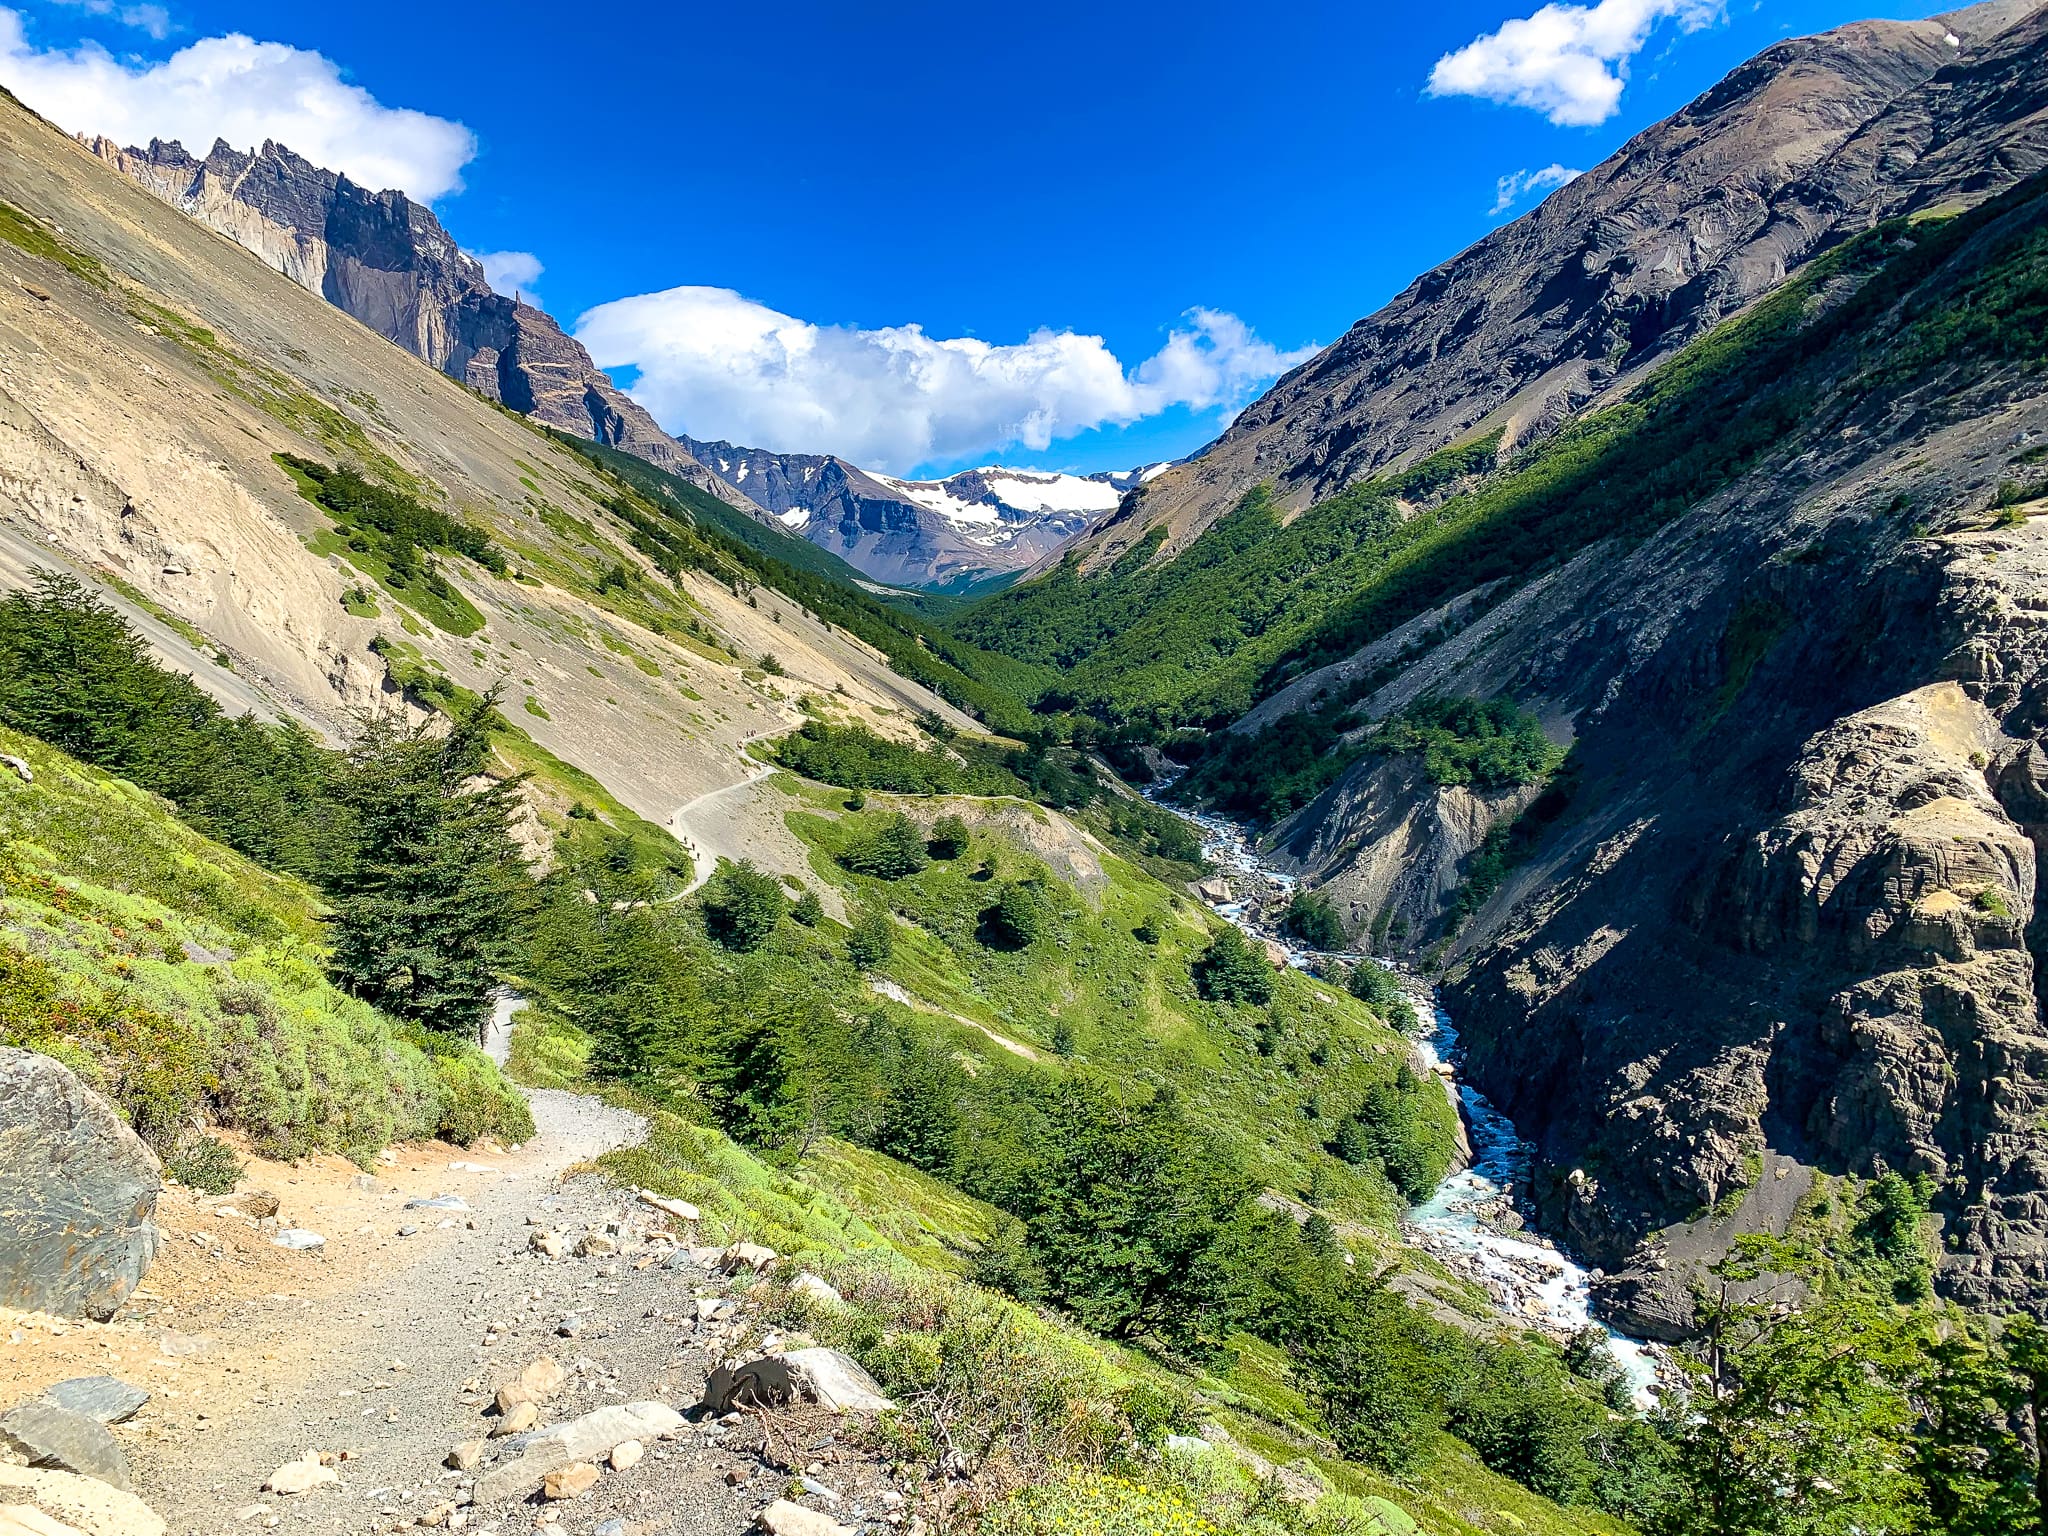
After about half a mile, the trail will start to climb uphill & the landscapes of the park will open up granting you majestic views of the lakes below. As you trek along, the path will become narrower with a series of steep ups & downs. As you climb higher in elevation, the winds become more breezier. You will eventually come to Paso de los Vientos or “Windy Pass” which confirms your struggles.
Part Two: From Refugio Chileno Through a Deep Forest
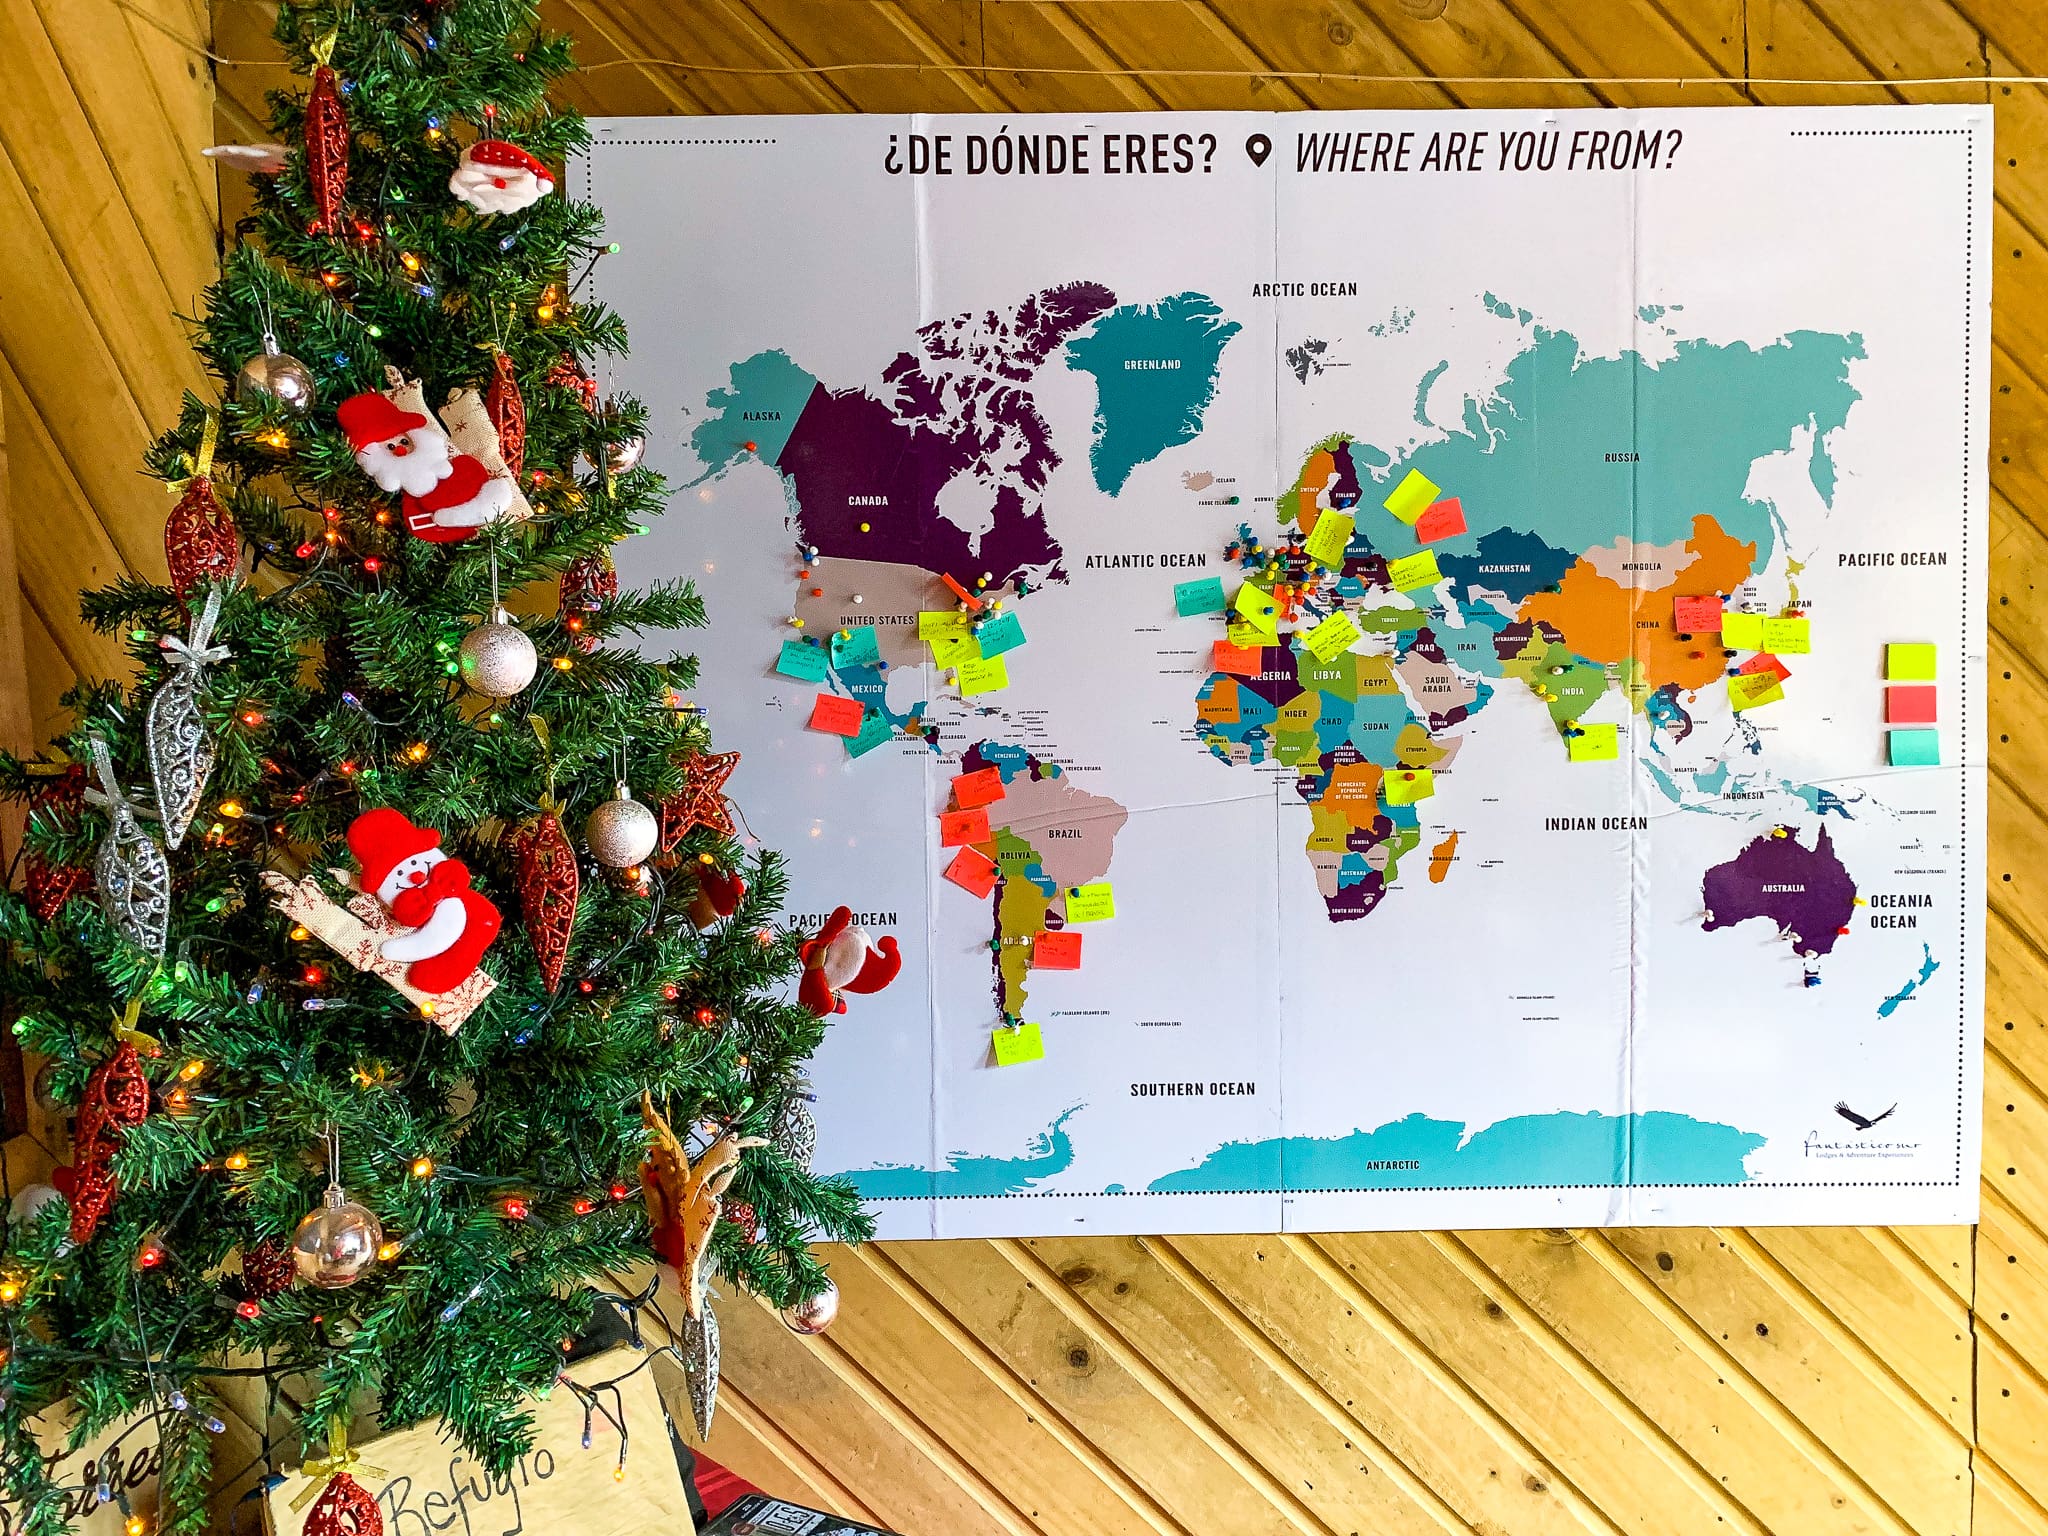
Near the half-way mark, you will arrive at the Refugio Chileno. This is the perfect place to rest your weary legs & use the restroom for 500 CLP ($0.65 USD). There is also a small cafeteria that sells delicious food, hot beverages, & beer. Take some time to mingle with other people & introduce yourself. It is interesting to see the diversity of fellow hikers & listen to their stories of how they traveled from all around the world to visit Patagonia.
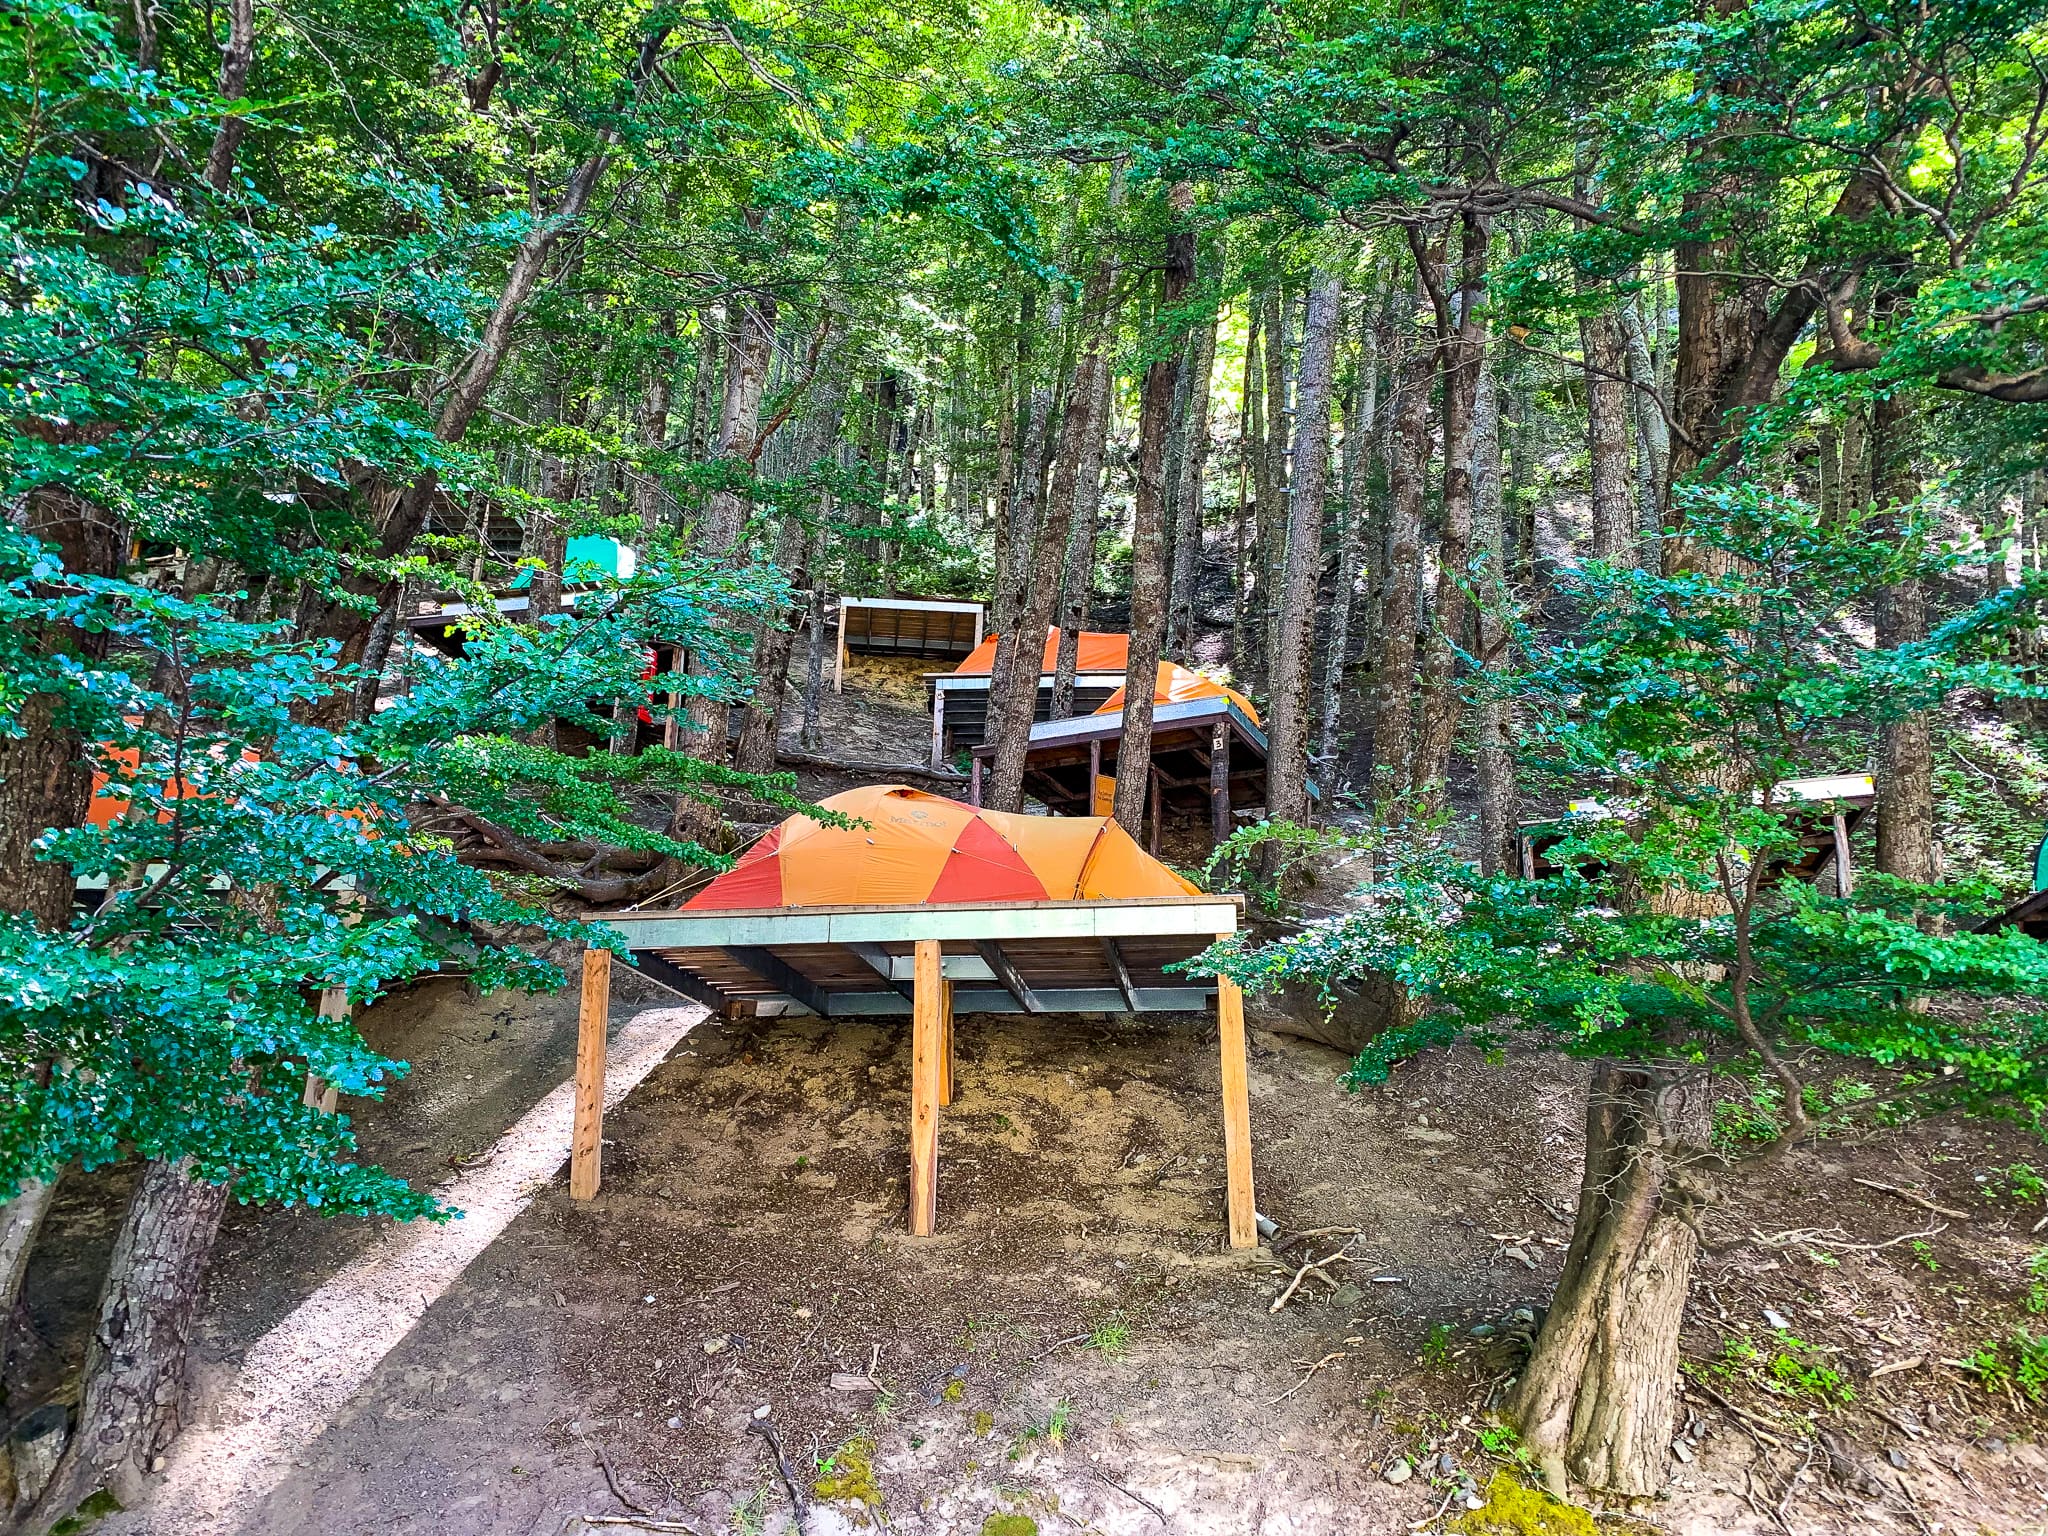
The Refugio also serves as an accommodation for multi-day trekkers or those hoping to catch an epic alpenglow at sunrise. For those who prefer to rough it can book one of the 50 platform campsites in Camping El Chileno, a few meters from the Refugio. If you don’t have any camp gear with you, they are available for rental. Unlike other campsites, there are no outdoor cooking areas. Bathroom & shower facilities are available in the Refugio. To stay at the Refugio or campsite, you must book ahead of time with Fantástico Sur. Don’t forget to print your proof of reservation as this will be checked at different control points within the park.
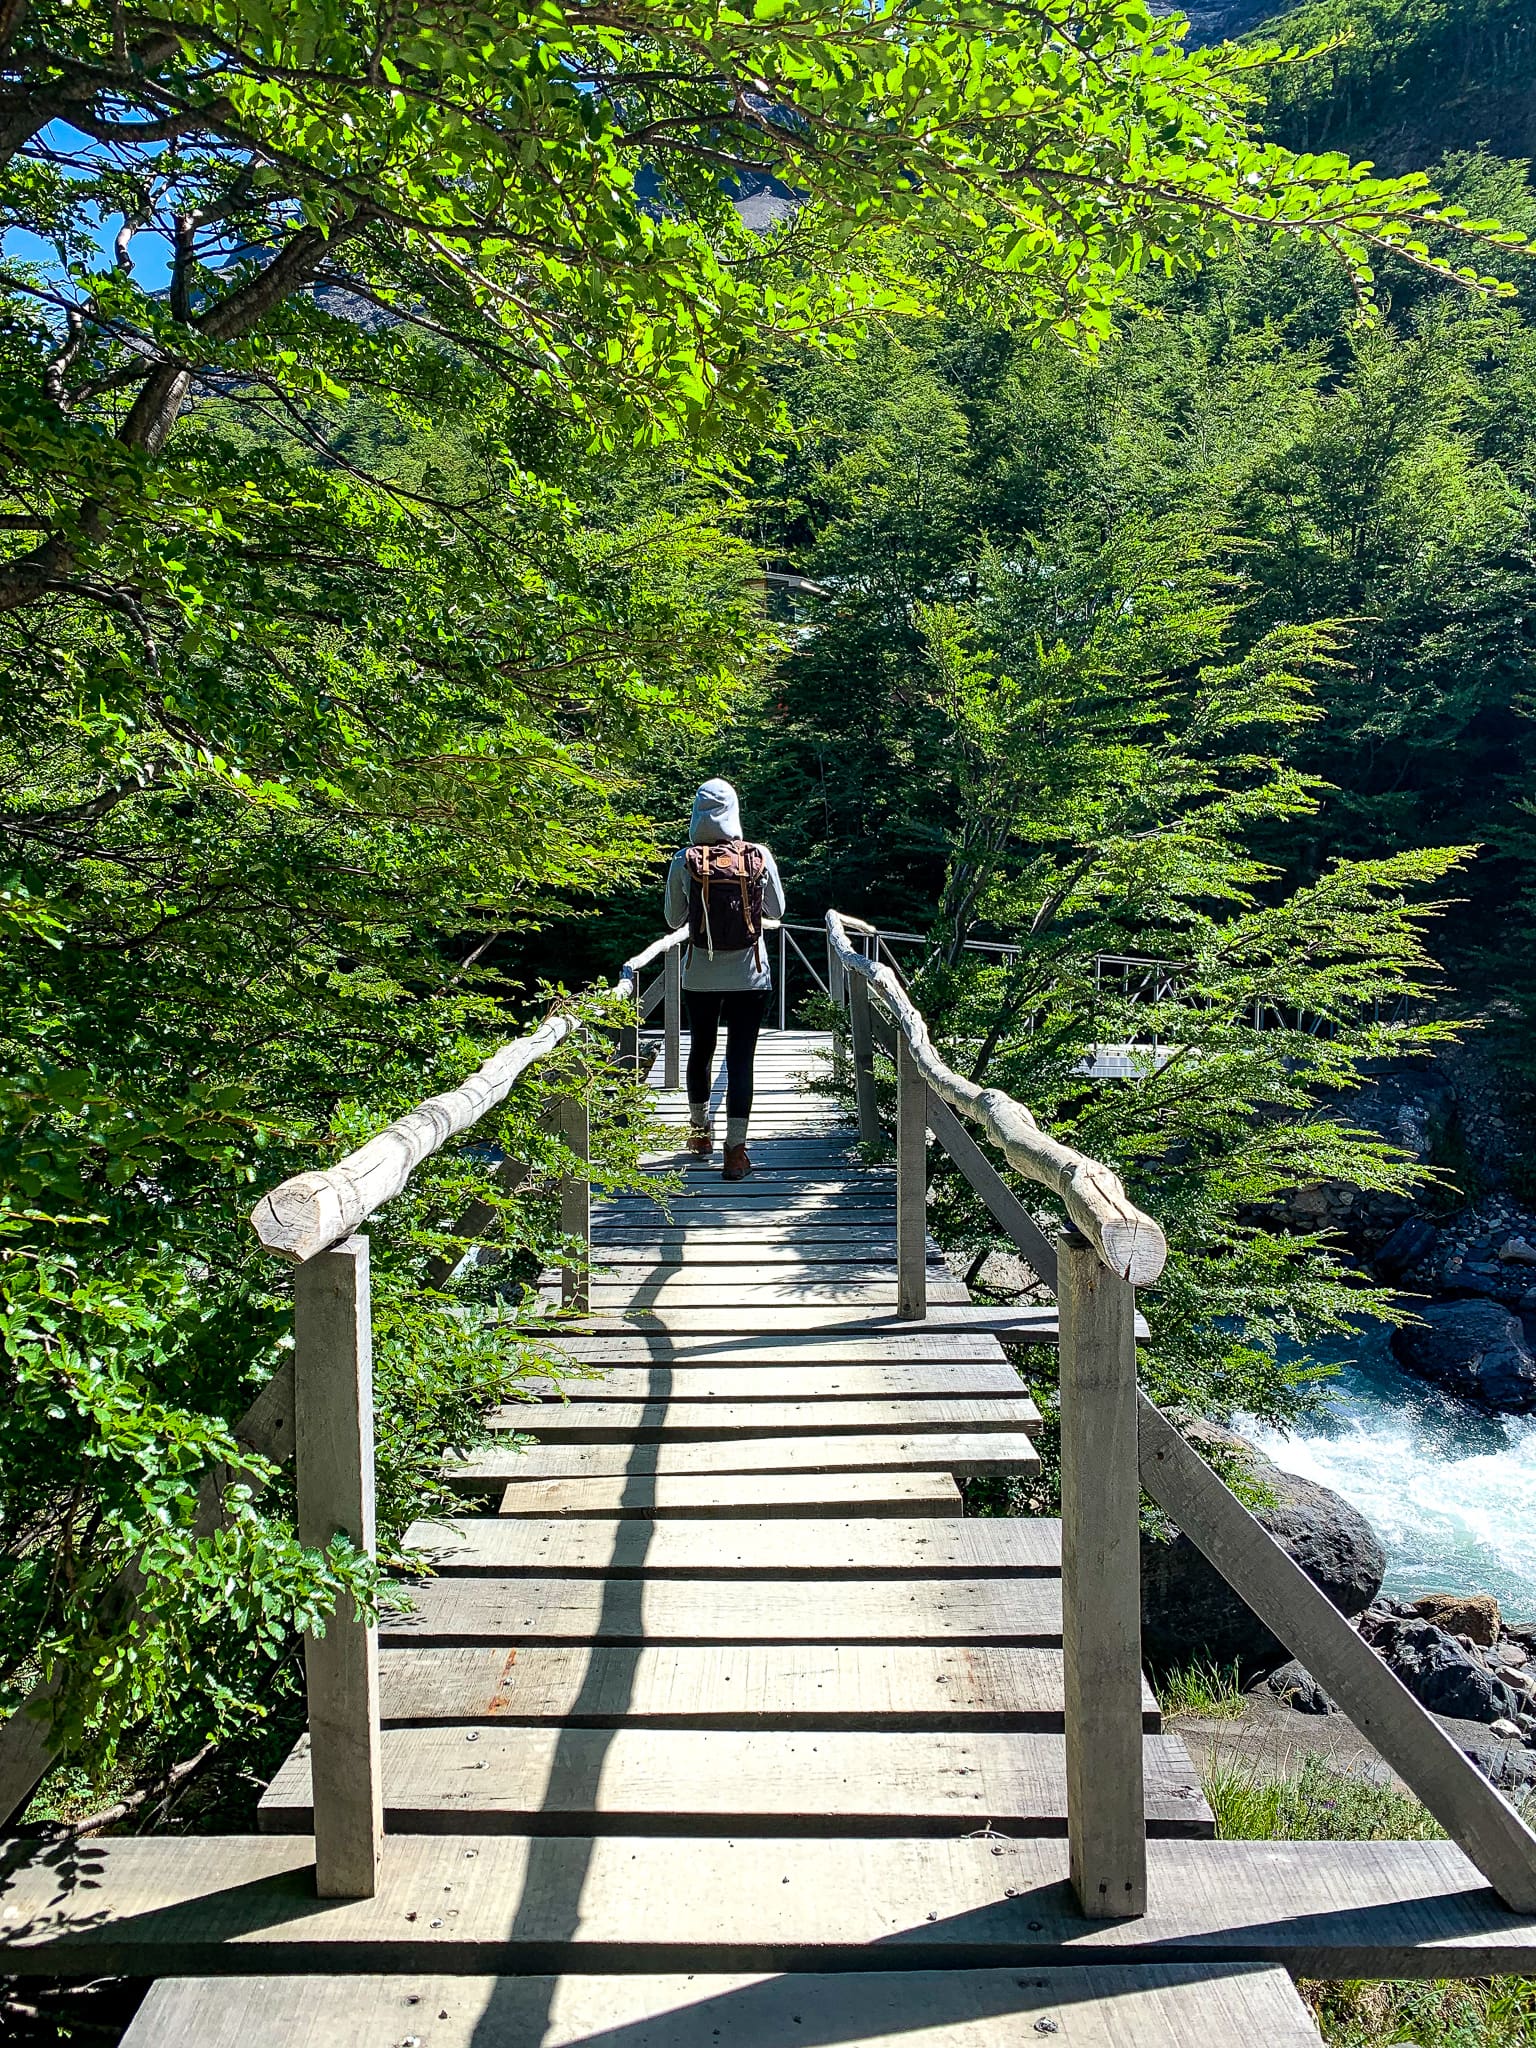
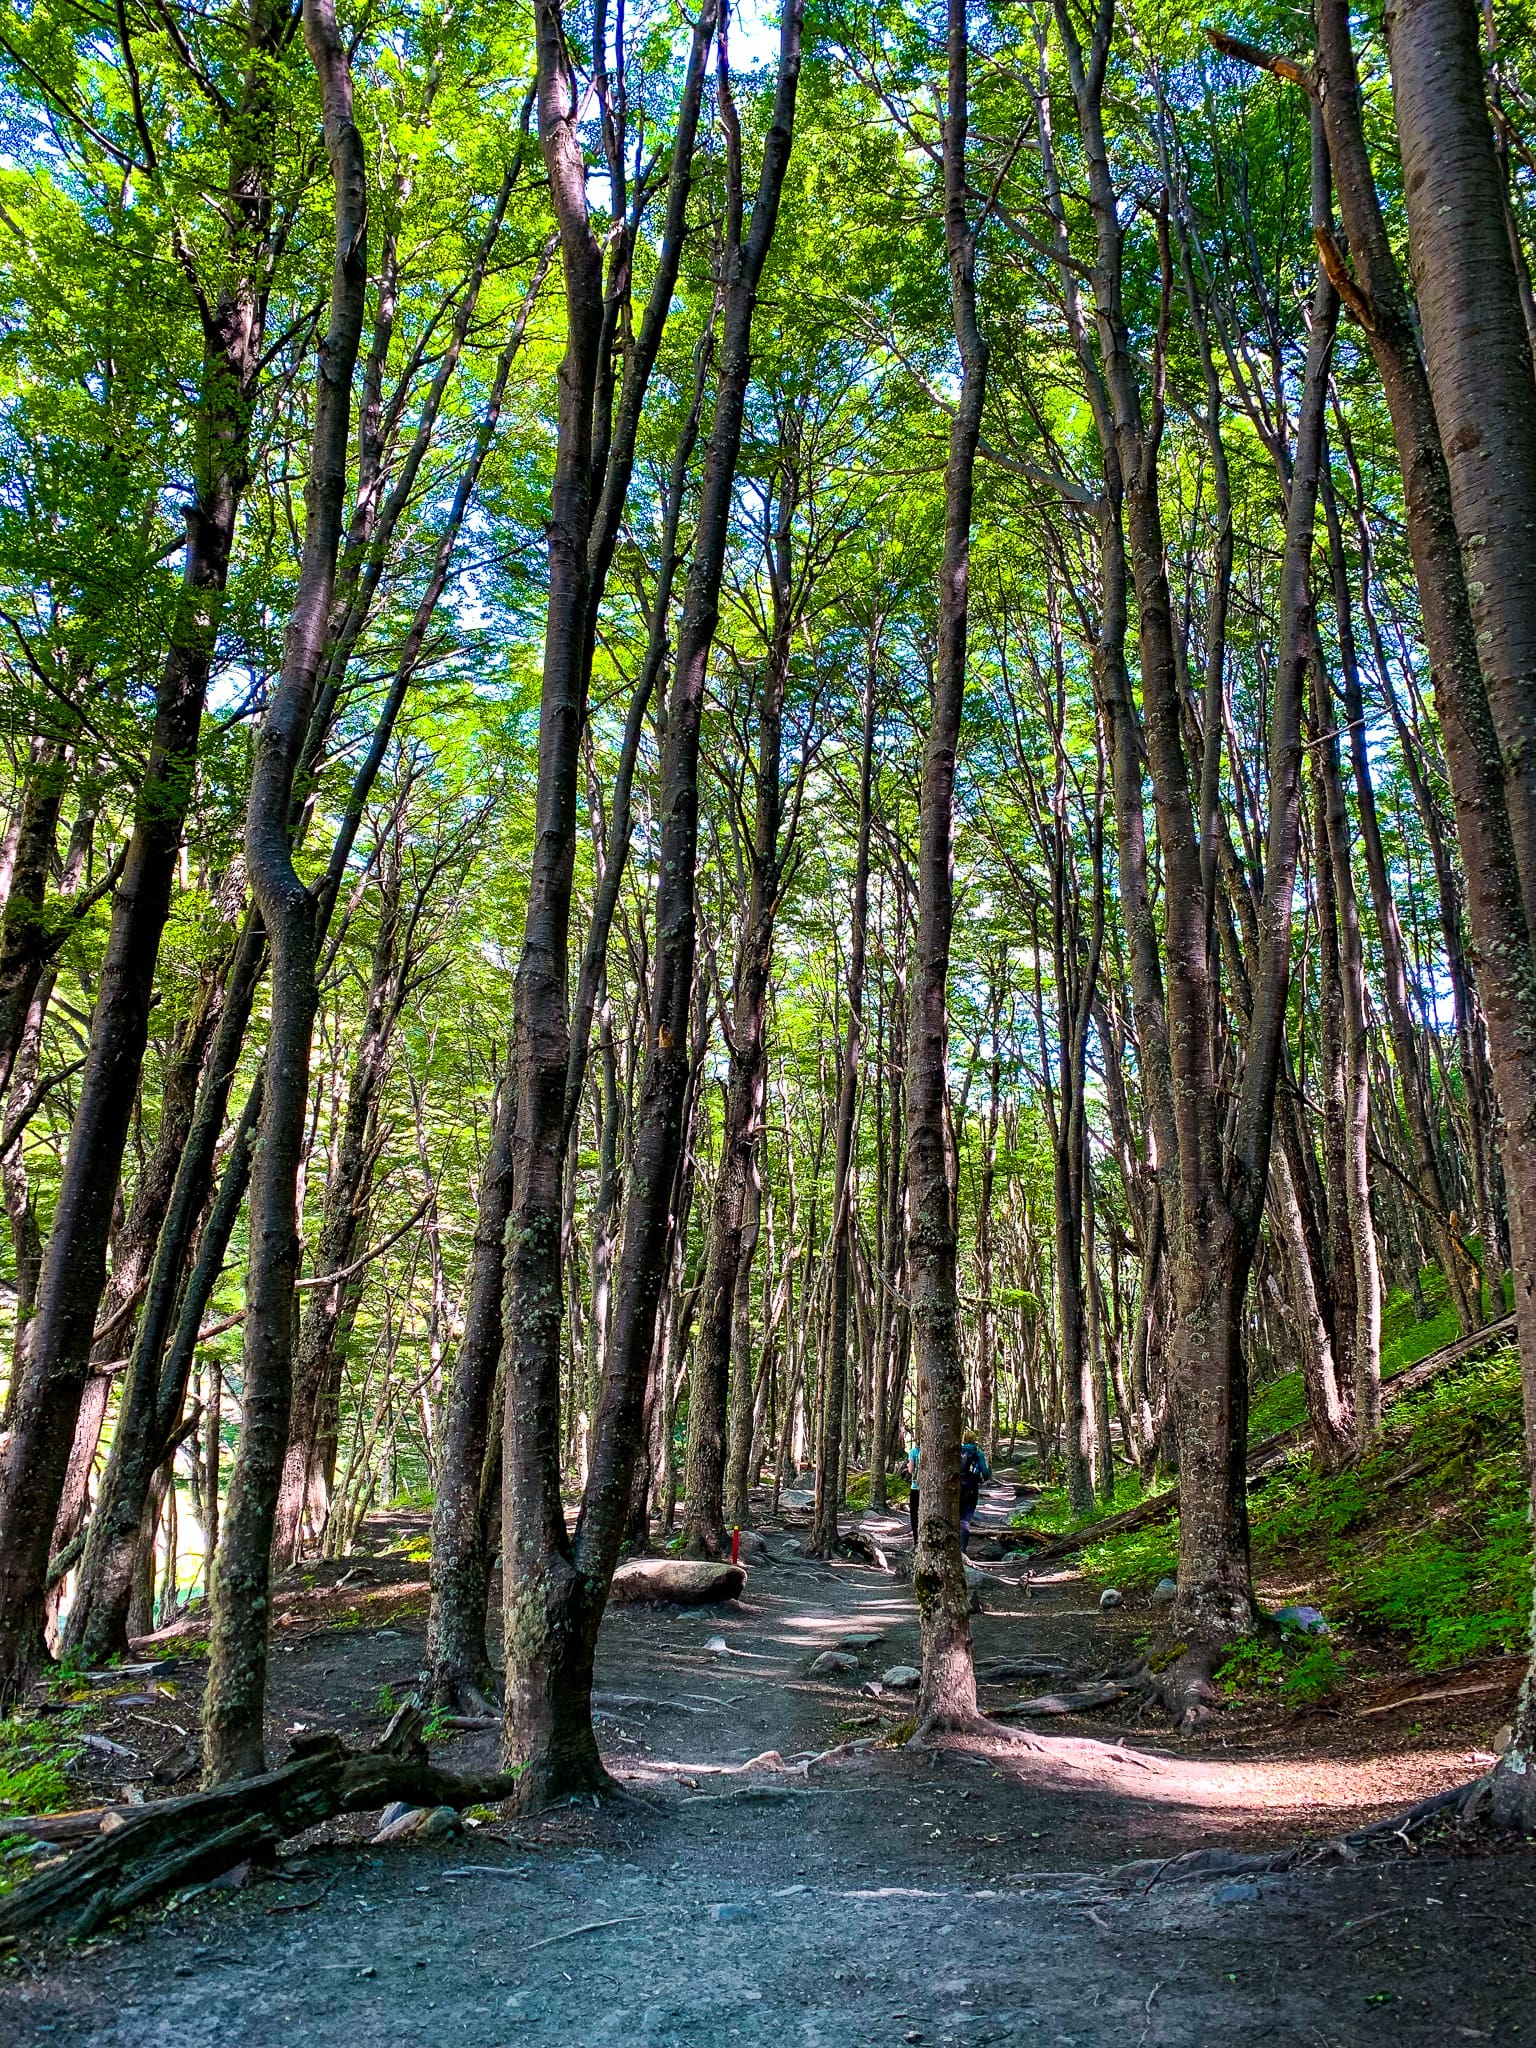
Forest bathing through a quiet, meditative forest.
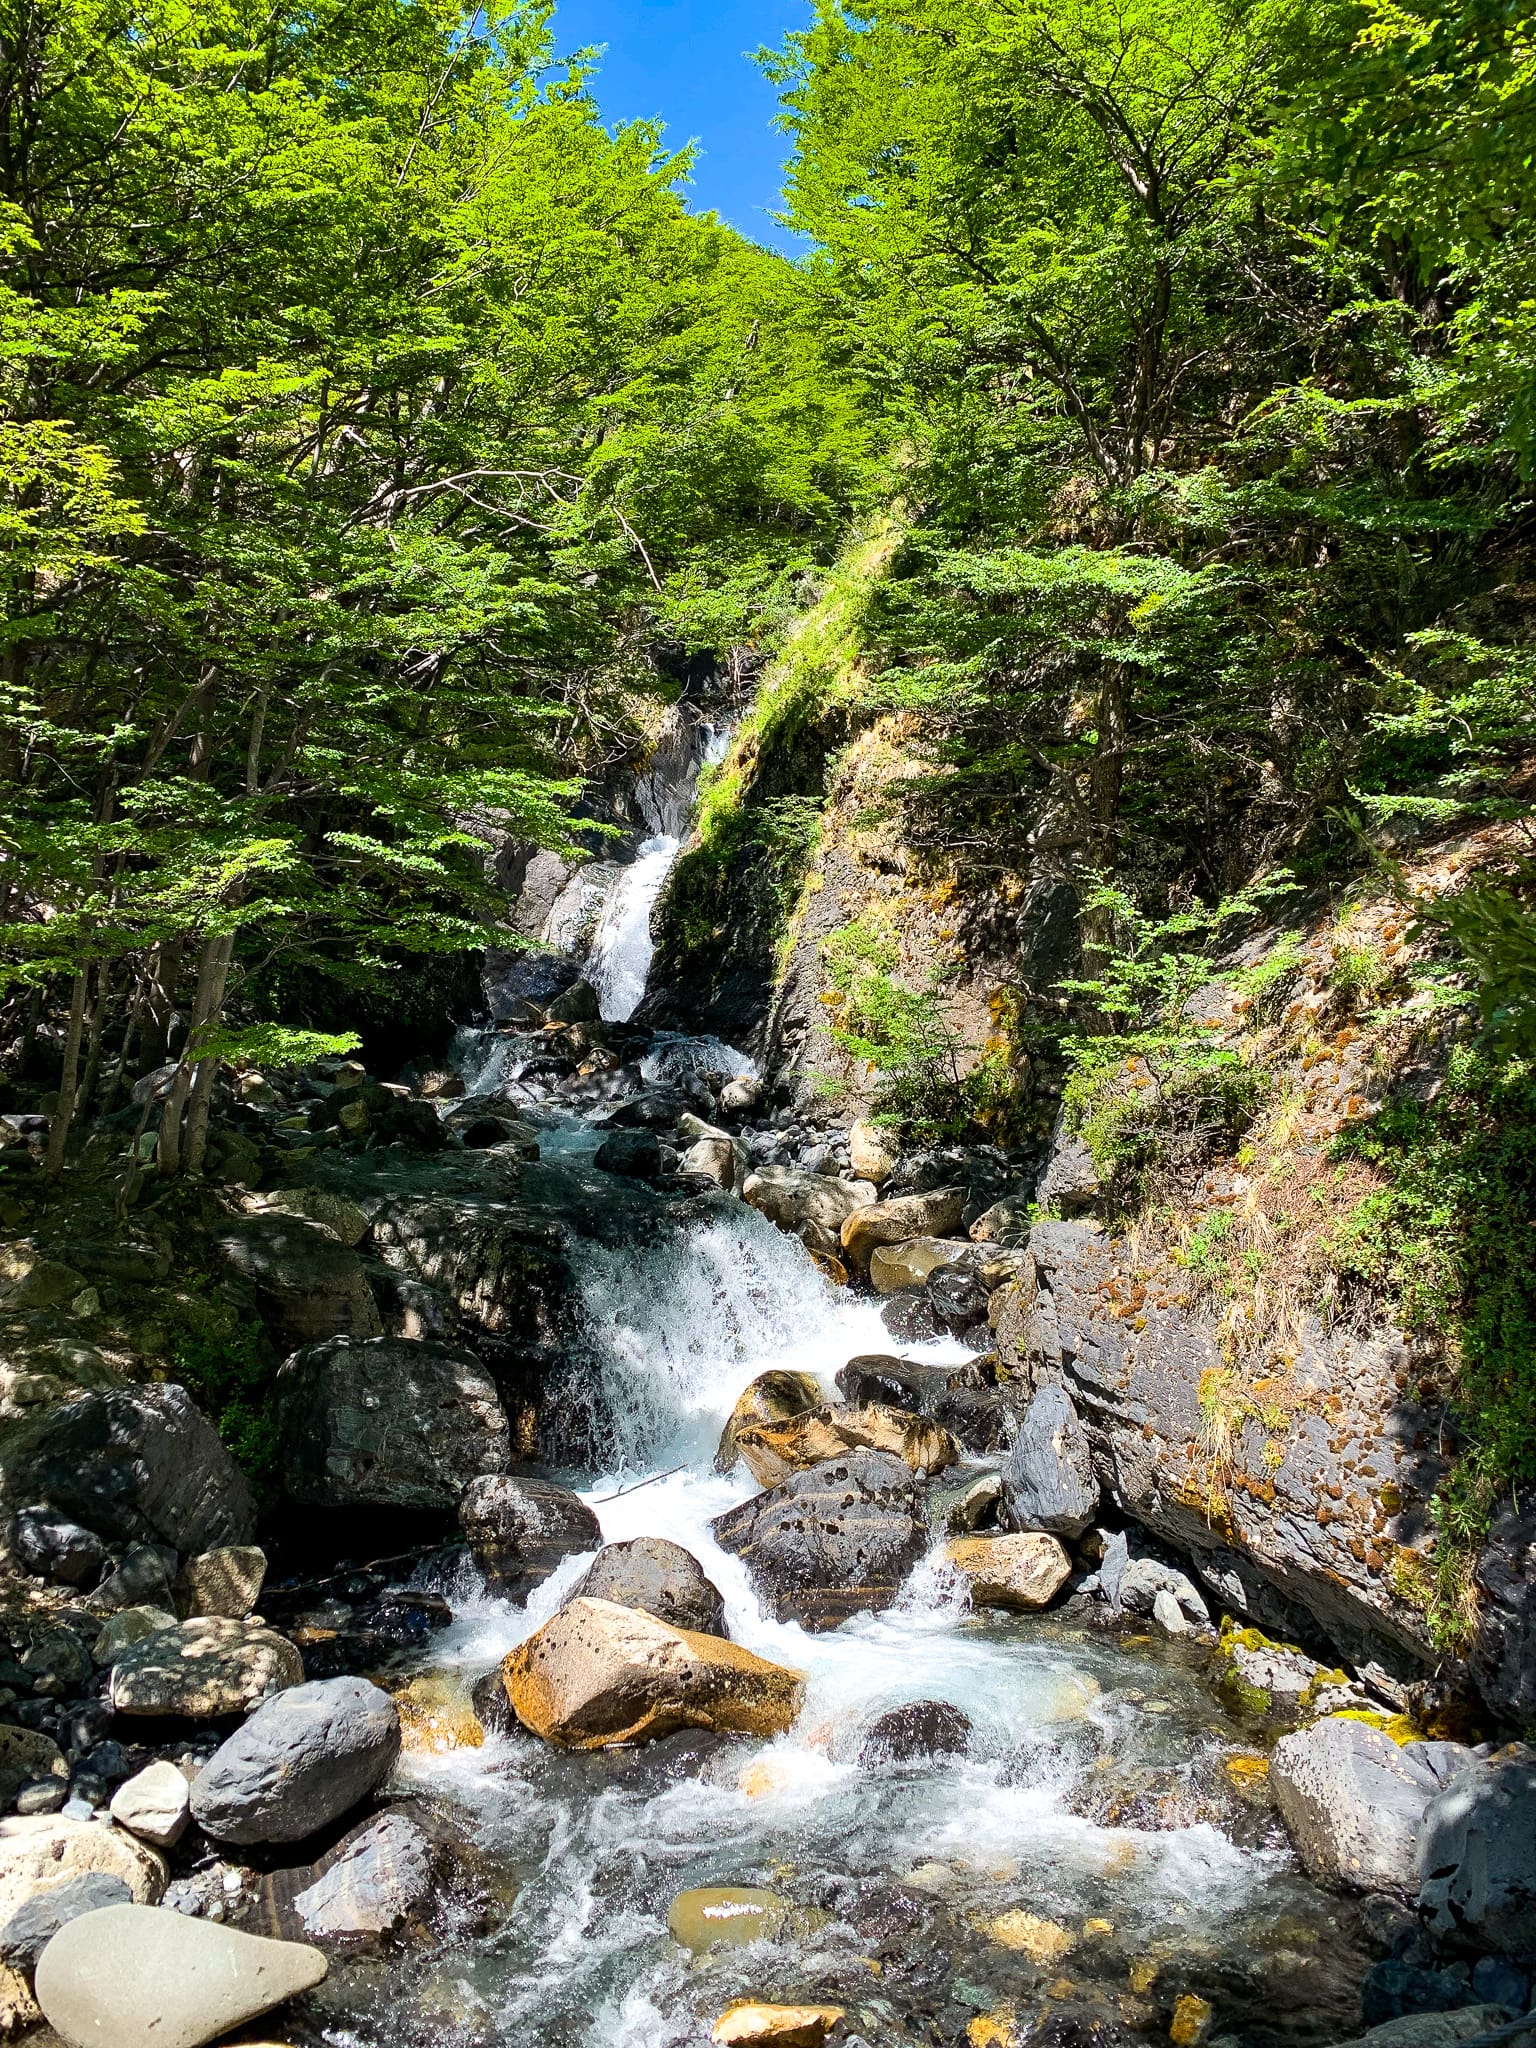
Feeling refreshed & back on the trail, the path from here on out flattens pretty nicely. You will walk through a verdant forest along small streams & rivers made from glacier melt. The trees provide temporary cover from the blustery winds & the sound of rustling leaves is very therapeutic.
Note that most of the water sources in the Patagonia wild are clean enough to drink. You can refill your water reservoirs straight from the streams without fear of contamination! Of course, always use common sense. If you see any live stock in the area, I advise you bypass it.
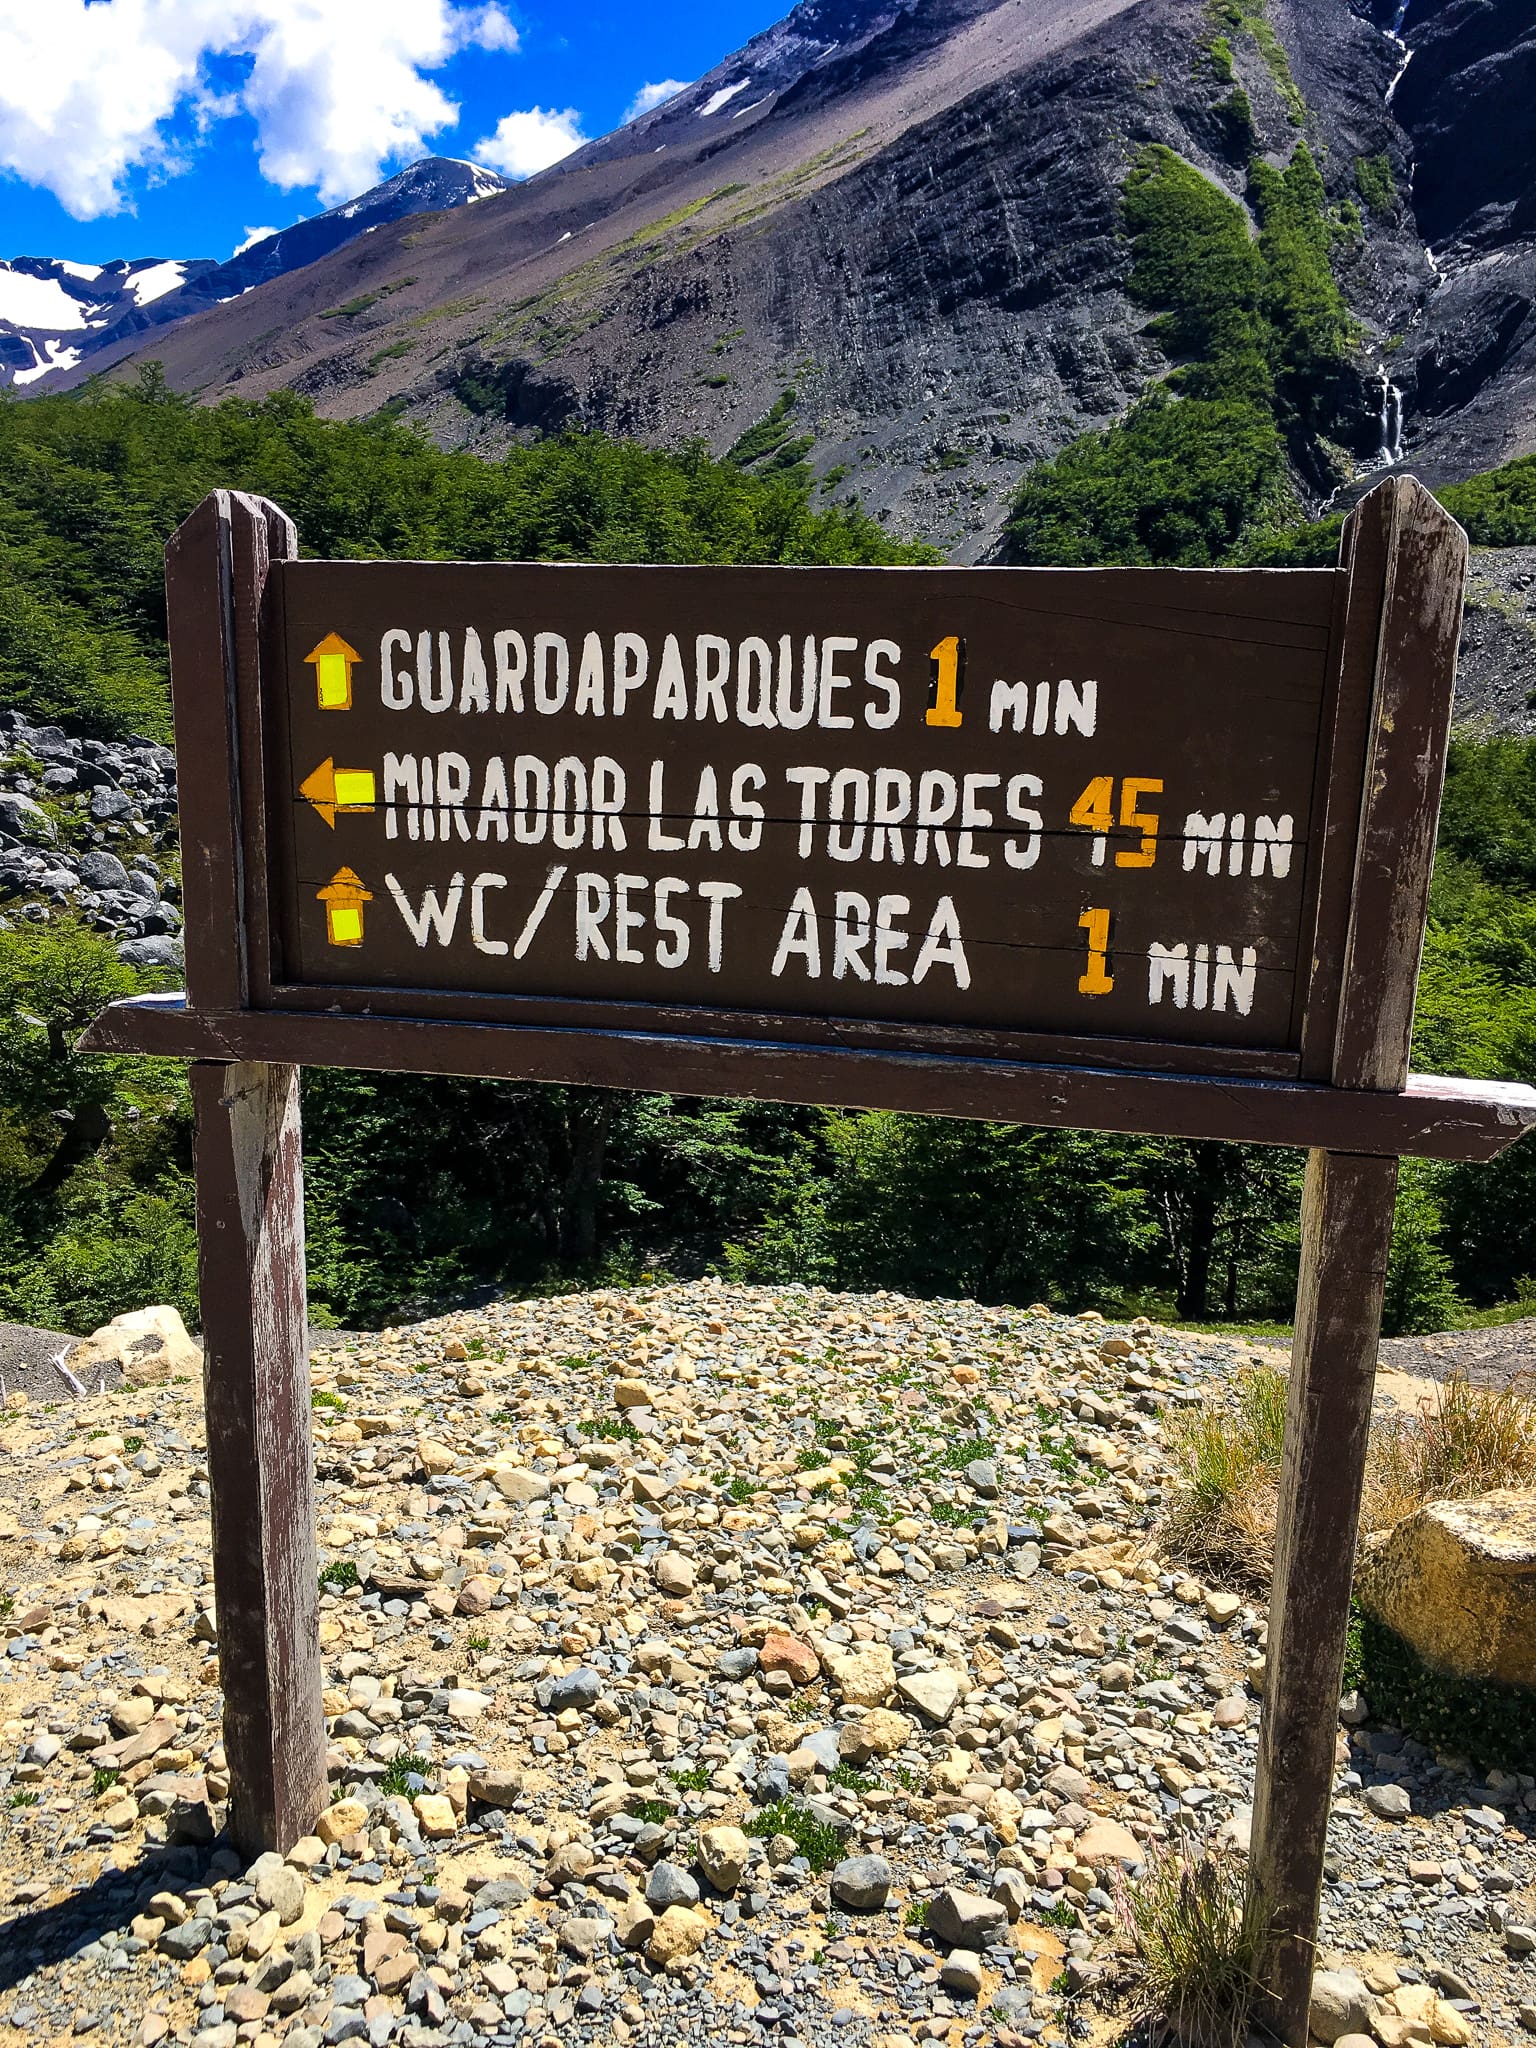
Part Three: Final Push Towards the Towers
After walking about 1.5 hours through the forest, you will be greeted by your final challenge. Before you begin, make sure you use the restrooms at the ranger station located here. You will spot a sign that points towards the left, “Mirador Las Torres: 45 minutes.” This last stretch is the hardest, as the ascent gets steeper & the winds more aggressive topping at nearly 70mph! Be careful around the exposed ledges as you can easily get knocked off your feet as I almost did!
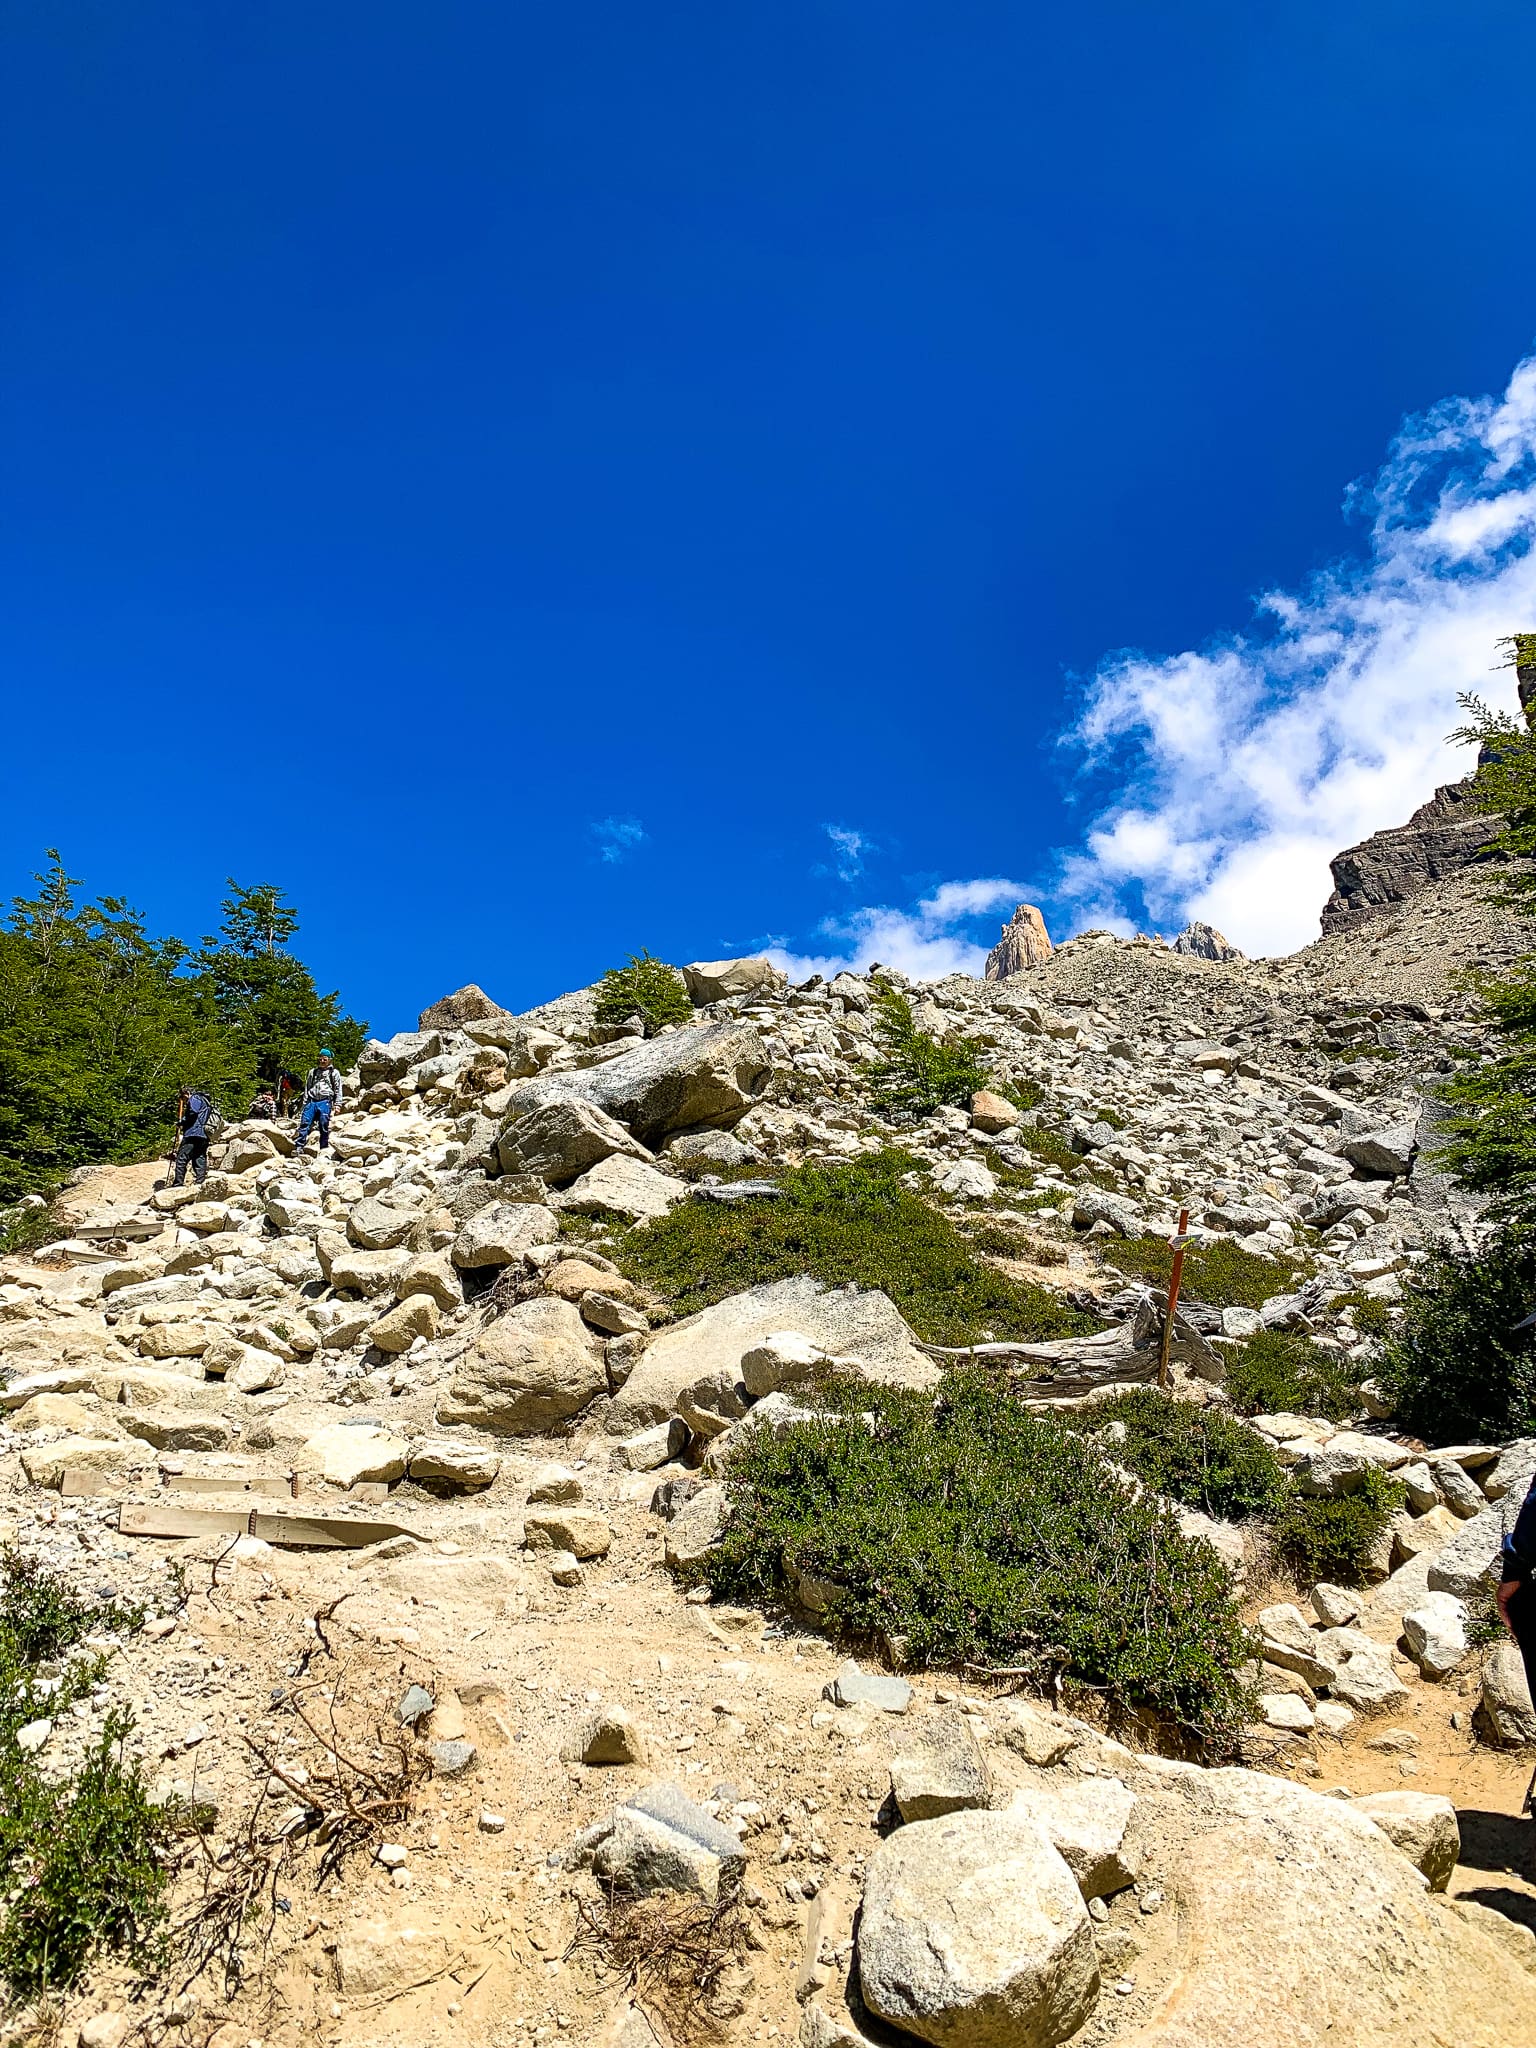
The rugged trail weaves among massive boulders which you may have to scramble over. Be mindful of your step as the ground is uneven with lots of loose gravel. Additionally, there is less tree cover so the wind factor will be much stronger. But don’t let all this slow you down. Keep visualizing those towers & press on because you are almost there!
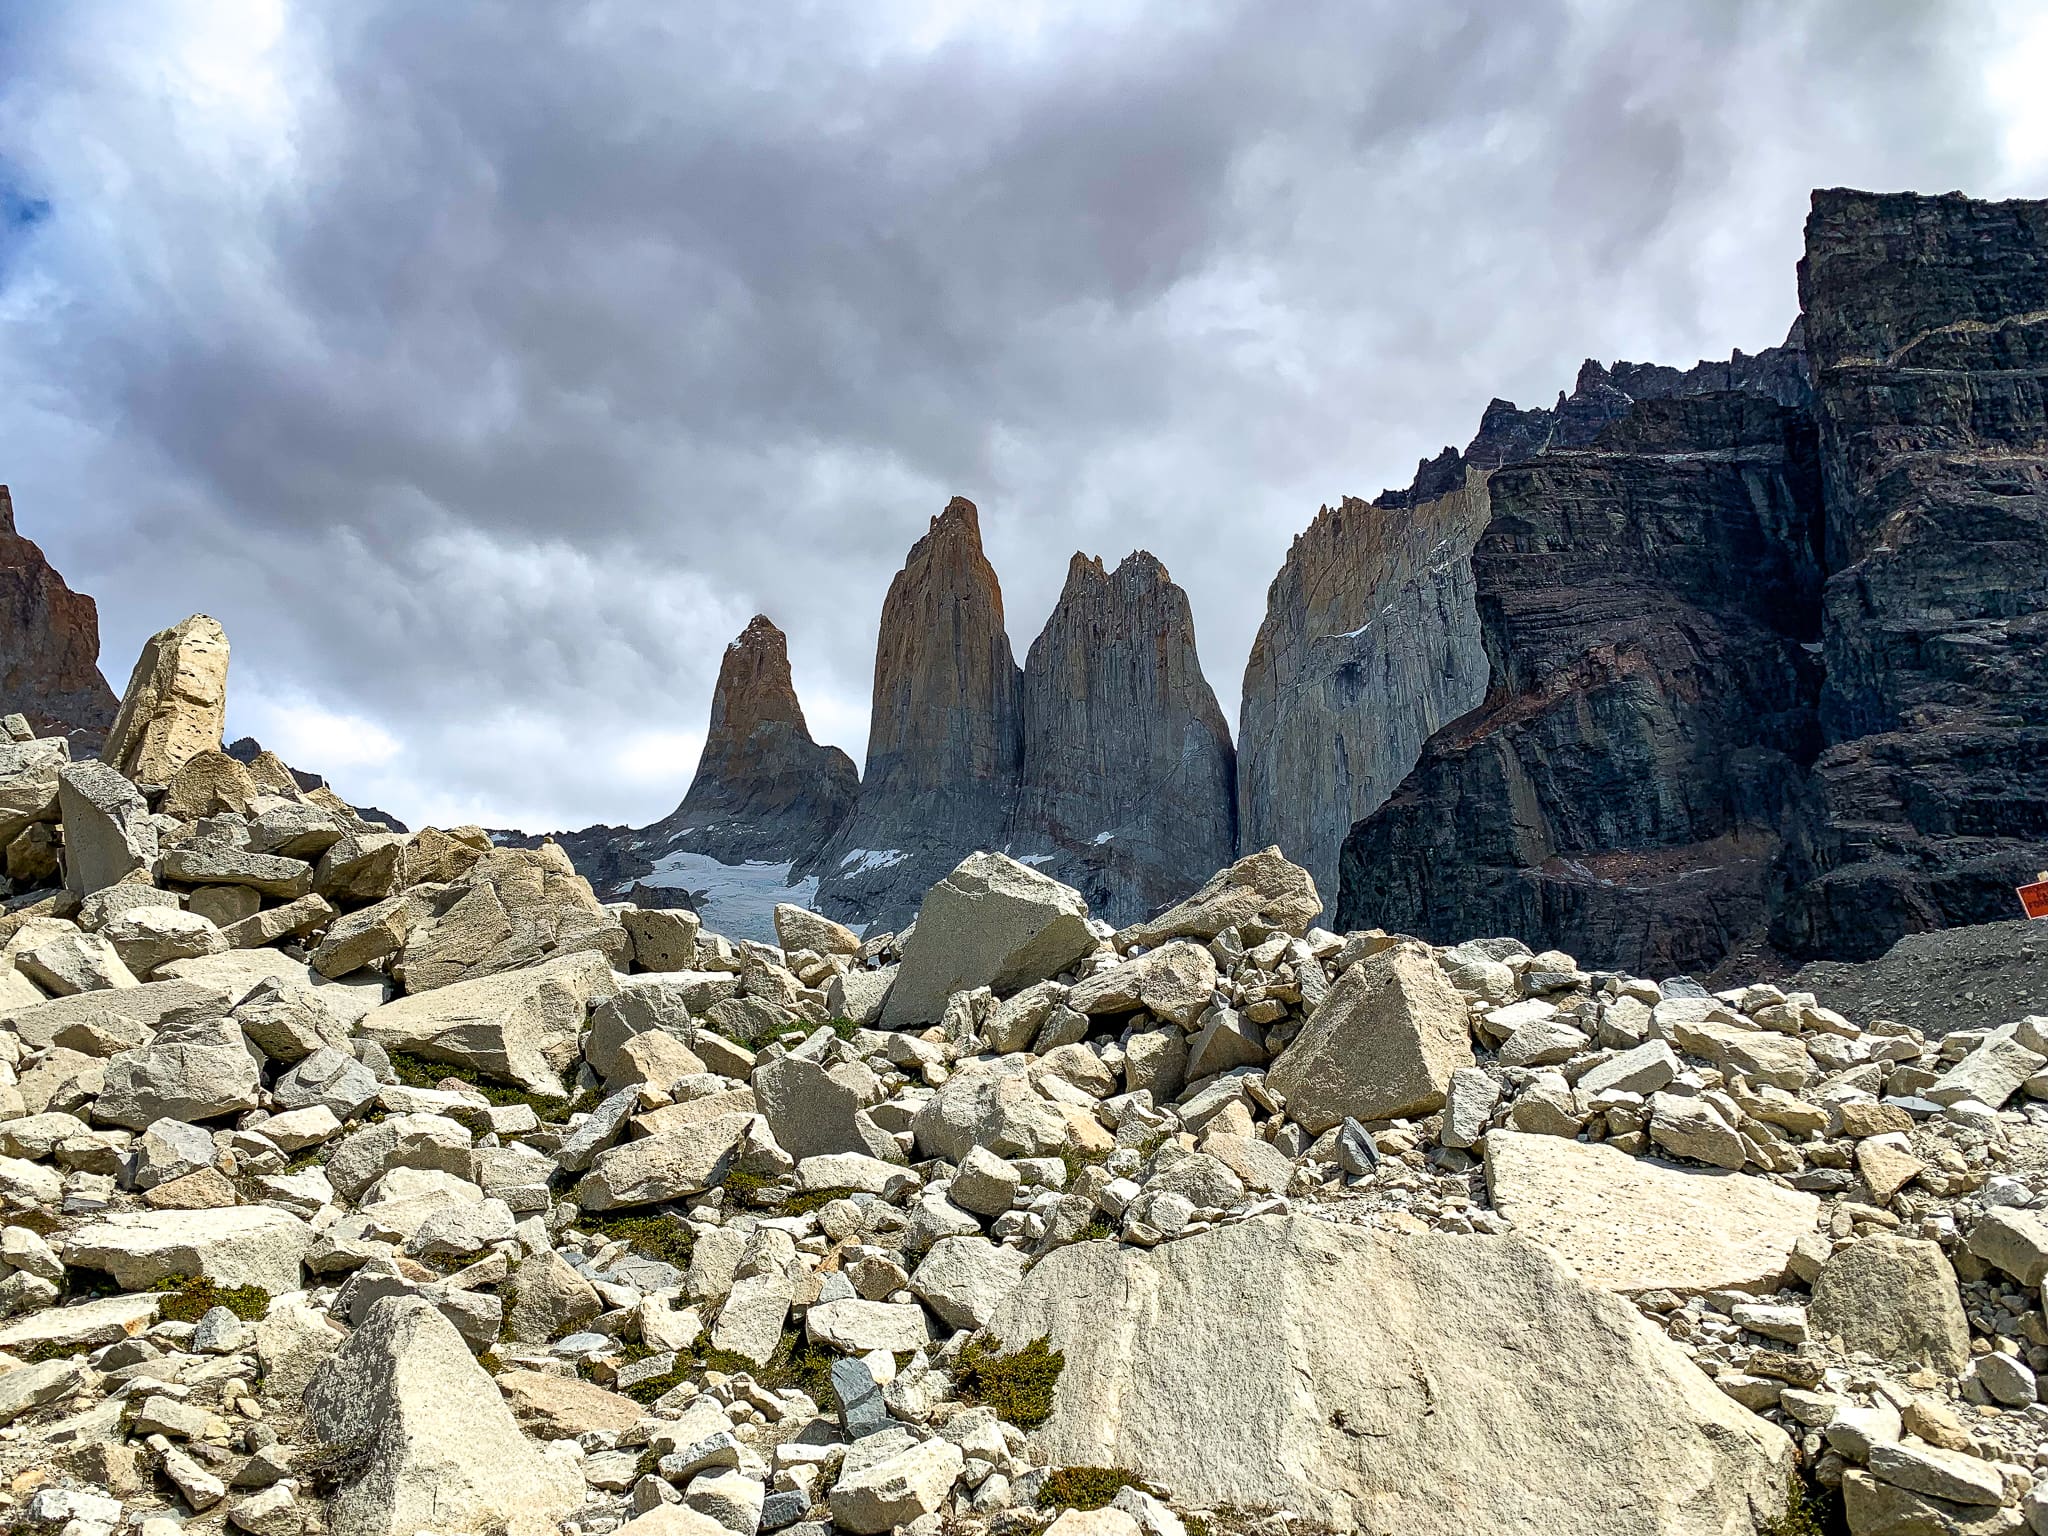
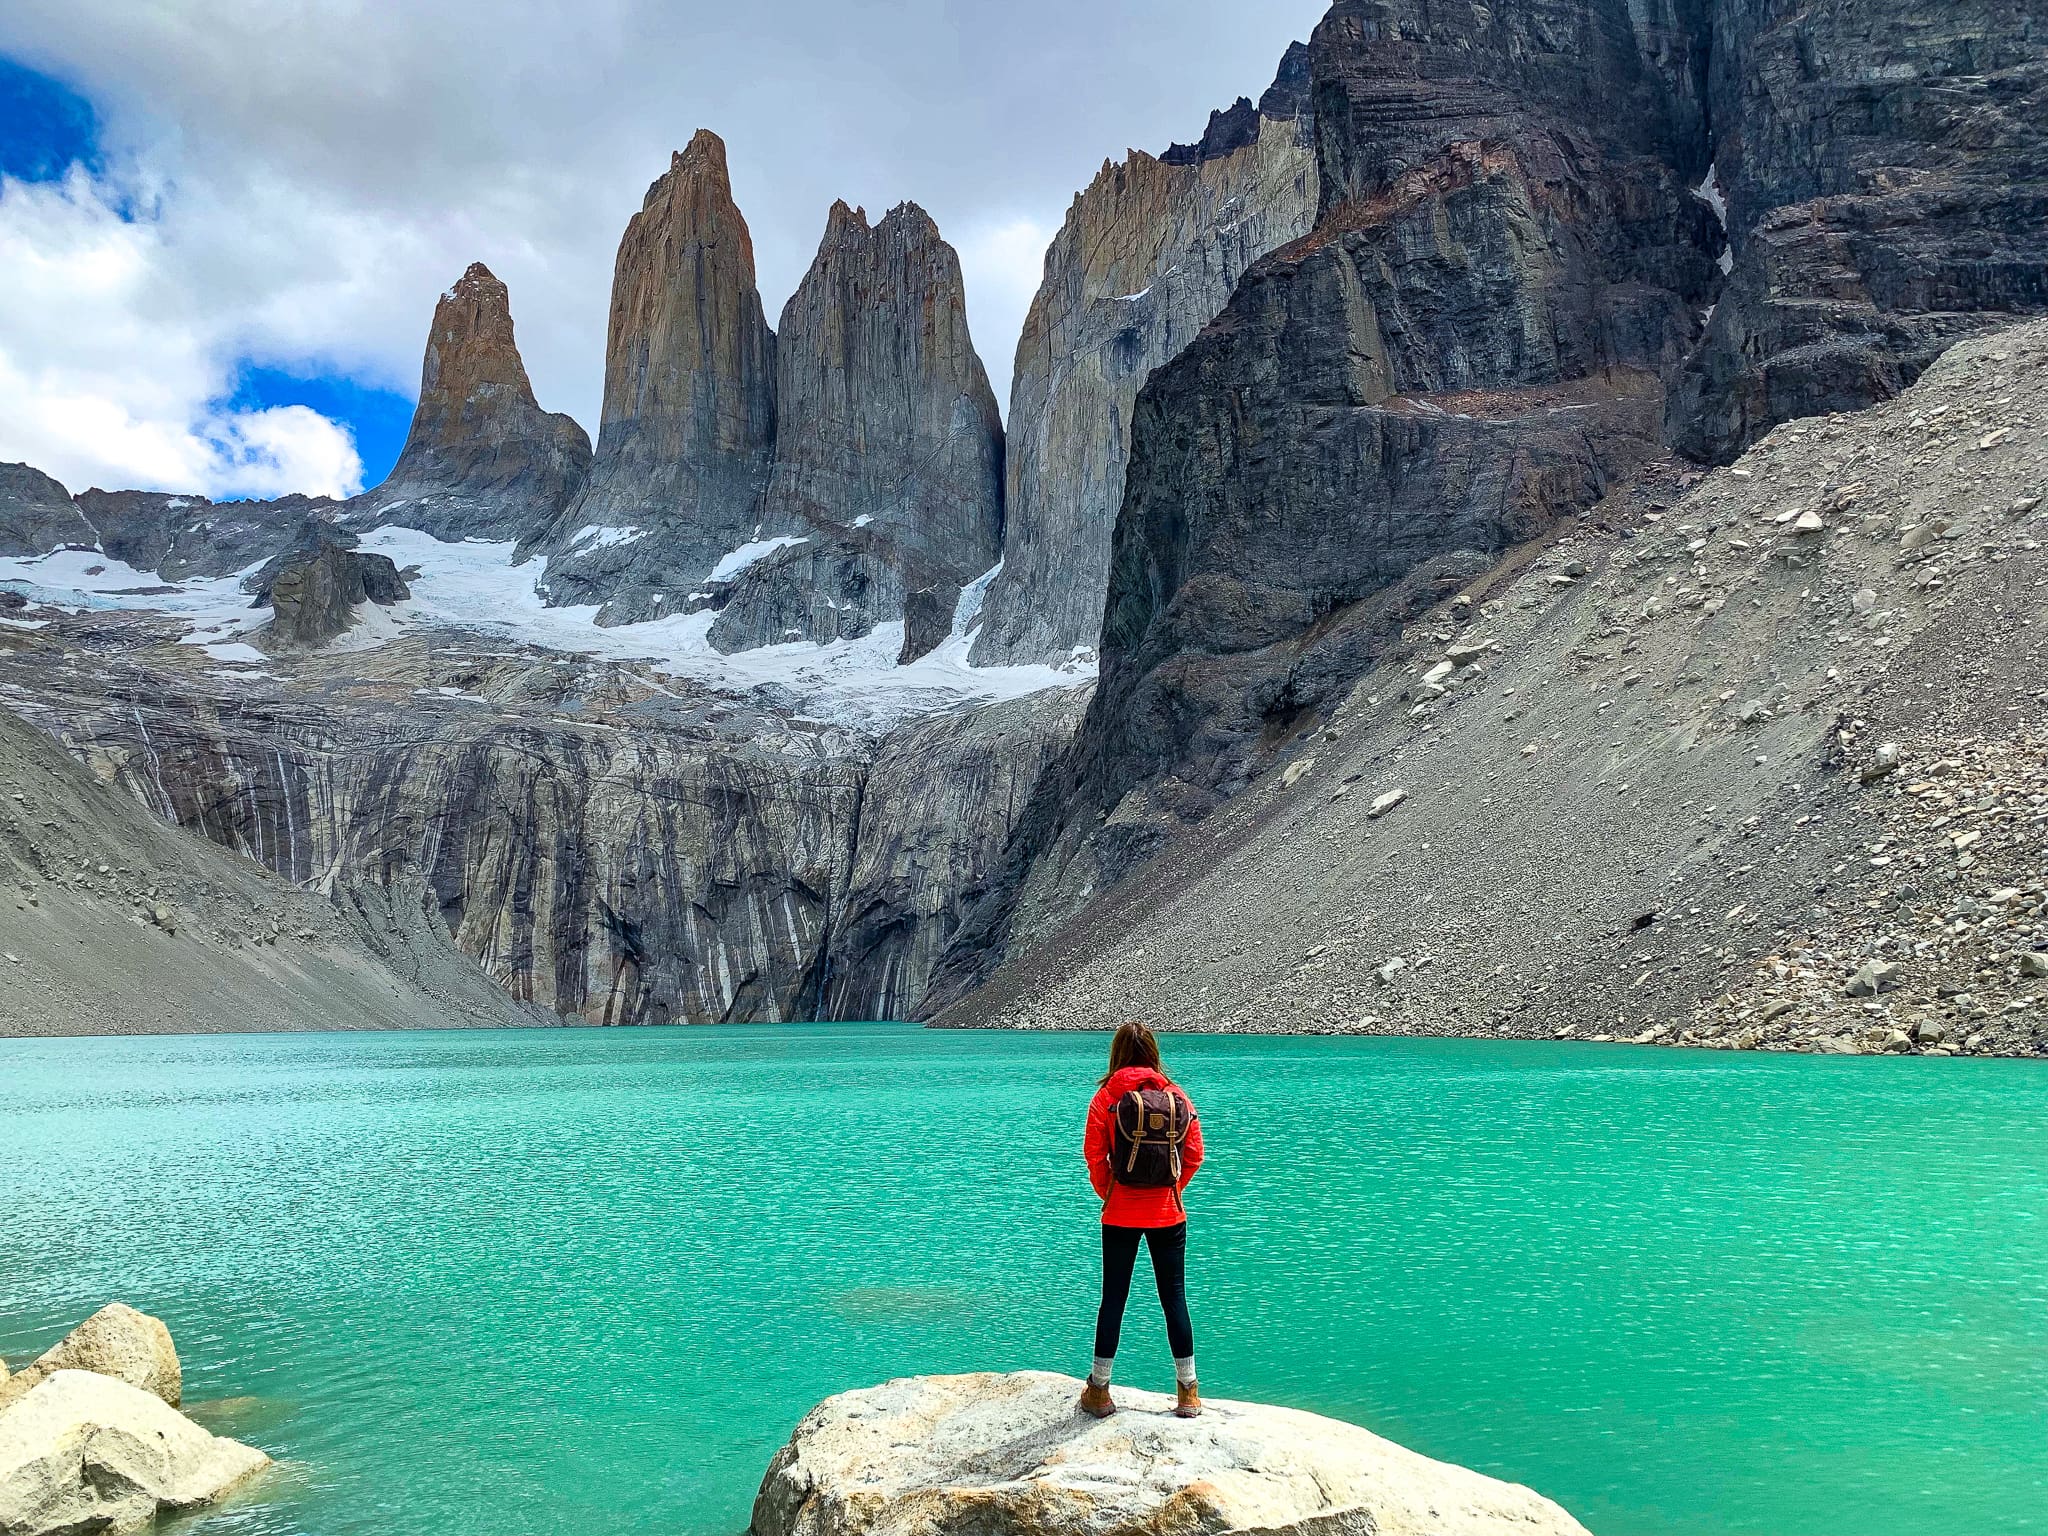
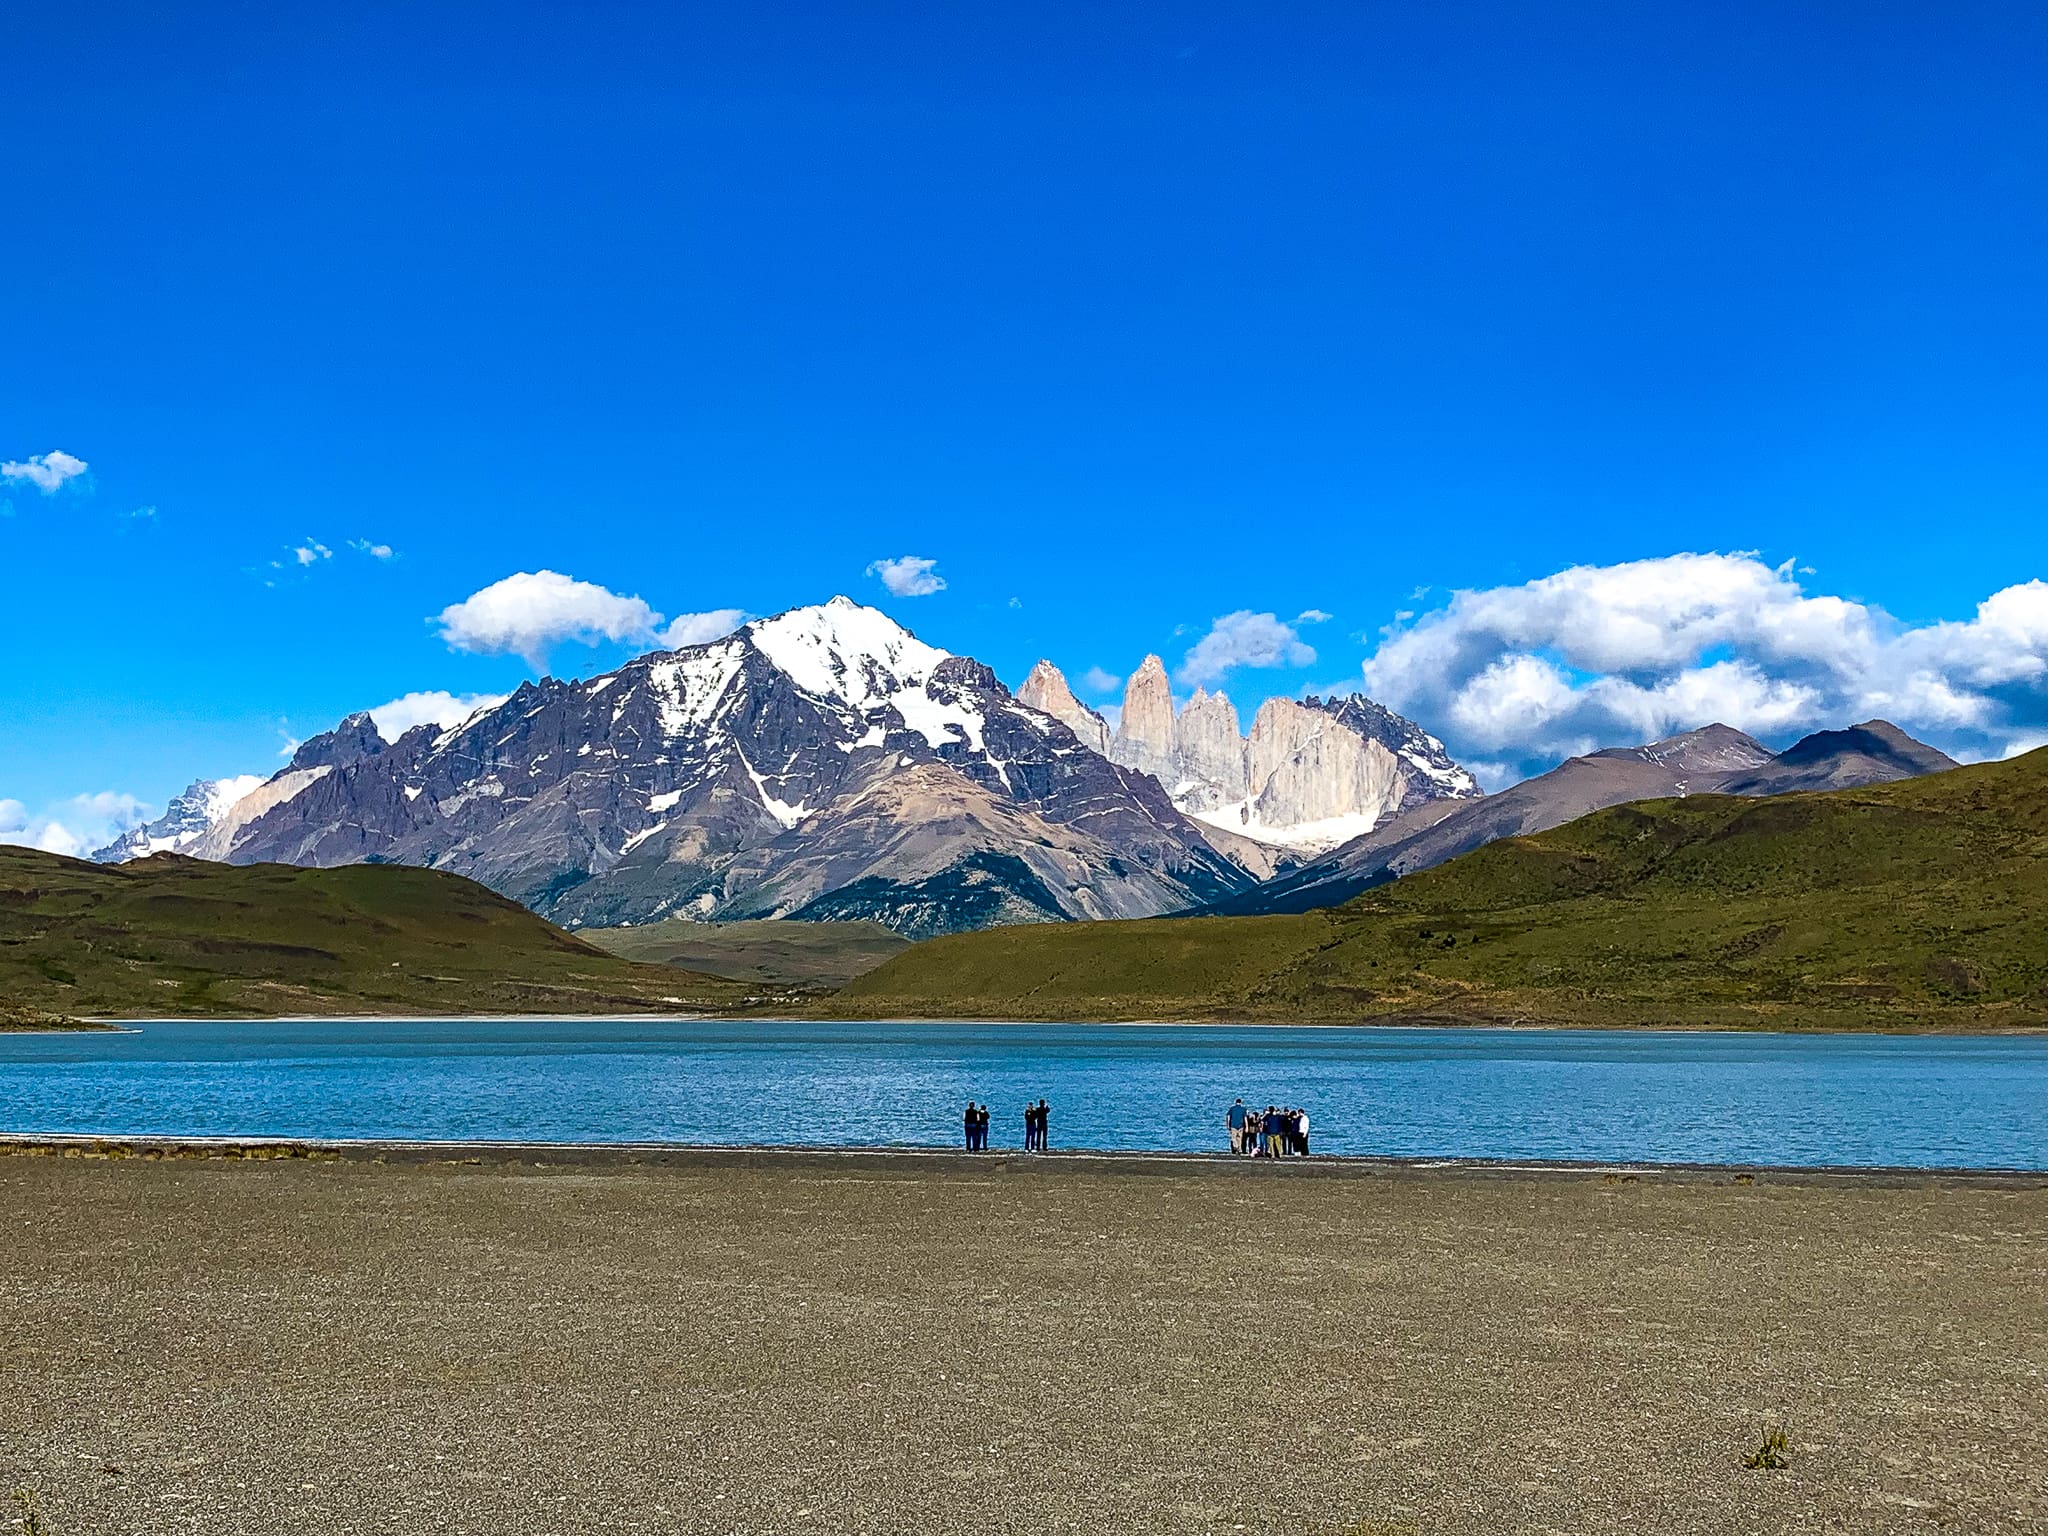
Finally…Mirador Las Torres
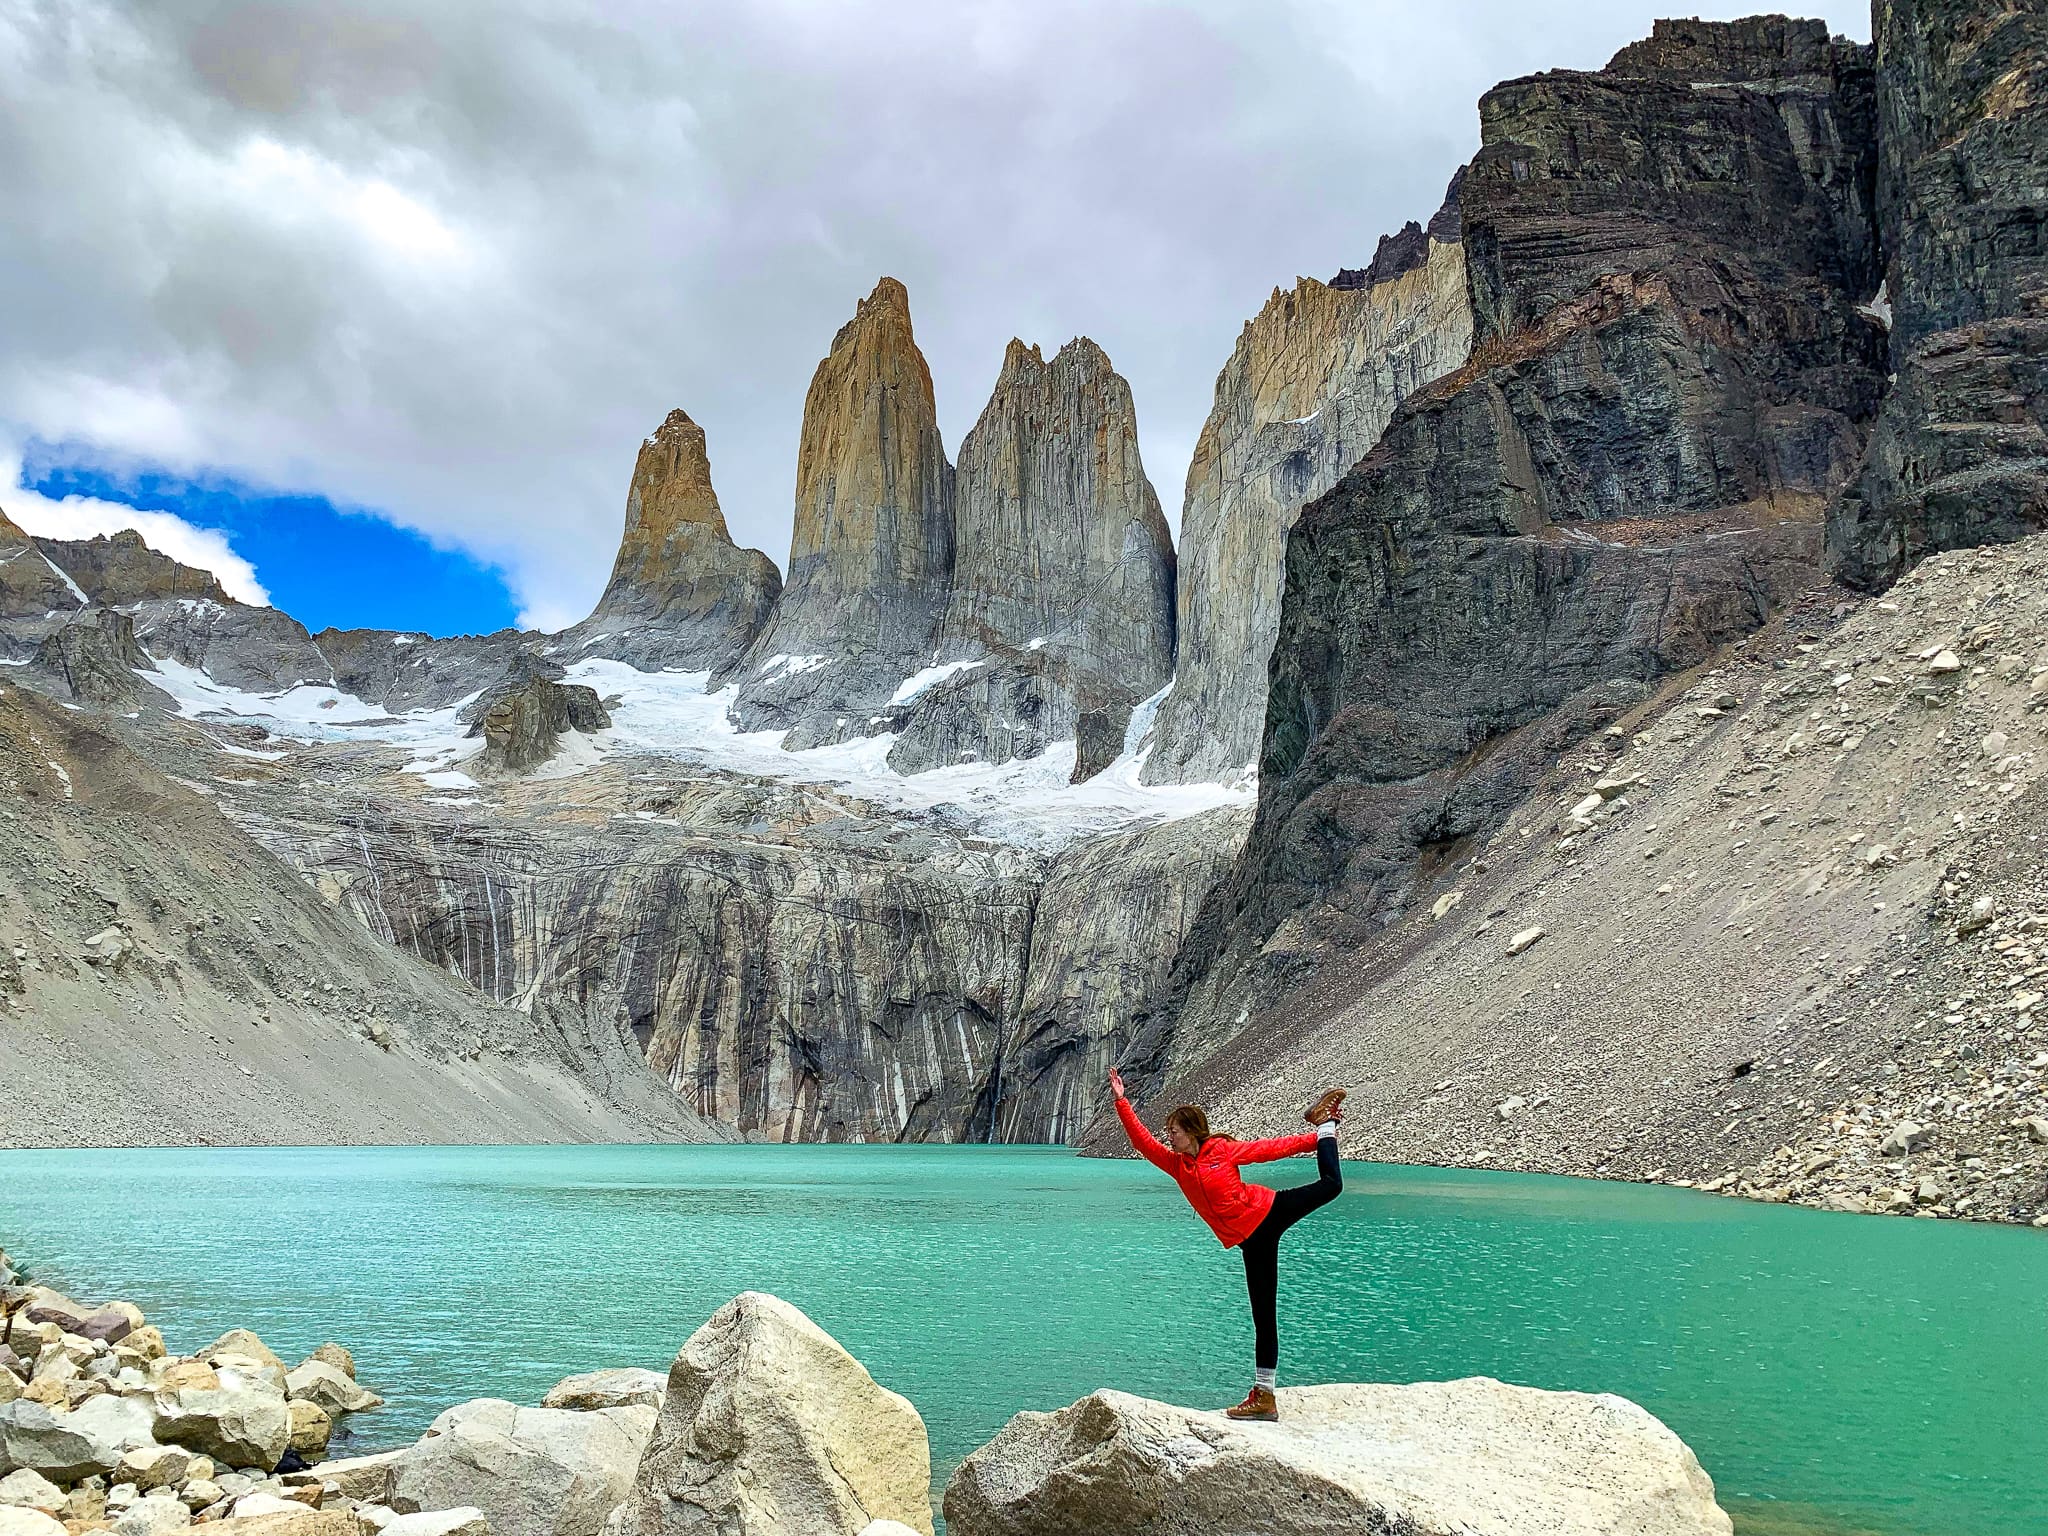
As you reach the tail end of the trail, you will begin to see the top of Las Torres peaking above the rocks. Rounding the last bend, you will catch your breath only to have it taken away again. At an average height of 8,000 feet, the granite spires were grander than I had ever imagined. From left to right, the towers are: Torre Sur, Torre Central, & Torre Norte. My first impression of the towers was like a legendary scene right out of Tolkien’s Lord of the Rings. We were fortunately blessed with good conditions & the turquoise water was glistening under the sun. It was truly (& literally) breathtaking!
Off to the left side of the boulders, you will notice no trespassing signs. These are to prevent people from ruining the unstable landscape & potentially causing dangerous avalanches. It is also to stop people from attempting to climb to the other side of the lake near the towers. Sadly, we saw a few people who chose to disregard these signs so they could take some photos. Please do not be one of those tourists!
If luck is on your side, you may even spot a huge, majestic condor like we did! The great Andean condor is a national symbol in several South American countries, including Chile. In Andean mythology & folklore, the condor was often associated with the sun deity. It also symbolized power & health. Coincidentally, I was feeling instant relief from my bronchitis symptoms after witnessing the condor’s graceful flight above Las Torres. All at once, it was as if my entire body was overcome by unexplainable warmth & healing.
Heading Back Towards Civilization
After a satisfying lunch in front of the grand vista views, it was time to head back down. While I thought hiking back would be easier, it proved a lot more challenging for me. As the clouds started rolling in, it began to rain & the trail became difficult to navigate due to slippery conditions. But we took our time, careful with each step & dodging the late group of hikers heading up.
Hikers who need to take the private shuttle back to the ranger station can board at 9:00am, 2:00pm, or 7:00pm. Be sure to keep track of your time, otherwise you may end up walking back which takes about 90 minutes.
Accommodations Near the Mirador Las Torres Trailhead
If you prefer to spend the night closer to the park, instead of in Puerto Natales, there are several accommodations available. For those looking for the most comfortable & convenient option, can reserve a private room at Hotel Las Torres Patagonia.
A much cheaper alternative is to book a shared room at Refugio Torres Central or Refugio Torres Norte. Keep in mind, refugios are small mountain lodges similar in set-up to college dorms. They provide simple bunk beds, lockers, & bathrooms shared between 4-6 people. You will have to pay extra for bed linen or a sleeping bag. Meal plans may be purchased ahead of time or food can be ordered à la carte at the cafeteria.
You can also choose to camp in the Torres Central Campground near the base of the trail. Reservations for both the refugio & campsites can be made through Fantástico Sur. Due to increased popularity, be sure to book these spots several months in advance.
Other Hiking Routes on Mirador Las Torres: W, O, & Q Circuits
Aside from Mirador Las Torres, there are several multi-day backpacking trails. The most popular route is the W Circuit (3-5 days). This path takes you along some of the main highlights of the Torres del Paine National Park including Grey Glacier, Frances Valley, & of course, the Torres. It is about a 50 mile long trek.
Hikers can also opt for the O Circuit (6-9 days), which not only covers the W Circuit, but circumnavigates the Cordillera del Paine. The O Circuit is very rigorous, covering a total of 70 miles. Far less traveled than the aforementioned trails, you can definitely expect to find peace & solitude in the deep wilderness.
For the ultimate Patagonia backpacking experience, there is the Q Circuit (10-11 days)! After following the O Circuit, this trek includes an additional day hiking south of Refugio Paine Grande along Lago Pehoé. Whichever route you choose to explore Torres del Paine National Park, you will not be disappointed.
Angella’s Travel Tips
- Even if you are only hiking Mirador Las Torres for a day, bring your passport as you will need it for registration at the ranger station.
- Be sure to carry extra Chilean money. Park admission & shuttle fees can only be paid in local cash.
- Make your important social connections & check your emails before arriving at the National Park. Wi-Fi & cellular reception are not as reliable the further you venture in.
- Food & beverages are expensive at the cafeterias within the park. If you want to save money, I suggest buying everything in Puerto Natales prior to your visit. Some of our favorite snacks for hiking include:
- Protein bars
- Energy chews
- Trail mix
- Jerky sticks
- Apple slices
- Almond butter & jelly sandwiches
- In an effort to preserve the wild in our ‘wild’erness, it is important to be conscious of the effects our actions may have on public lands, the animals, & even other nature enthusiasts. The 7 Leave No Trace principles provide a framework for enjoying the outdoors while leaving the smallest footprint possible. Learn more about how you can apply the Leave No Trace principles on your next adventure to help protect the beautiful places we all love so much.

Miranda
January 14, 2020 at 11:57 amThis post was so informative and the pictures are absolutely stunning! It reminds of a magazine story spread. This is a great save for when planning a trip to Patagonia. Added to the bucket list.
Nina | Lemons and Luggage
January 13, 2020 at 12:22 pmI’ve been seeing more and more of Chile on travel blogs and Instagram lately, and I think it must really be worth a trip. But Argentina is even higher on my list so maybe I should combine the two which would be super convenient.
Kara
January 7, 2020 at 10:40 amI absolutely love how you wrote this article and included so much information. Now I want to plan a visit here!
theresaannd
January 6, 2020 at 2:40 pmI can’t wait to start planning my trip here. This looks so beautiful and thank you SOOO much for detailing your itinerary!
csginger
January 6, 2020 at 12:05 pmThis pictures are just spectacular. It looks like such a beautiful part of South America. Can’t wait to visit this place one day.
josypheen
January 5, 2020 at 9:52 amGoodness what a fantastic day hike! This looks like my idea of holiday heaven, I would love to visit the Mirador las Torres soooo much! It’s awesome that you got to see an Andean condor as well! You just have felt on top of the world.
I hope your lungs are feeling better now. 🙂
Patti
January 4, 2020 at 6:37 pmI’ve always wanted to visit the Patagonia. But it’s so intimidating. Thanks for a great post to ease my worries.
Angella
January 14, 2020 at 12:33 pmHi Patti! It definitely looks like an intimidating trek! But with light conditioning & proper gear, hikers of all levels can enjoy the one day Mirador Las Torres! Trust me, if I could do it with mild bronchitis, you can too! 😅
Emma
December 29, 2019 at 8:52 amSo many beautiful views here, this is quite the hike. You sold me, this looks amazing, and really helpful tips
Angella
January 14, 2020 at 12:30 pmThanks Emma! The Mirador Las Torres was definitely worth the effort & the quickest way to view the grand towers! Next time, we hope to hike the epic W Circuit!
Rhonda Albom
December 28, 2019 at 12:36 pmWow, quite a trip filled with so much natural beauty. We didn’t make it quite that far south, as Bariloche was our southern point in Argentina, just the tip of Patagonia. Looks like another trip might be needed, although I am not sure I have your energy for quite so much lovely hiking.
Angella
January 5, 2020 at 11:33 amAwww, I heard so many lovely things about the little town of Bariloche, but we missed it on this trip! Patagonia is so vast & there are so many different trails to explore…I’m sure you will find one that fits your endurance level! Definitely gives us both a reason to go back again.